KIA Niro: Tailgate Assembly
Tailgate / Repair Procedures
Adjustment
- After loosening the tailgate hinge (A) mounting bolts, adjust the tailgate by moving it up and down, or right and left.
- Adjust the tailgate height by turning the tailgate overslam bumpers (B).
- After loosening the tailgate striker (C) mounting bolts, adjust the tailgate striker by moving it up and down, or right and left.

Tailgate assembly
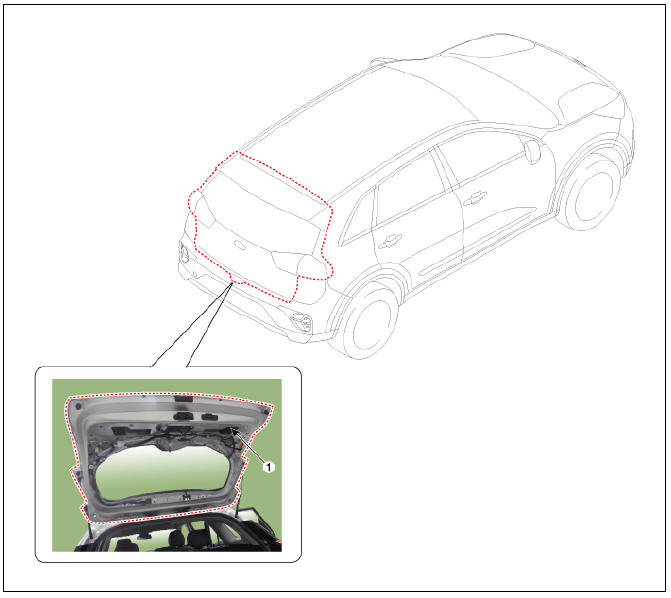
- Tailgate assembly
Replacement
Warning
Wear gloves to protect hands from injury.
Warning
Work in a group of two when removing and installing the tailgate.
- Remove the tailgate trim (A).
(Refer to Tailgate - "Tailgate Trim")
- Remove the rear spoiler.
(Refer to Body Side Molding - "Rear Spoiler")
- Disconnect the washer nozzle hose (A) and high mounted stop lamp connector (B).
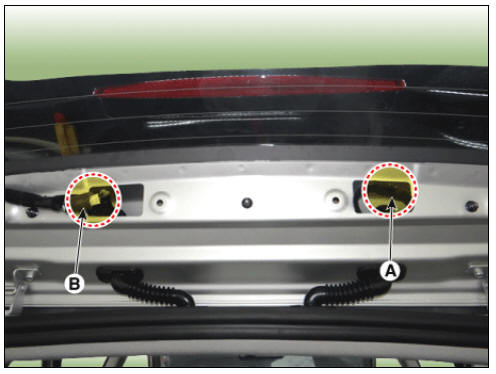
- Using a screwdriver, lift the socket clips (A) up slightly on both ends of the tailgate lifter (B).
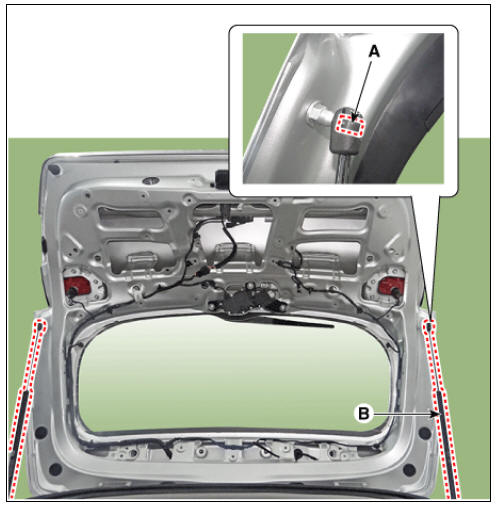
- Disconnect the connectors and tailgate wiring harness (A).
- Remove the tailgate assembly (B) after loosening the mounting bolts.
Tightening torque : 21.6 - 26.5 N*m (2.2 - 2.7 kgf*m, 15.9 - 19.5 lb*ft)

- Install in the reverse order of removal.
Warning
- Make sure that the tailgate locks/unlocks and opens/closes properly.
- Adjust the tailgate alignment.
- Make sure the connectors are connected in properly.
- Replace any damaged clips.
READ NEXT:
 Tailgate Trim | Tailgate Latch Assembly
Tailgate trim
Replacement
Warning
Put on gloves to protect your hands.
Warning
Use a plastic panel removal tool to remove interior trim pieces without marring the surface.
Be careful not to bend or scratch the trim and p
SEE MORE:
TJ Joint Repair procedures
Removal
Warning
Drive shaft joints require special grease, so do not add any
other type of grease.
When replacing the boot band, it must be a new one.
Remove the front drive shaft.
(Refer to Driveshaft Assembly - "Front Drive
Filler-Neck Assembly Repair procedures | Fuel Pump Control Module (FPCM)
Removal
Open the fuel filler door.
Switch "OFF" the ignition and disconnect the negative (-) terminal of the auxiliary 12V battery.
Remove the filler-neck assembly mounting screws (A).
Lift the vehicle.
Re
Categories
- Home
- KIA Niro EV, Hybrid - Second generation - (SG2) (2021-2024) - Owner's manual
- Kia Niro - First generation - (DE) (2017-2022) - Service and Repair Manual
- Contact Us