KIA Niro: Filler-Neck Assembly Repair procedures | Fuel Pump Control Module (FPCM)
Removal
- Open the fuel filler door.
- Switch "OFF" the ignition and disconnect the negative (-) terminal of the auxiliary 12V battery.
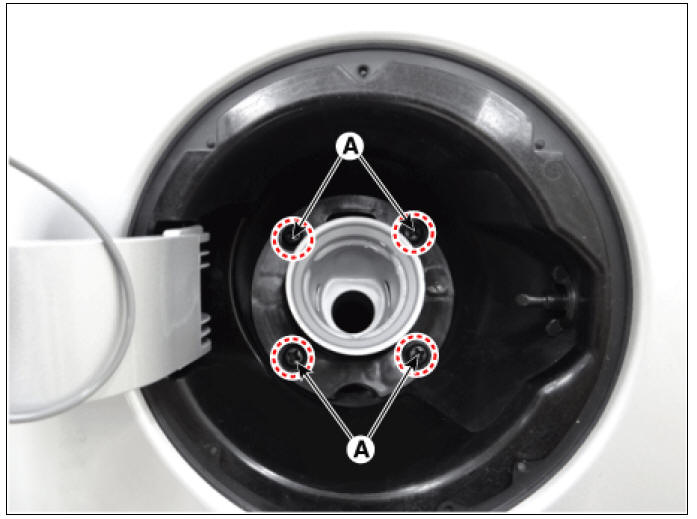
- Remove the filler-neck assembly mounting screws (A).
- Lift the vehicle.
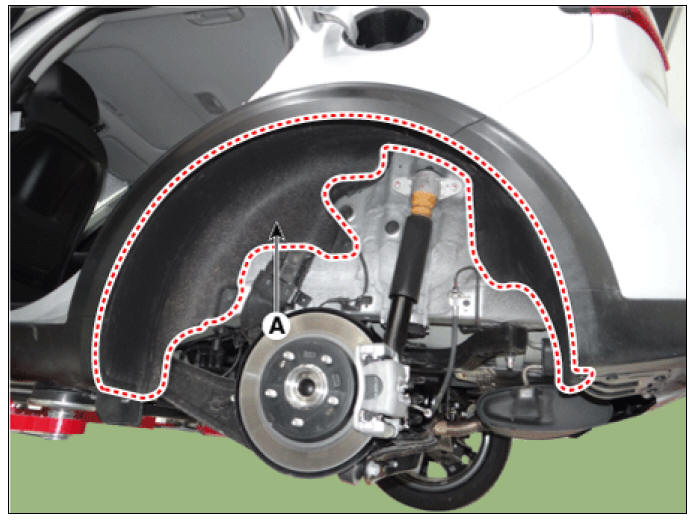
- Remove the rear-LH wheel, tire, and the inner wheel house (A).
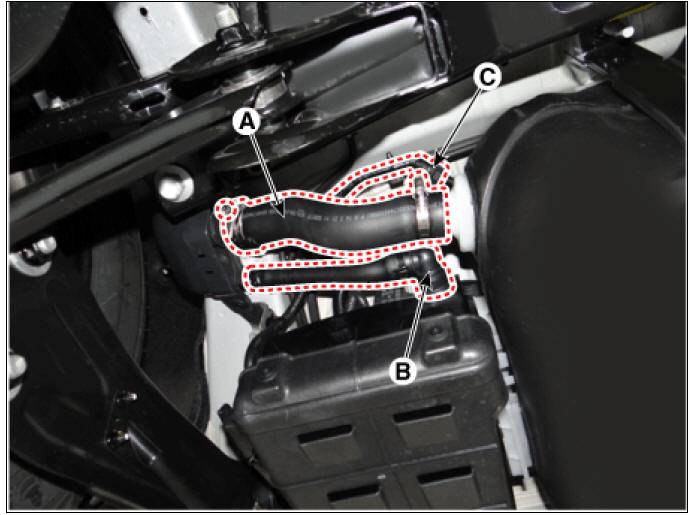
- Disconenct the fuel filler hose (A) and ventilation hose (B).
- Disconnect the vapor tube quick-connector (C).
- Remove the filler-neck assembly after loosening the mounting bolt (A).

Installation
- Install in the reverse order of removal.
Fuel Pump Control Module (FPCM)
Description
Installed on the right hand side of the fuel tank, the Fuel Pump Control Module (FPCM) controls the DC motor mounted inside the low pressure fuel pump.
The module compares instantaneous fuel pressure measured by the fuel pressure sensor (FPS) with target fuel pressure provided by the ECM and generates the desired target fuel pressure by controlling the fuel pump motor and regulating fuel flow rate in the low pressure fuel line between the low and high pressure fuel pumps.

Operation
- The ECM provides target fuel pressure to the FPCM via CAN.
- The FPS provides the FPCM with actual pressure of the low pressure fuel line between the low and high pressure fuel pumps, and the FPCM forwards this to the ECM. Also, the FPCM diagnoses faults in the FPCM, fuel pump motor and FPS and then provides the diagnostic information to the ECM.
- The FPCM compares the actual fuel pressure measured by the FPS with the target fuel pressure provided by the ECM and controls the voltage provided to the low pressure fuel pump motor. The FPCM keeps regulating the fuel flow rate by controlling the low pressure fuel pump, depending on engine speed (rpm) and vehicle loads.
Circuit Diagram

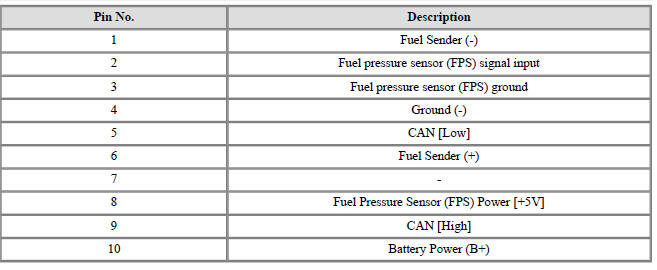
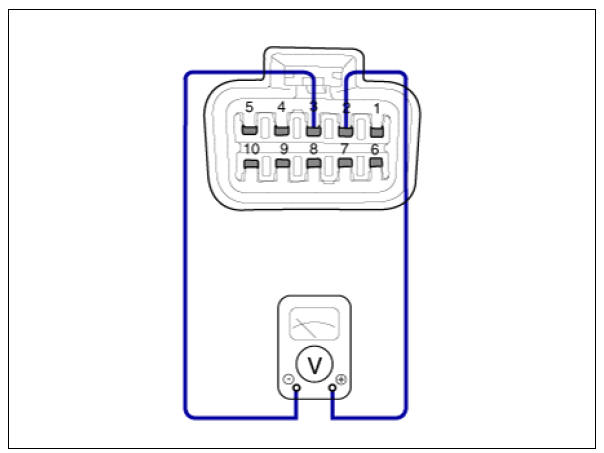
Terminal Information
Terminal Illustration

Terminal Function
Fuel Pump Control Module (FPCM) Repair procedures
Removal
- Release the residual pressure in fuel line.
(Refer to the Fuel Delivery System - "Release Residual Pressure in Fuel Line")
- Switch "OFF" the ignition and disconnect the negative (-) battery terminal.
- Remove the rear seat cushion.
(Refer to Body - "Rear Seat Assembly")
- Fuel pump service cover (A).

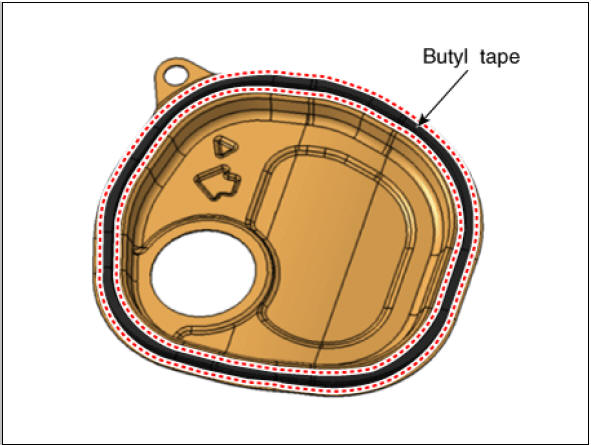
Warning
- When reinstalling a protective cover for a fuel pump, remove the existing butyl tape and apply a new one.
- Before assembling the protective cover, ensure that the temperature of the butyl is about 30ºC using a hair dryer or a heat gun.
Warning
When installing the protective cover for the fuel pump, pay attention to the installation direction of the grommet and the protective cover.
- The arrow (A) should be in the forward direction of the car.
- Align the bulging part of the vehicle body (B) with the hole of the protective cover.
- Align the bulging part of the grommet (C) with the bulging part of the protective cover.

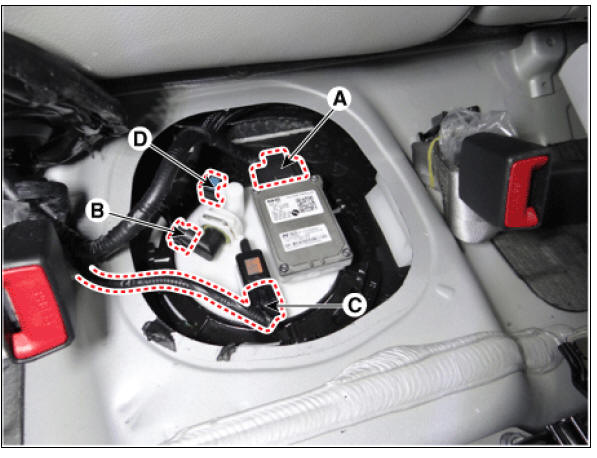
- Remove the fuel pump control module connector (A).
- Disconnect the fuel pressure sensor connector (B).
- Disconnect the fuel tank pressure sensor (C).
- Disconnect the fuel feed tube quick-connector (D).
- Remove the fuel pump plate cover (B) by using the special service tool (A) (SST NO.:09310-B8100).

- Remove the fuel pump (A).

Installation
- Install in the reverse order of removal.
Warning
Carefully note the fuel pump direction during installation.
Inspection
- Connect the KDS to the vehicle's data link connector (DLC).
- Check for DTCs and repair any according to the DTC guide.
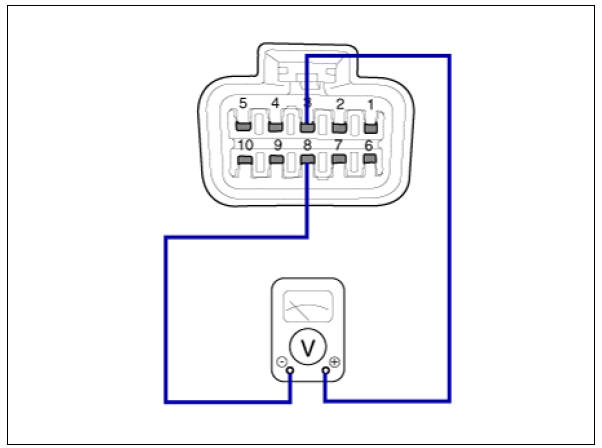
- Check the power supply voltage provided to the fuel pressure sensor (FPS).
Specification: 5V
- Check the voltage provided to the fuel pressure sensor (FPS) at idle.
Specification: 1.9 - 3.2 V
- Check the fuel pressure in the low fuel line.
(Refer to Fuel Delivery System - "Fuel Pressure Test")
Specification


READ NEXT:
 Fuel Pressure Sensor (FPS)
Description
Installed on top of the low pressure fuel pump, the Fuel Pressure Sensor
(FPS) measures the pressure
in the low pressure fuel line.
Based on the fuel pressure measured by the FPS and the amount of fuel consumed,
the fuel pump
co
Delivery Pipe Repair procedures
Removal
Warning
In case of removing the high pressure fuel pump, high pressure fuel
pipe, delivery pipe, and injector, there
may be injury caused by leakage of the high pressure fuel. So don't do any
repair work right after engine
stops.
SEE MORE:
Filter inspection
The climate control air filter should be replaced according to the
maintenance schedule.
If the vehicle is operated in severely air-polluted cities or on dusty rough
roads for a long period, it
should be inspected more frequently and replaced
Exhaust Manifold Repair procedures
Exhaust Manifold Components and components location
Components
Exhaust manifold gasket
Exhaust manifold
Exhaust manifold stay
Heat protector
Exhaust Manifold Repair procedures
Removal and
Installation
Remove the engine room un
Categories
- Home
- KIA Niro EV, Hybrid - Second generation - (SG2) (2021-2024) - Owner's manual
- Kia Niro - First generation - (DE) (2017-2022) - Service and Repair Manual
- Contact Us