KIA Niro: Tailgate Trim | Tailgate Latch Assembly
- Tailgate trim
Replacement
Warning
Put on gloves to protect your hands.
Warning
- Use a plastic panel removal tool to remove interior trim pieces without marring the surface.
- Be careful not to bend or scratch the trim and panels.
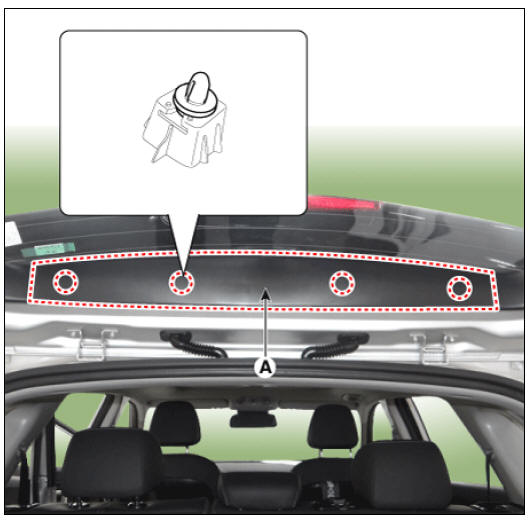
Tailgate upper trim
- Using a remover, remove the tailgate upper trim (A).
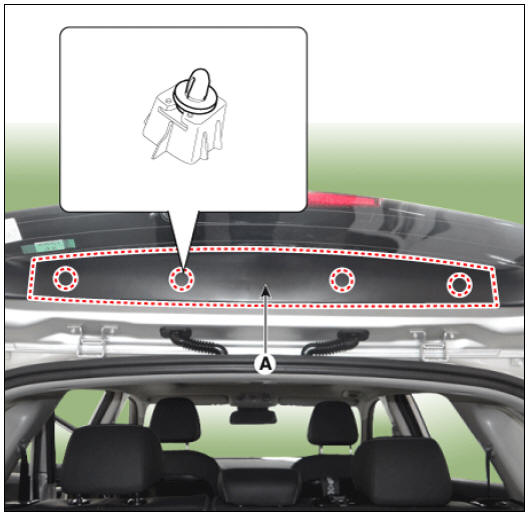
- Install in the reverse order of removal.
Warning
Replace any damaged clips.
Tailgate side trim
- Remove the tailgate trim (A).

- Remove the tailgate upper trim (A).
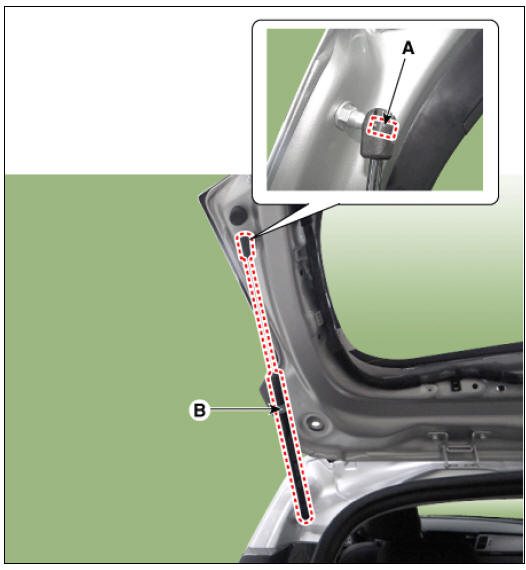
- Remove the tailgate side trim (A) after loosening the mounting screw.
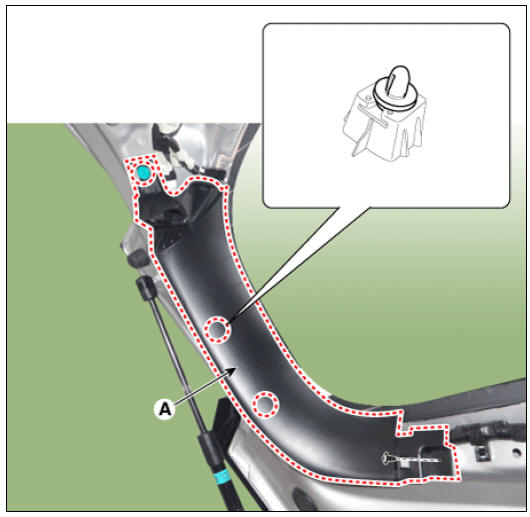
- Install in the reverse order of removal.
Warning
Replace any damaged clips.
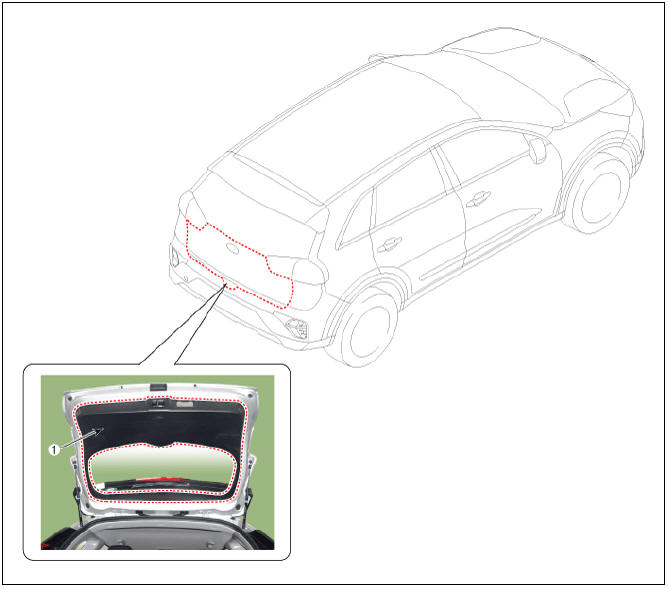
Tailgate trim
- Remove the tailgate pull handle caps (A).
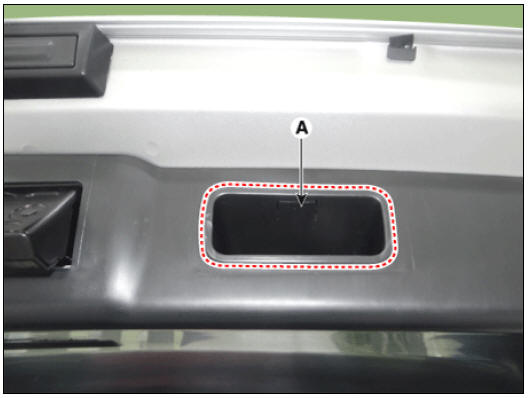
- Remove the tailgate trim (A) after loosening the mounting screws and clips.
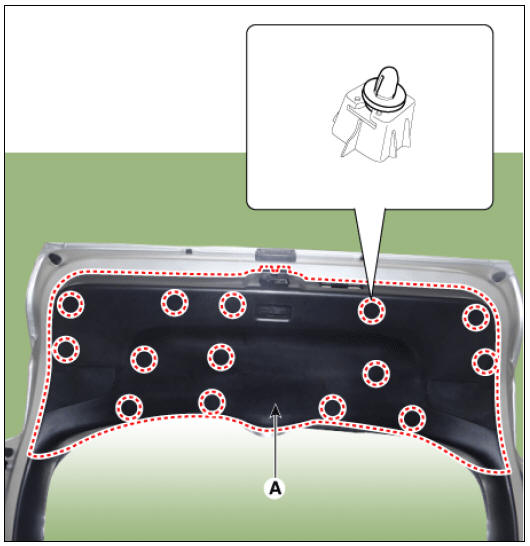
- Install in the reverse order of removal.
Warning
Replace any damaged clips
Tailgate Latch Assembly
- Tailgate latch assembly
Replacement
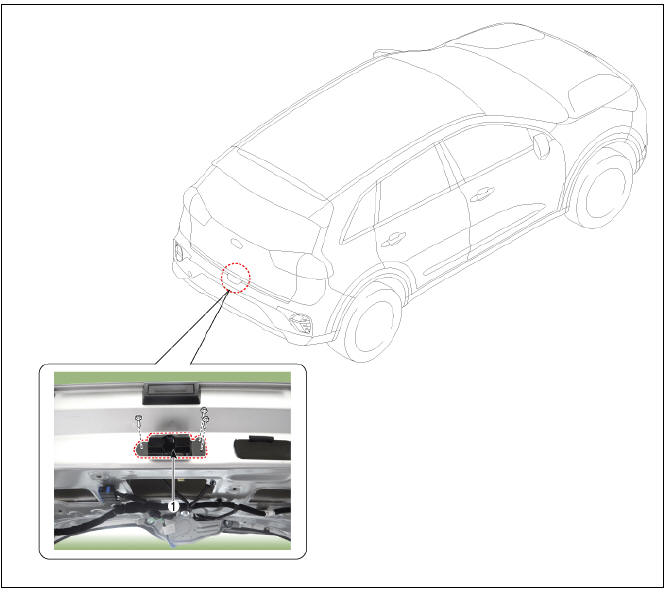
- Remove the tailgate trim.
(Refer to Tailgate - " Tailgate Trim")
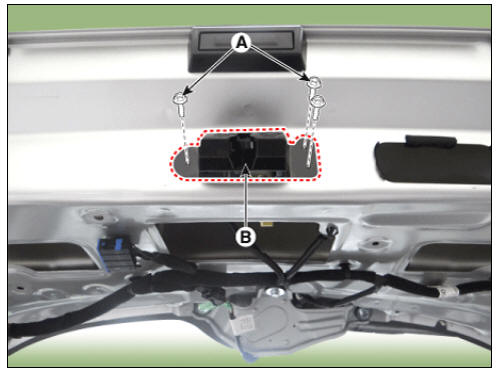
- Disconnect the tailgate latch connector (A).
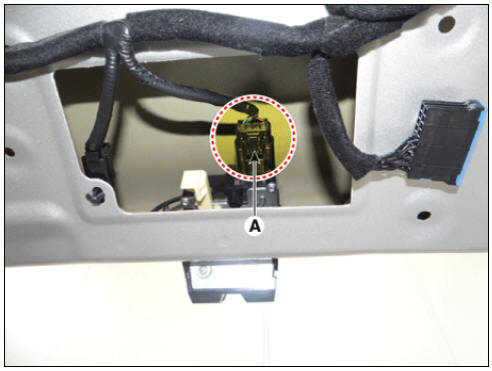
- Remove the tailgate latch assembly (B) after loosening the mounting bolts (A).
Tightening torque : 10.8 - 11.8 N*m (1.1 - 1.2 kgf*m, 8.0 - 8.7 lb*ft)
- Install in the reverse order of removal.
Warning
- Make sure that the tailgate locks/unlocks and opens/closes properly.
- Adjust the tailgate alignment.
- Make sure the connectors are connected in properly.
Tailgate Lift Repair procedures
Warning
Be careful as the tailgate may fall down on people when the lifts are removed. Have a helper hold the tailgate open, or use a secure method to hold it open.
- Using a screwdriver (A), lift up slightly the socket clips (B) of both ends on the lifter (D), and then remove the lifter from the bracket (C).
- Push the socket of the lifter into the bracket for installation.
Warning
Make sure the tailgate locks and opens properly and locks securely.
Tailgate Weatherstrip Repair procedures
Replacement
Warning
Do not apply sealant to the body.
- Remove the tailgate weatherstrip (A).
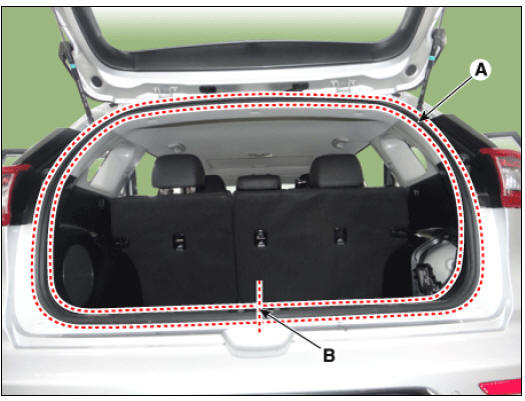
- Install in the reverse order of removal.
Warning
Install the weatherstrip aligned with center line (B).
READ NEXT:
 Windshield Glass / Repair Procedures
Windshield Glass / Components And Components Location
Windshield glass
Windshield Glass / Repair Procedures
Removal
Warning
Put on gloves to protect your hands.
Warning
Use seat covers to avoid damaging any surfaces.
Remove the fr
SEE MORE:
Engine compartment
(Kia NIRO Hybrid)
Smartstream G1.6 GDi HEV
Smartstream G1.6 GDi PHEV
Engine coolant reservoir
Brake fluid reservoir
Air cleaner
Engine oil filler cap
Engine oil dipstick
Windshield washer fluid reservoir
Fuse box
I
Emergency Rescue Guide - Introduction/
Identification
Emergency Rescue Guide - Introduction
Document Purpose
The purpose of this document is to familiarize first responders and the
towing/roadside assistance industry with the proper
methods to handle the Niro PHEV in an emergency situation. This gu
Categories
- Home
- KIA Niro EV, Hybrid - Second generation - (SG2) (2021-2024) - Owner's manual
- Kia Niro - First generation - (DE) (2017-2022) - Service and Repair Manual
- Contact Us