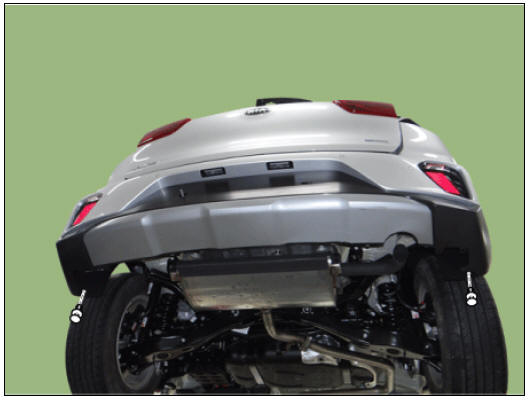
KIA Niro: Rear Bumper Assembly
Kia Niro - First generation - (DE) (2017-2022) - Service and Repair Manual / Body (Interior And Exterior) / Rear Bumper / Rear Bumper Assembly
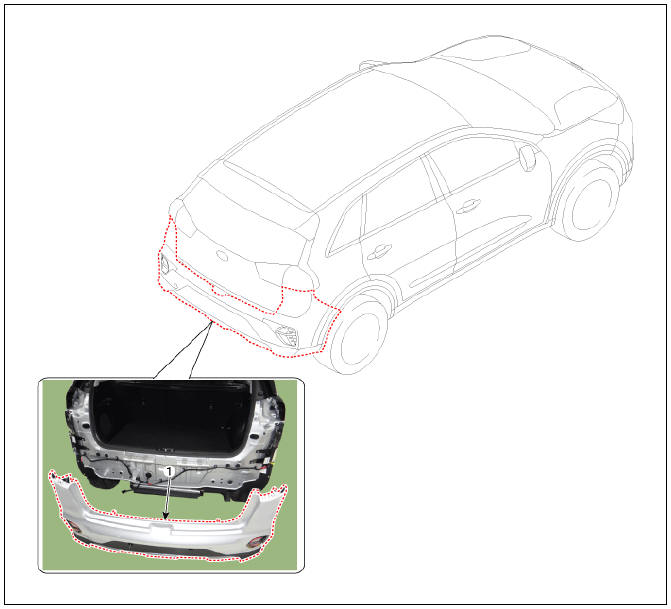
- Rear bumper assembly
Replacement
Warning
Put on gloves to protect your hands.
Warning
- Use a plastic panel removal tool to remove interior trim pieces without marring the surface.
- Be careful not to bend or scratch the trim and panels.
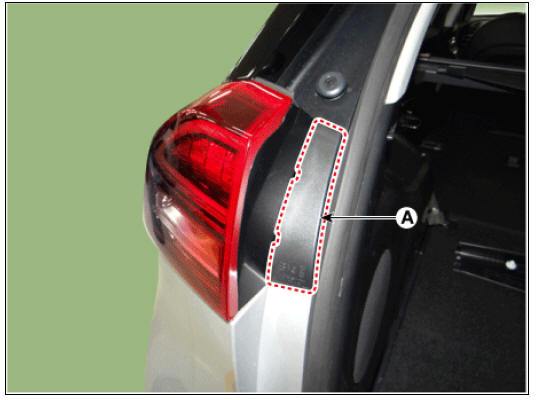
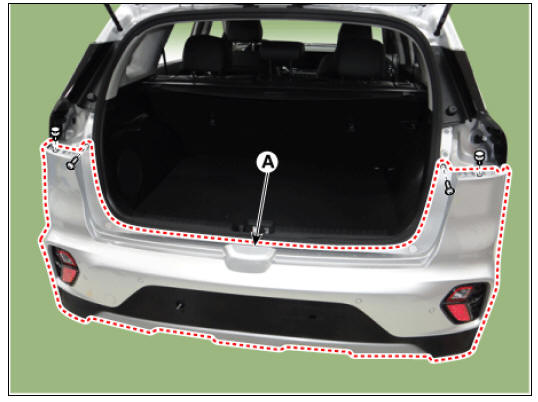
- Remove the combination lamp cover (A).
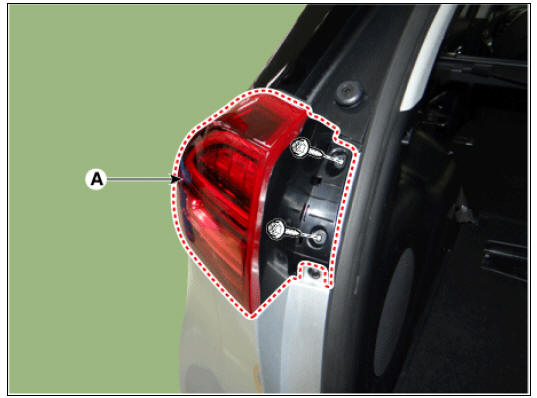
- Remove the rear combination lamp (A) after loosening the mounting screws.
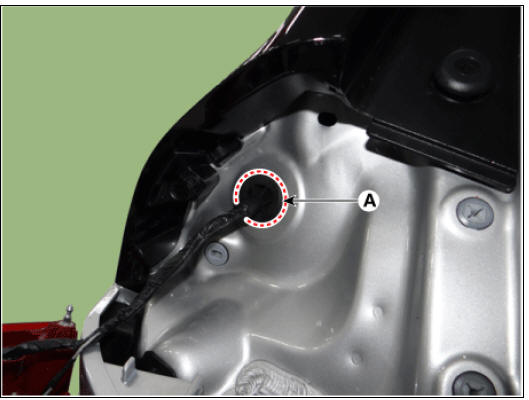
- Remove the waterproof seal (A).
- Disconnect the rear combination lamp connector (A).
- After loosening the screws on the side of rear bumper assembly (A), detach the side part of rear bumper assembly.
Warning
Be careful not to damage the tabs on the side part of rear bumper.
- Remove the rear bumper side under cover (A).
LH
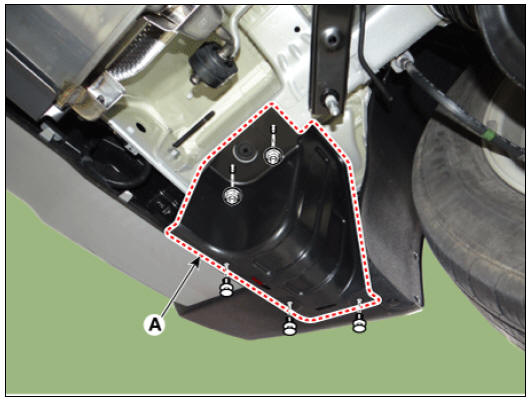
RH
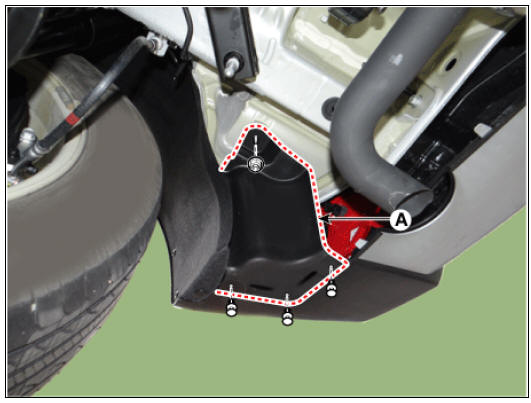
- Loosen the rear bumper lower mounting clips.
- Loosen the rear bumper lower mounting bolts.
LH

RH
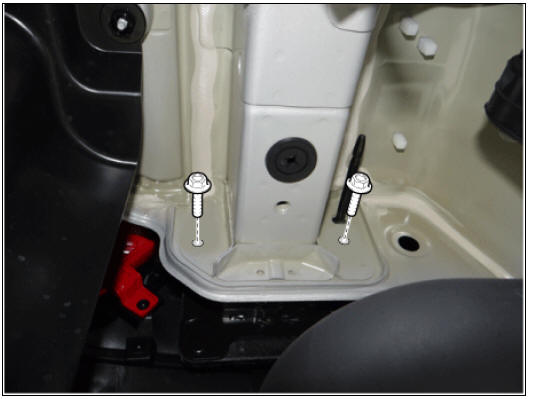
- Loosen the mounting clips and screws, remove the rear bumper assembly (A).
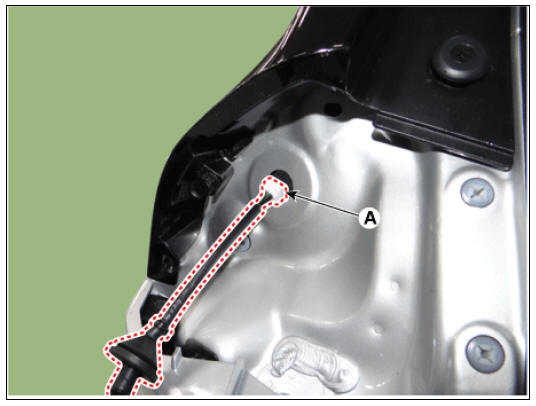
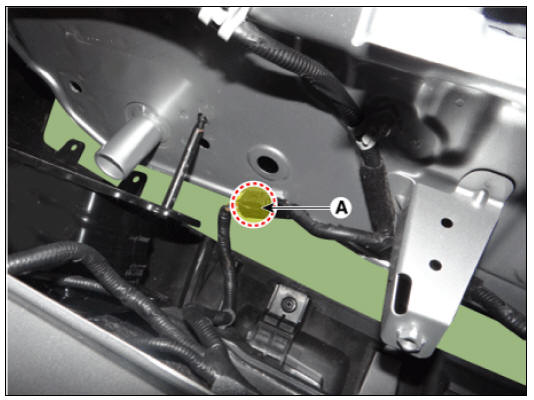
- Disconnect the rear bumper main connector (A).
- To install, reverse the removal procedure.
Warning
- Replace any damaged clips (or pin-type retainers).
- Make sure the connector are connected in properly.
Warning
- Use only genuine parts to repair the rear bumper where the rear corner radar is located.
- Do not apply license plate molding or foreign objects such as a bumper sticker or a bumper guard near the radarsensor. Doing so may adversely affect the sensing performance of the radar.
- The system may not work properly if paint repair is performed near the rear corner radar. Be careful not to use a Polyester putty which has iron content.
- The system may not work properly if the rear corner radar is covered with foreign matters, such as snow, rainor dirt, etc.
- The system may not work properly if the bumper around the rear corner radar is impacted, damaged or the radaris out of position.
- Check if the radar and bracket are damaged after the bumper around the rear corner radar is impacted. (Theremust be no mechanical damage near the rear corner radar)
READ NEXT:
 Rear Bumper beam Assembly
Rear bumper beam assembly
Replacement
Warning
Put on gloves to protect your hands.
Warning
Use a plastic panel removal tool to remove interior trim pieces
without marring the surface.
Be careful not to bend or scratch the trim a
Rear Door / Repair Procedures
Rear door trim
Rear door delta inner cover
Rear door panel & module
Rear door delta lower run & channel
Rear door side weatherstrip
Rear door body side weatherstrip
Rear door window glass run
Rear door delta moulding
Rear
SEE MORE:
Forward Collision-Avoidance Assist (FCA) (Sensor Fusion) (if equipped)
Basic function
Forward Collision-Avoidance Assist is
designed to help detect and monitor the
vehicle ahead or help detect a powered
two-wheeler, pedestrian or cyclist in the
roadway and warn the driver that a collision
is imminent with a wa
Positive Crankcase Ventilation (PCV) Valve Repair procedures | Canister Repair procedures
Removal
Disconnect the vapor hose (A).
Remove the PCV valve (B).
Inspection
Insert a thin stick (A) into the PCV valve (B) from the threaded side to check the plunger movement.
Warning
If the plunger does not move (PCV
Categories
- Home
- KIA Niro EV, Hybrid - Second generation - (SG2) (2021-2024) - Owner's manual
- Kia Niro - First generation - (DE) (2017-2022) - Service and Repair Manual
- Contact Us