KIA Niro: Battery Pack Assembly Repair procedures
Kia Niro - First generation - (DE) (2017-2022) - Service and Repair Manual / Hybrid Control System / High Voltage Battery System / Battery Pack Assembly Repair procedures
Warning
- Be sure to read and follow the "General Safety Information and Caution" before doing any work related with the high voltage system. Failure to follow the safety instructions may result in serious electrical injuries.
- Be sure to shut off the high voltage before doing any work related with the high voltage system(Refer to "High Voltage Shut-off Procedure"). Failure to follow the safety instructions may result in serious electrical injuries.
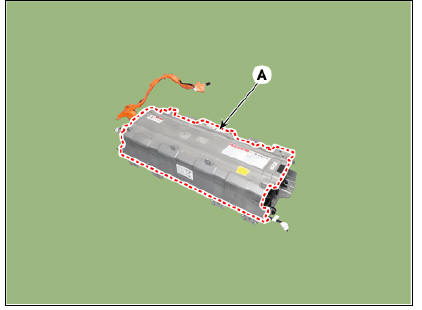
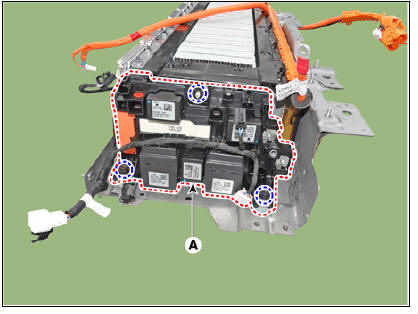
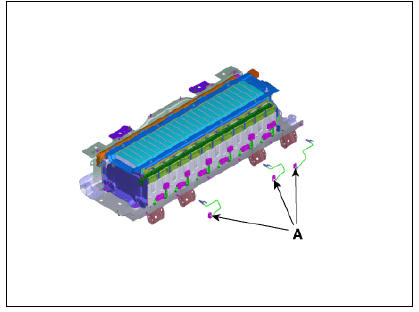
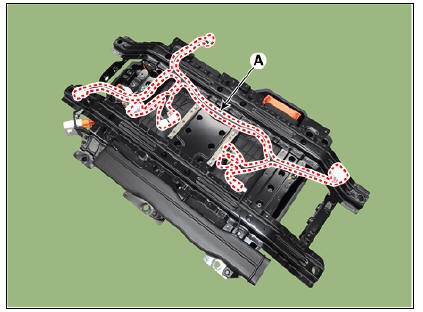
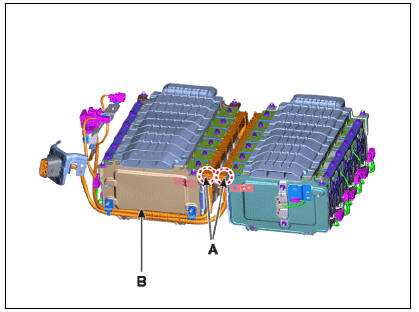
- Remove the high voltage battery front cover (A).
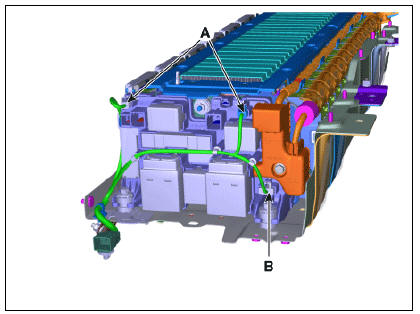
- Disconnect the OBC relay connector (A) and PRA connector (B).
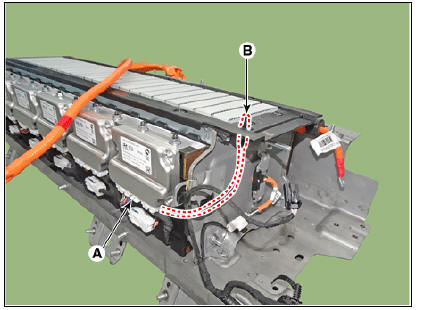
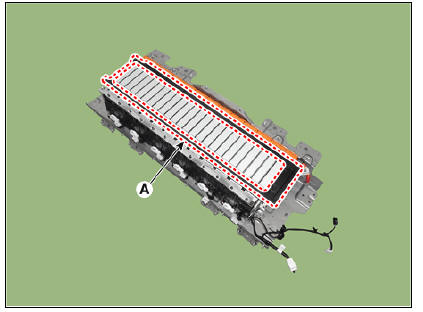
- Remove the high voltage cable cover (A).
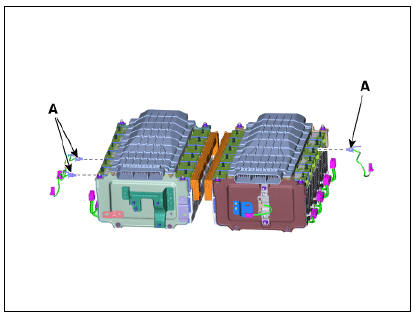
- Disconnect the battery current sensor connector (A).
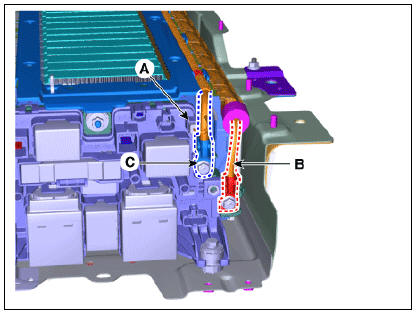
- Disconnect the high voltage power cable (+) terminal (A) and (-) terminal (B) after loosening the mounting nuts.
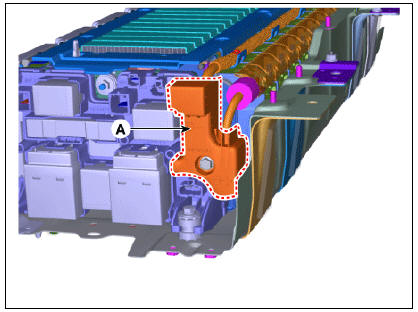
- Remove the power relay assembly (A) after loosening the mounting bolts and nuts.
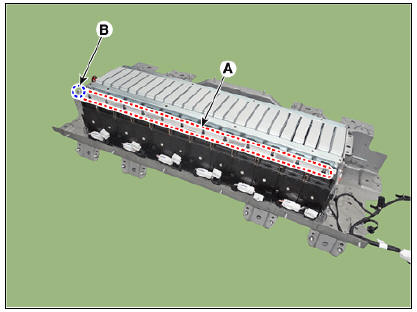
- Disconnect the inlet temperature sensor connector (A) and then remove the inlet temperature sensor (B).
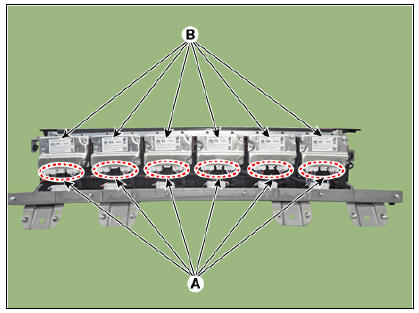
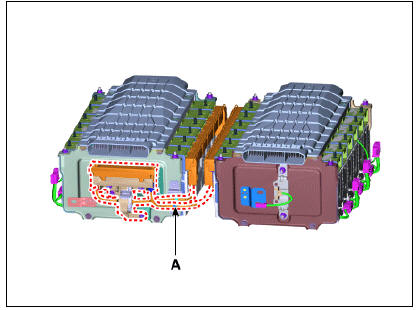
- Disconnect the cell monitoring unit connector (A).
- Remove the cell monitoring unit (CMU) (B) after loosening the mounting nuts and screw.
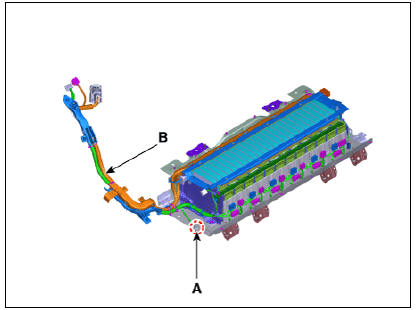
- Remove the high voltage cable (B) after loosening the ground bolts (A).
- Remove the battery temperature sensor (A).
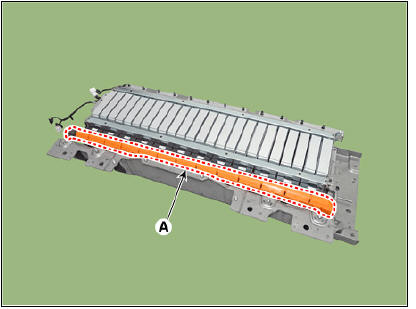
- Remove the air duct (A).
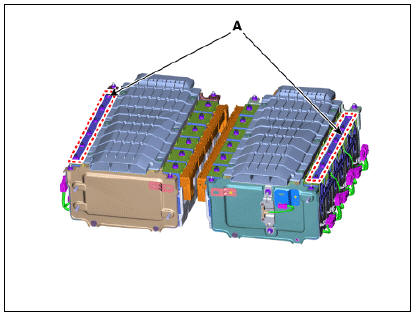
- Remove the bus bar (A) after loosening the mounting nuts.
- Remove the cell monitoring unit bracket (A) after loosening the mounting nuts.
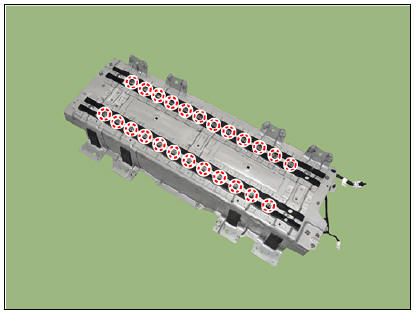
- Remove the battery module mounting nuts.
- Remove the main battery pack support bar (A).
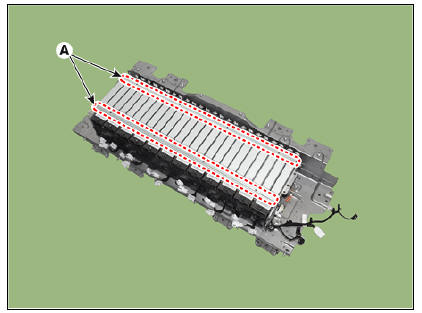
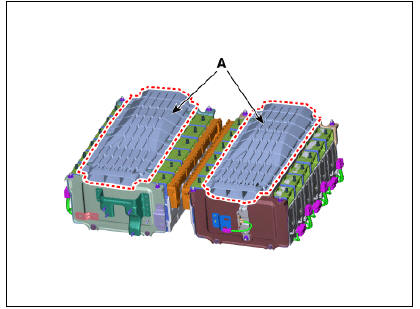
- Remove the sub high voltage battery module (A) from the battery plate.

Sub Battery Pack Assembly
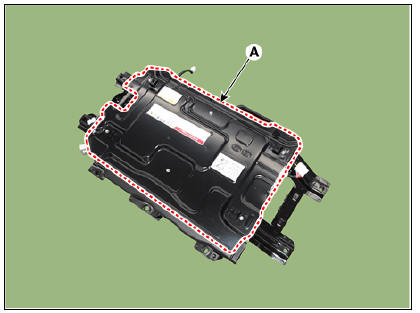
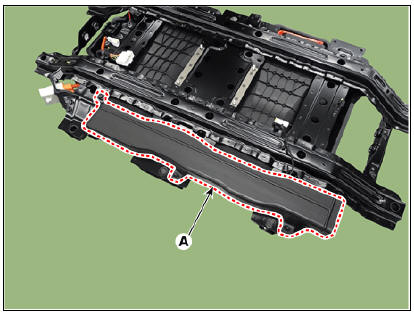
- Remove the high voltage battery cover (A) after loosening the bolts.
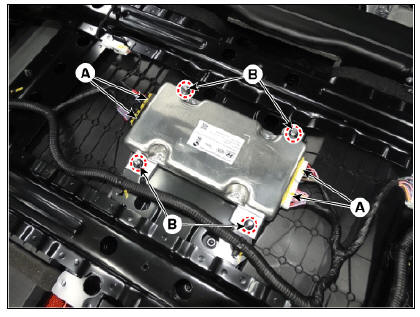
- Disconnect the BMS connector (A).
- Remove the BMS after loosening the bolts (B).
- Remove the BMS wiring harness (A).
- Remove the outlet duct (A).
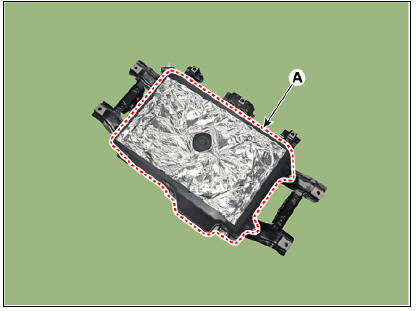
- Remove the watertight case (A) after loosening the bolts.
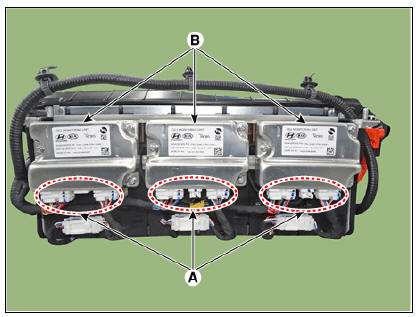
- Disconnect the cell monitoring unit connector (A).
- Remove the cell monitoring unit (B) after loosening the screw.

- Remove the high voltage cable (B) after loosening the nuts (A).
- Remove the cell monitoring unit bracket (A) after loosening the nuts.
- Remove the main fuse assembly (A) after loosening the nuts.
- Remove the battery temperature sensor (A).
- Remove the air duct (A).
- Remove the sub battery pack support bar (A).
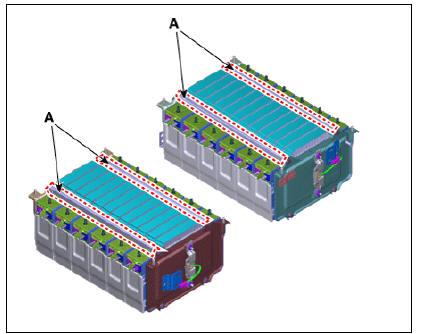
- Remove the sub high voltage battery module (A) from the battery plate.

Adjustment
READ NEXT:
 High Voltage Battery Module Balancing & Voltage Measurement
After removing the defective module from the HV battery pack make
carefully a visual check and then put back it into the
safety disposal box.
Warning
The cell quantity varies per module number. Check before
conducting procedure.
Power Relay Assembly (PRA)
Description
The Power Relay Assembly (PRA) consists of the positive and negative main
relays, pre-charge relay, pre-charge resistor and
battery current sensor. It is located inside the battery pack assembly and
controls the high voltage power c
SEE MORE:
Pressure Source Unit Repair procedures
Pressure Source Unit Components and components location
Components
Warning
PSU (Presser Source Unit) must not be disassembled.
Pressure Source Unit (PSU)
Pressure Source Unit (PSU) connector
Motor
Filler adapter
Bracket
Accumulat
Airbag system (SRS: Supplemental Restraint System)
Airbag
Seven airbags are installed in the Niro, located in standard area of the
vehicle so that the first responder can find them
immediately. Before emergency procedure, make sure the vehicle ignition switch
is turned off, disconnect the negat
Categories
- Home
- KIA Niro EV, Hybrid - Second generation - (SG2) (2021-2024) - Owner's manual
- Kia Niro - First generation - (DE) (2017-2022) - Service and Repair Manual
- Contact Us