KIA Niro: Speaker Repair procedures
Troubleshooting of the speakers
Warning
When handling the speakers :
- Do not cause shock to the speakers by dropping or throwing them.
- Be careful not to drop water and oil on the speakers.
- Use caution to handle the speaker because diaphragm made of paper is easily torn by impact or external force.
- Audio system tuning may cause damage to the speakers. The modified speakers are not covered by the manufacturer's warranty.
- Basic inspection
Loosen the screws to rule out the interference from the body trims and surrounding parts and then remove the speaker.
After removing the speaker, check the sound quality of the speaker with the connector plugged in.
- Inspection for each cause
(1) Abnormal vibration
- Make sure the mounting screws are properly tightened before replacing the speaker.
- Reinstall the speaker and check that the symptom is resolved.
- If the symptom does not disappear, replace the speaker with a new one.
(2) Noise
- Check that the speaker connector is properly connected and reinstall the connector if necessary.
- If noises occur in the radio mode, turn to the CD player mode.
- If noises occur in both modes, replace the speaker with a new one.
Warning
If noises occur only in the radio mode, the poor radio reception is the cause so do not replace the speaker.
(3) Poor working
- Check the plus (+) and negative (-) speaker terminals using an ohmmeter.
- If resistance is measured at the specified value shown below, the speaker operation is normal.
- If the measured resistance is different from the specified value, replace the speaker.

Front Door Speaker
- Remove the front door trim.
(Refer to Body - "Front Door Trim")
- Remove the front door speaker (B) after disconnecting the connector (A) and loosening the screws.

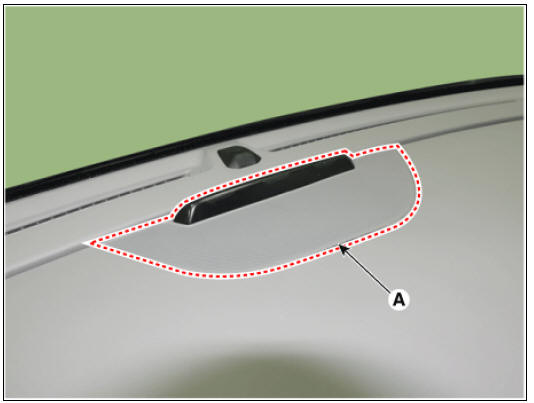
Tweeter Speaker
- Remove the front pillar trim.
(Refer to Body - "Front Pillar Trim")
- Using a scraper or remover, remove the tweeter speaker grill (A).
Warning
Take care not to scratch the crash pad and related parts.
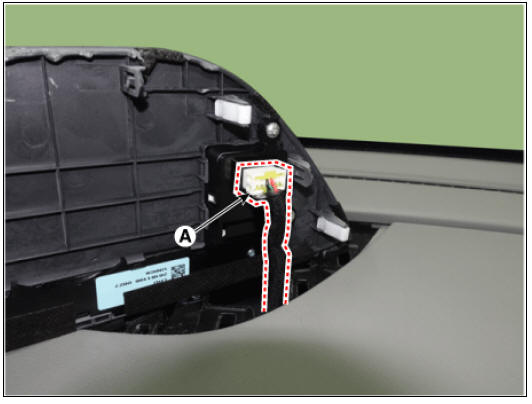
- Remove the tweeter speaker (A) after loosening the mounting screws.
- Disconnect the tweeter speaker connector (A).

Rear Door Speaker
- Remove the rear door trim.
(Refer to Body - "Rear Door Trim")
- Remove the rear door speaker (B) after disconnecting the connector (A) and loosening the screws.

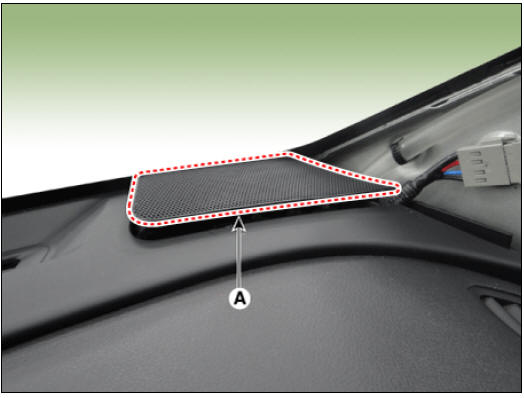
Crash Pad Center Speaker
- Using a scraper or remover, remove the crash pad center speaker grill (A).
Warning
Take care not to scratch the crash pad and related parts.
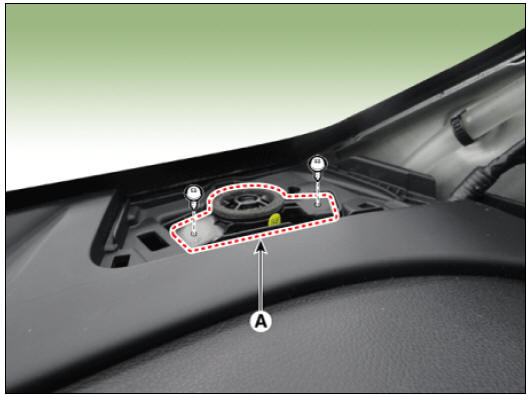
- Disconnect the center speaker grill connector (A).
- Remove the crash pad center speaker (A) after loosening the mounting screws.
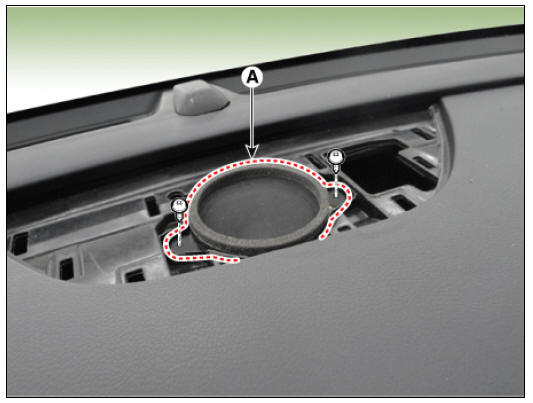
- Disconnect the crash pad center speaker connector (A).

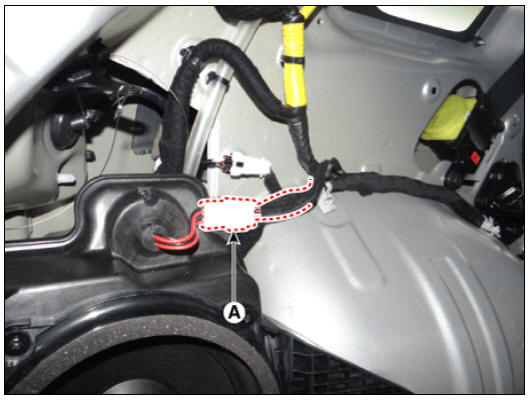
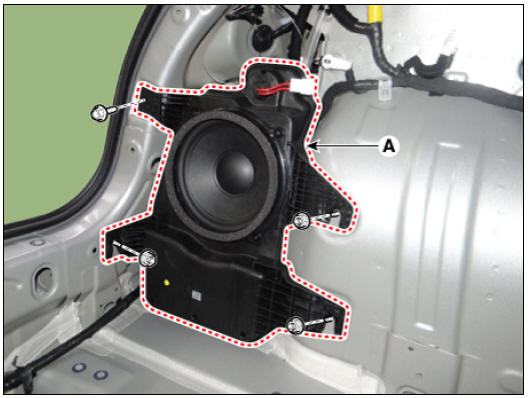
Sub Woofer Speaker
- Remove the left luggage side trim.
(Refer to Body - "Luggage Side Trim")
- Disconnect the sub woofer speaker connector (A).
- Remove the sub woofer speaker (A) after loosening the bolt and nuts.
Installation
- Install in the reverse order of removal.
READ NEXT:
 External AMP | Roof Antenna | AVN Remote Controller
Connector Pin Information
External AMP Repair procedures
Removal
Remove the main crash pad.
(Refer to Body - "Main Crash Pad Assembly")
Remove the external amplifier (A) after loosening the mounting bolts and
SEE MORE:
Air conditioning refrigerant label
Example Type A
Example Type B
Classification of refrigerant
Amount of refrigerant
Classification of Compressor lubricant
Caution
Flammable Refrigerant
Registered technician to service Air
Conditioning system
Service manual
Coolant Repair procedures
Warning
Never remove the radiator cap when the engine is hot. Serious
scalding could be caused by hot fluid under
high pressure escaping from the radiator.
Warning
When pouring engine coolant, shut the relay box lid and be careful
not to spil
Categories
- Home
- KIA Niro EV, Hybrid - Second generation - (SG2) (2021-2024) - Owner's manual
- Kia Niro - First generation - (DE) (2017-2022) - Service and Repair Manual
- Contact Us