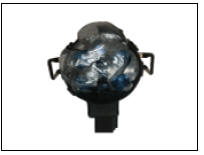
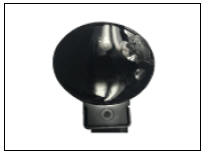
KIA Niro: Rain Sensor Repair procedures
Inspection
Check point for rain sensor:
- To properly adjust sensitivity if auto wiping operates sensitively or insensitively.
- To check if a connector of sensor is normally connected

- To check if sensor and bracket are normally connected.
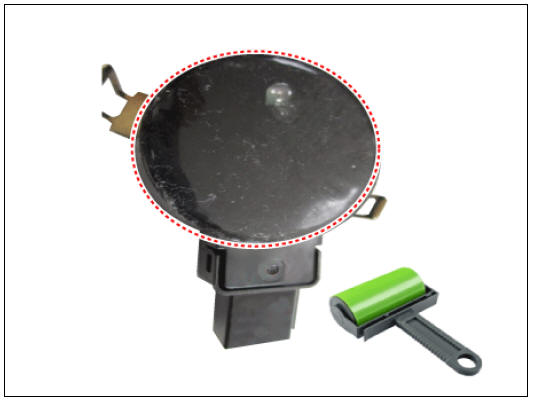
- To check if sensor are contaminated by foreign substances (In case that silicone gel pad of rain sensor is polluted by foreign substances, rain sensor can be reusable after they are removed by sticker roller.)

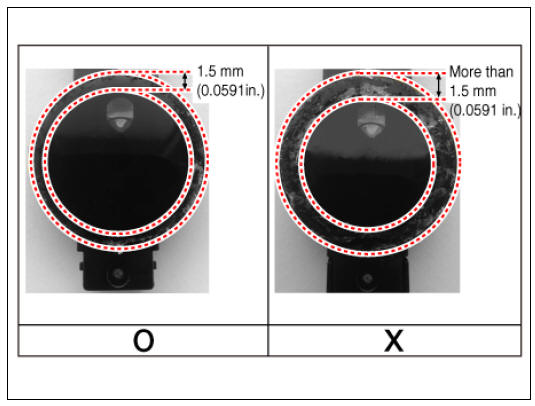
- To check if silicone gel pad on sensor is damaged.
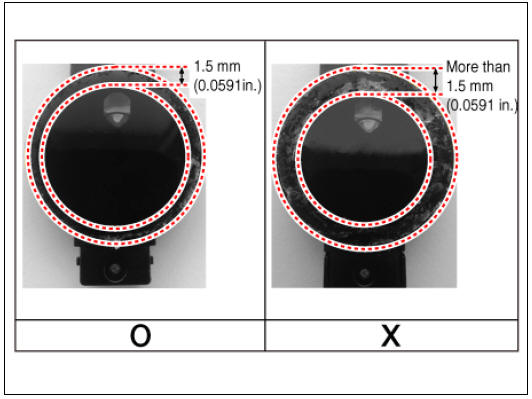
- If the damaged area of silicone gel pad is more than 1.5mm (0.0591in.),
then the perfect
appearance and the function are not guaranteed anymore. Therefore, silicone
gel pads need to be
replaced.
(Refer to Rain Sensor - "Replacement")
Failure case
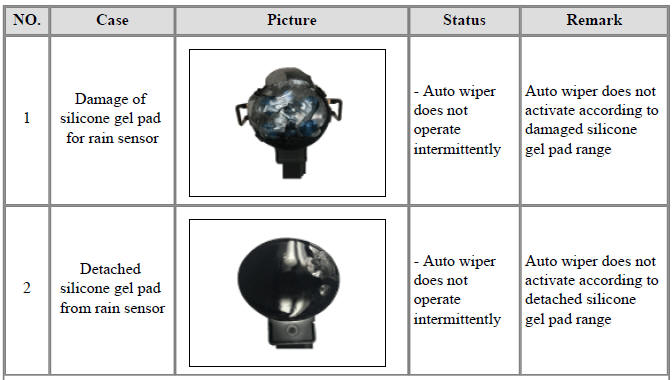
- Damage of
silicone gel pad
for rain sensor
Status
- Auto wiper does not operate intermittently
Remark
Auto wiper does not activate according to damaged silicone gel pad range
- Detached
silicone gel pad
from rain sensor
Status
- Auto wiper does not operate intermittently
Remark
Auto wiper does not activate according to detached silicone gel pad range
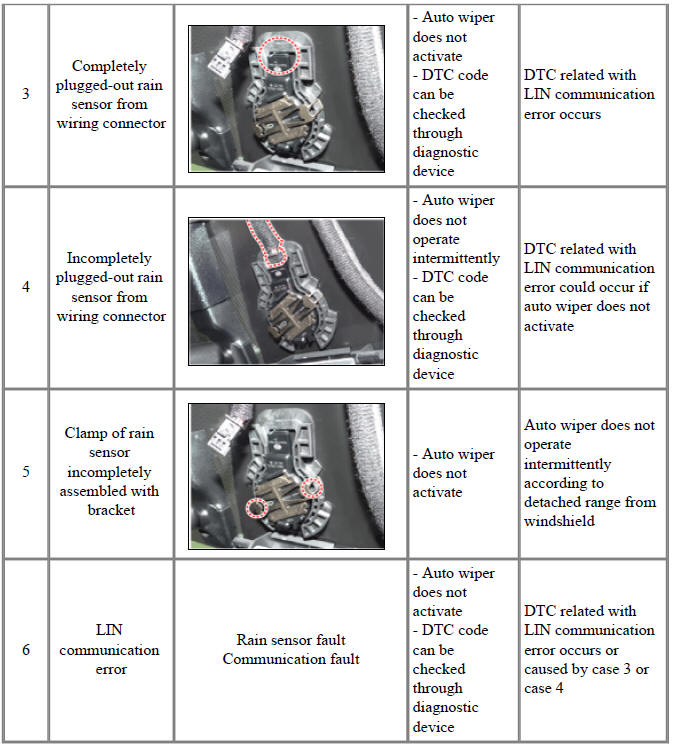
- Completely
plugged-out rain
sensor from
wiring connector
Status
- Auto wiper does not activate
- DTC code can be checked through diagnostic device
Remark
DTC related with LIN communication error occurs
- Incompletely
plugged-out rain
sensor from
wiring connector
Status
- Auto wiper does not operate intermittently
- DTC code can be checked through diagnostic device
Remark
DTC related with LIN communication error could occur if auto wiper does not activate
- Clamp of rain
sensor
incompletely
assembled with
bracket
Status
- Auto wiper does not activate
Remark
Auto wiper does not operate intermittently according to detached range from windshield
- LIN communication error
Rain sensor fault Communication fault
Status
- Auto wiper does not activate
- DTC code can be checked through diagnostic device
Remark
DTC related with LIN communication error occurs or caused by case 3 or case 4
Warning
Caution for handling
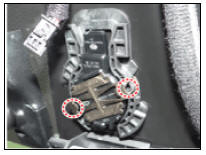
- Carefully separate the rain sensor from the windshield as it may be damaged if separated by force.
- Do not touch sensing area of silicone.
- Be careful for contamination of foreign substances on silicone gel pad.
- After removing the rain sensor, protect the sensor surface with protection cover until installing the rain sensor to bracket for accurate function.
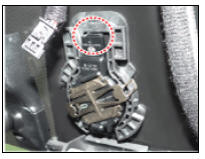
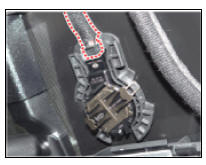
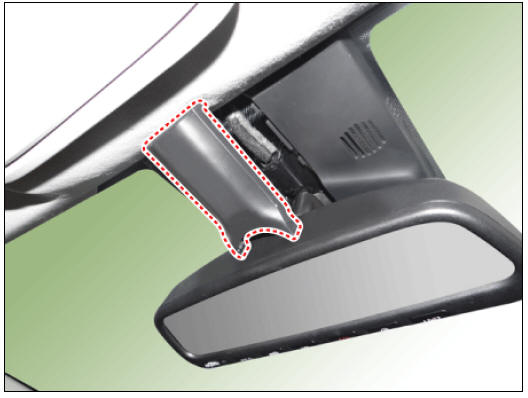
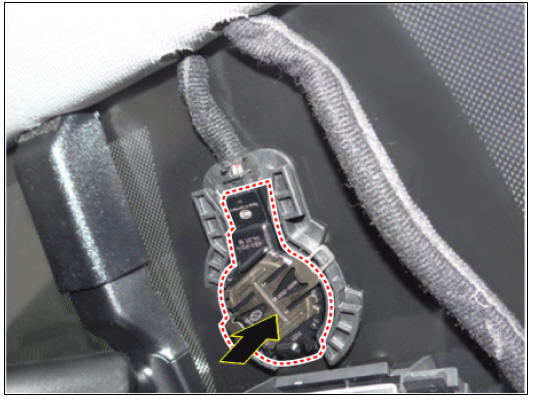
- Remove the mirror wiring cover (A).
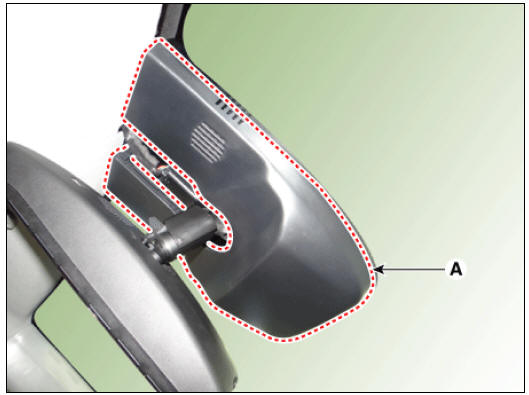
- Disconnect the rain sensor connector (A).
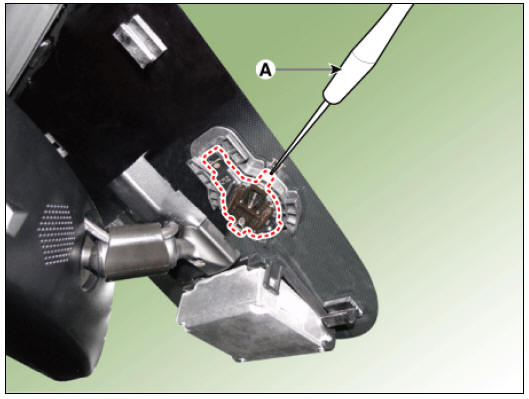
 Be careful not to damage
the cover latch by applying excessive force. To remove the latch, pull
aside the latch using the cover hole with a small flat-blade screwdriver
(A).
Be careful not to damage
the cover latch by applying excessive force. To remove the latch, pull
aside the latch using the cover hole with a small flat-blade screwdriver
(A).
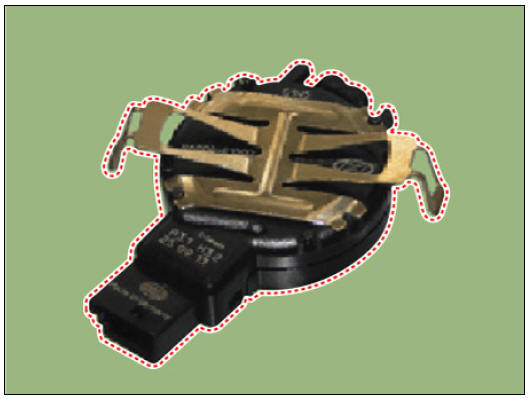
- Rain sensor module is attached to the front windshield by glue. To replace the front windshield, remove the rain sensor module from the existing front windshield and install on the new front windshield.
Installation
- Install in the reverse order of removal.
Warning
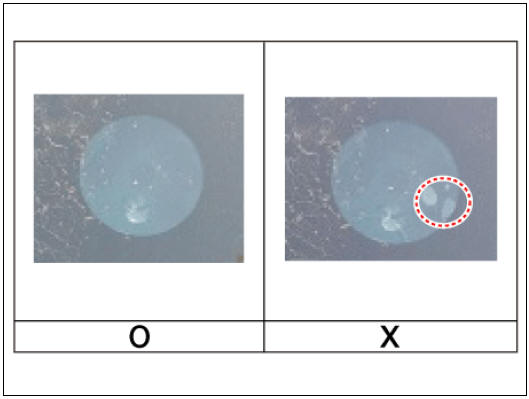
When reuse the rain sensor, check the silicone gel pad for damages, soiling and air bubbles.
- If the damaged area of silicone gel pad is more than 1.5mm
(0.0591in.), then the perfect
appearance and the function are not guaranteed anymore. Therefore, silicone
gel pads need to
be replaced.
(Refer to Rain Sensor - "Replacement")
- The silicone gel pad has to be free of dirt. In case that
silicone gel pad of rain sensor is
polluted by foreign substances, rain sensor can be reusable after they are
removed by sticker
roller.
Matters that require attention when installing the rain sensor.
- Be careful when detaching protection cover from rain sensor because silicone gel pad could be damaged.
- Do not touch the silicone gel pad.
- Be careful not to damage the silicone gel pad during assembly.
- The windshield glass has to be clean and free of contamination or foreign substances.
- Do not snap both spring arms at the same time. (Important : two times click sound)
- Check the snap fit condition between spring and bracket after installing.
- After installing the rain sensor, check the silicone gel pad
for air bubbles. (Press the rain
sensor several times, if air bubbles occurred.)
READ NEXT:
 Gel pad
Replacement
Remove the damaged silicone gel pad completely on the lens plate of rain
sensor.
Warning
The silicone gel must be fully detached from the rain sensor by
rubbing it off with the fingers
without any tool.
The surface
Heating, Ventilation And Air Conditioning / Troubleshooting
Problem Symptoms Table
Before replacing or repairing air conditioning components, first determine if
the malfunction is due to
the refrigerant charge, air flow or compressor.
Use the table below to find the cause of the problem. The numbers in
SEE MORE:
Intake Actuator
Intake Actuator Components and components location
Intake actuator
Description
Located in the blower unit, the intake actuator regulates the intake door
based on the signal from the
control unit. Pressing the intake selection switch wi
Electric parking brake / Description And Operation
Description
The EPB is an electronic parking brake.
The EPB is different from existing parking systems which operated with the brake
pedal or the lever
type. The EPB system sends the signal to the ECU when a driver operates the EPB
switch. T
Categories
- Home
- KIA Niro EV, Hybrid - Second generation - (SG2) (2021-2024) - Owner's manual
- Kia Niro - First generation - (DE) (2017-2022) - Service and Repair Manual
- Contact Us