KIA Niro: Front Washer Motor Repair procedures
Kia Niro - First generation - (DE) (2017-2022) - Service and Repair Manual / Body Electrical System / Windshield Wiper/Washer / Front Washer Motor Repair procedures
Inspection
- With the washer motor connected to the reservoir tank, fill the reservoir tank with water.
Warning
Before filling the reservoir tank with water, check the filter for foreign material or contamination. if necessary, clean the filter.
- Connect positive (+) battery cables to power terminal (Front : 1, Rear 3) and negative (-) battery cables to ground terminal 2 respectively.
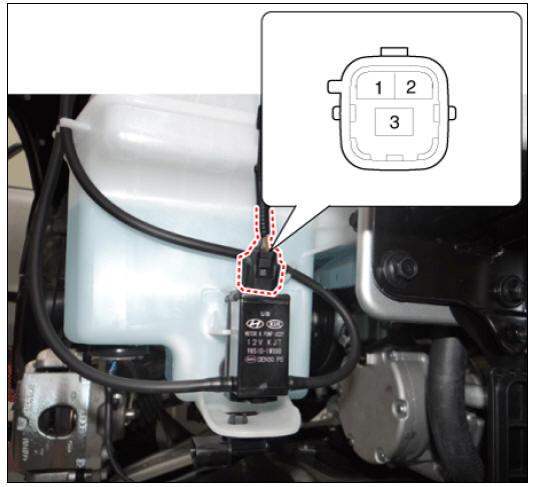

- Check that the motor operates normally and the washer motor runs and water sprays from the front nozzles.
- If they are abnormal, replace the washer motor.
Washer Fluid Level Sensor Switch
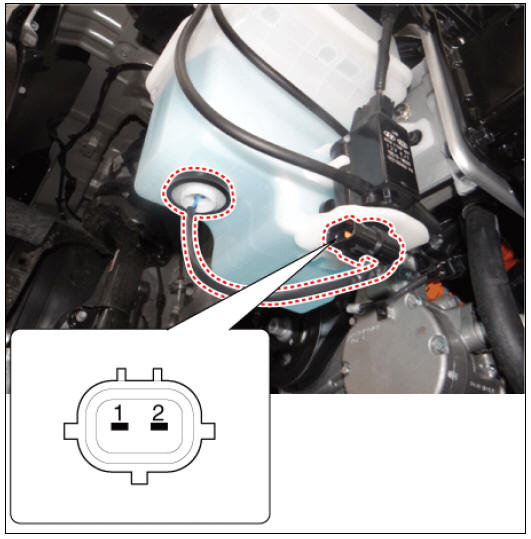
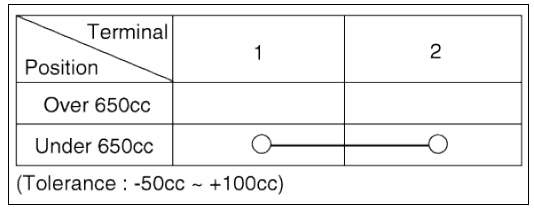
- Drain the washer fluid less than 650 cc.
- Check for continuity between the No. 1 and No.2 terminal in each float
position.
There should be continuity when the float is down.
There should be no continuity when the float is up.
- If the continuity is not as specified, replace the washer fluid level switch
- If the continuity is not as specified, replace the washer fluid level switch.
Removal
Washer Motor
- Remove the engine room under cover.
(Refer to Engine Mechanical System - "Engine Room Under Cover")
- Drain the washer fluid to less than 650 cc.
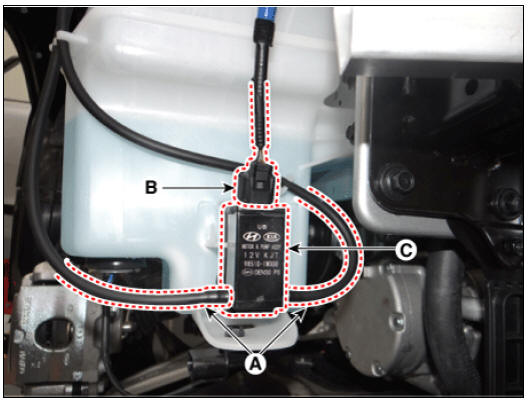
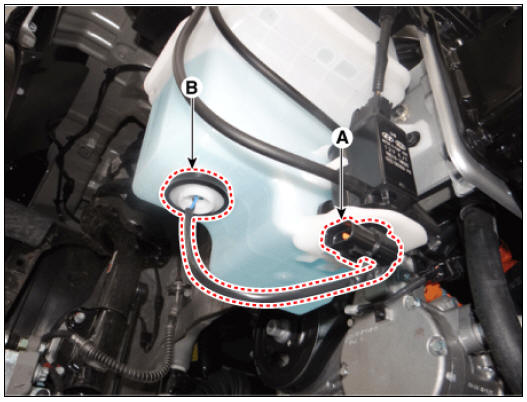
- Disconnect the washer hose (A) and washer motor connector (B).
- Remove the front washer motor (C).
Washer Fluid Level Sensor
- Remove the engine room under cover.
(Refer to Engine Mechanical System - "Engine Room Under Cover")
- Drain the washer fluid to less than 650 cc.
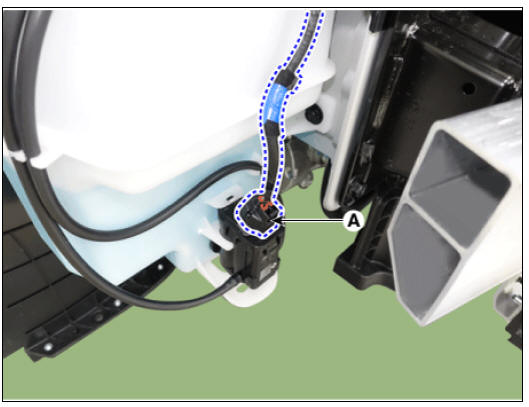
- Remove the washer fluid level sensor switch (B) after disconnecting the connector (A).
Reservoir
- Remove the engine room under cover.
(Refer to Engine Mechanical System - "Engine Room Under Cover")
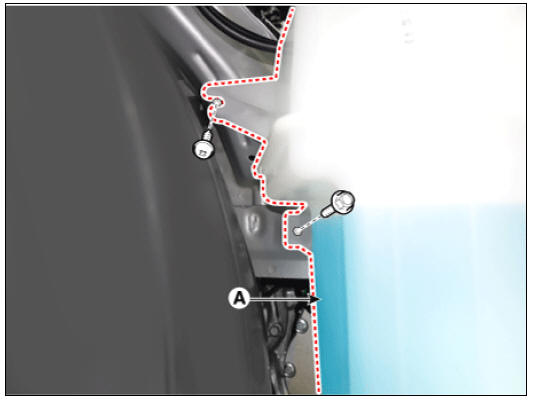
- Remove the front wheel guard (RH).
(Refer to Body - "Front Wheel Guard")
- Drain the washer fluid to less than 650 cc.
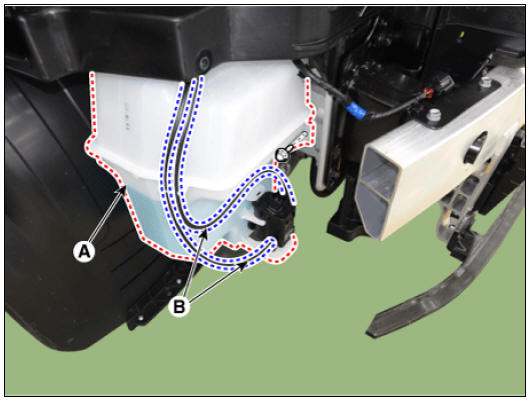
- Disconnect the washer motor connector (A).
- Remove the reservoir.
(1) Separate the washer hose.
(2) Remove the reservoir by loosening the bolts and screw.
Installation
- Install in the reverse order of removal.
READ NEXT:
 Rain Sensor Repair procedures
Inspection
Check point for rain sensor:
To properly adjust sensitivity if auto wiping operates sensitively or
insensitively.
To check if a connector of sensor is normally connected
To check if sensor and bracket are normal
Gel pad
Replacement
Remove the damaged silicone gel pad completely on the lens plate of rain
sensor.
Warning
The silicone gel must be fully detached from the rain sensor by
rubbing it off with the fingers
without any tool.
The surface
SEE MORE:
Mass Air Flow Sensor (MAFS)
Description
MAFS uses a sensing element made of a hot-film to measure the mass of intake
air entering the engine
and to send the signal to the ECM.
A large amount of intake air represents acceleration or high load conditions
while a small am
Rear Cross-Traffic Collision-Avoidance Assist (RCCA)
Rear Cross-Traffic Collision-Avoidance
Assist is designed to help detect vehicles
approaching from the left and right side
while your vehicle is reversing, and warn
the driver that a collision is imminent
with a warning message and an audible
w
Categories
- Home
- KIA Niro EV, Hybrid - Second generation - (SG2) (2021-2024) - Owner's manual
- Kia Niro - First generation - (DE) (2017-2022) - Service and Repair Manual
- Contact Us