KIA Niro: Ambient Temperature Sensor | Auto Defogging Sensor
Description
Located at the front of the condenser, the ambient temperature sensor detects the ambient air temperature. It is a negative type thermistor; resistance will increase at lower temperature and decrease at higher temperature.
The sensor output is used to control discharged air temperature, calibrate the sensor, control temperature control door, control the blower motor level, control the mix mode and control the in-car humidity.
Warning
If the ambient temperature is below 2.0ºC (35.6ºF), the A/C compressor will stop.
The compressor will operate manually.
Ambient Temperature Sensor Repair procedures
Inspection
- Check the resistance of the ambient temperature sensor between terminals 1 and 2 whether it changes by changing the ambient temperature.
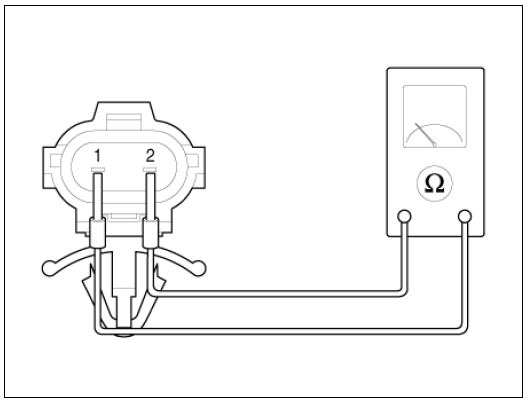
- Ambient sensor (+)
- Sensor ground
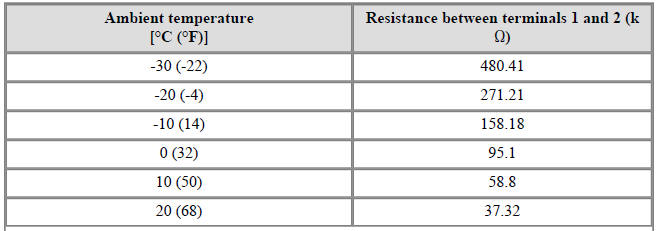
Specification

Replacement
- Disconnect the negative (-) battery terminal.
- Remove the front bumper assembly.
(Refer to Body - "Front Bumper Cover Assembly")
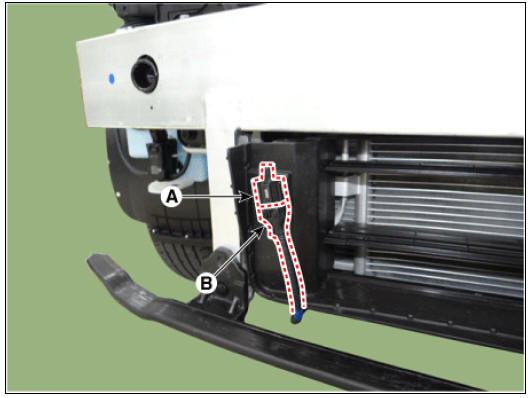
- Disconnect the connector (A) and remove the ambient temperature sensor (B).
- Install in the reverse order of removal.
Auto Defogging Sensor
Description
Installed on the windshield glass, the auto defogging sensor detects humidity to blow out wind for defogging to improve visibility and driver comfort. The air conditioner control module receives signal from the sensor and restrains moisture and eliminate defog by controlling the intake actuator, A/C, auto defogging actuator, blower motor rpm, and mode actuator.
Auto Defogging Sensor Repair procedures
Replacement
- Disconnect the negative (-) battery terminal.
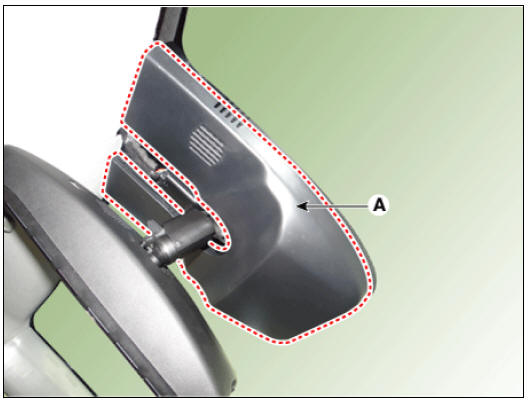
- Remove the auto defogging sensor cover (A).
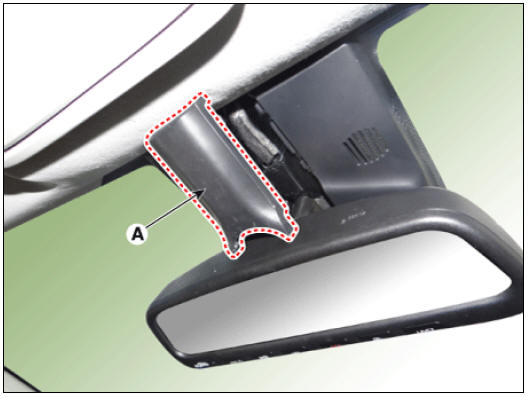
- Using a screwdriver or a remover, remove the LDWS & rain sensor cover (A).
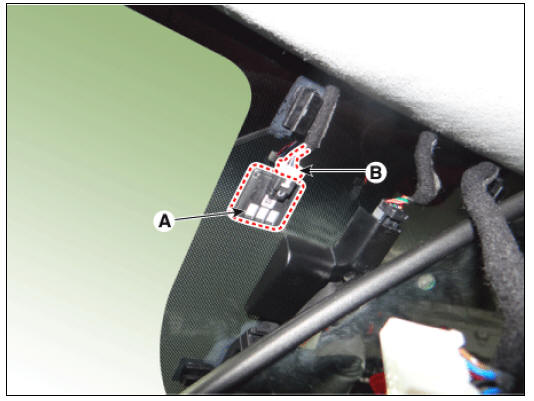
- Remove the auto defogging sensor connector (B) and the auto defogging sensor (A).
- Install in the reverse order of removal.
READ NEXT:
 Duct Sensor Repair procedures
Inspection
Check that the voltage between No. 1 and 2 duct sensors change.
Sensor (+ 5V)
Sensor ground
Specification
Replacement
Duct sensor - Floor
Disconnect the negative (-) battery terminal.
Remove the crash pad low
SEE MORE:
Inverter kit / Body kit
Remove the battery (-) cable.
Disconnect the high voltage circuit. (Refer to Generals)
Use the recovery/reproduction/charging device to recover the coolant.
Warning
When removing the connector between the vehicle and the
compressor,
Shift dial SBW type of DCT warning messages
Message/ Content
A: Steep grade! Press brake pedal
To hold the vehicle on an incline use the foot brake or the
parking brake.
When in stop-and-go traffic on an incline, allow a gap to form
ahead of you before moving the vehicle forward
Categories
- Home
- KIA Niro EV, Hybrid - Second generation - (SG2) (2021-2024) - Owner's manual
- Kia Niro - First generation - (DE) (2017-2022) - Service and Repair Manual
- Contact Us