KIA Niro: Seat Heater Repair procedures
Kia Niro - First generation - (DE) (2017-2022) - Service and Repair Manual / Body Electrical System / Seat Heater / Seat Heater Repair procedures
Inspection
Front Seat Heater
- Check for continuity and measure the resistance between power terminal (heater : 3, ventilation : 4) and ground terminal (6).
Standard value
Driver / Assists (cushion + back)
Heater seat : 1.77Ω+-10%/23ºC
Ventilation seat : 1.93Ω+-10%/23ºC
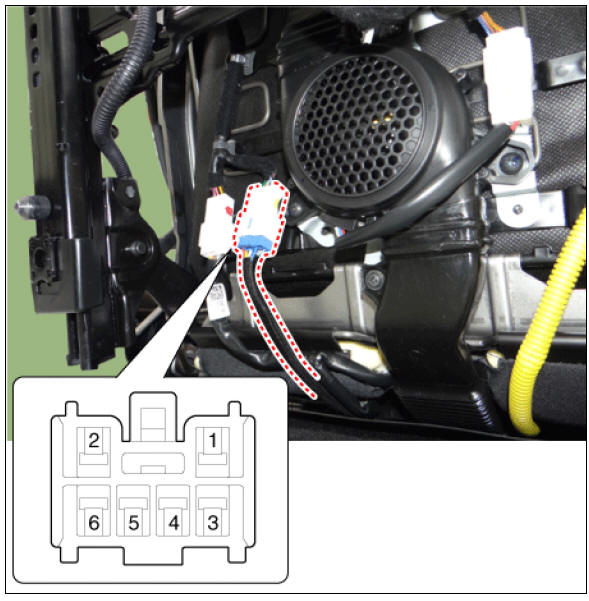


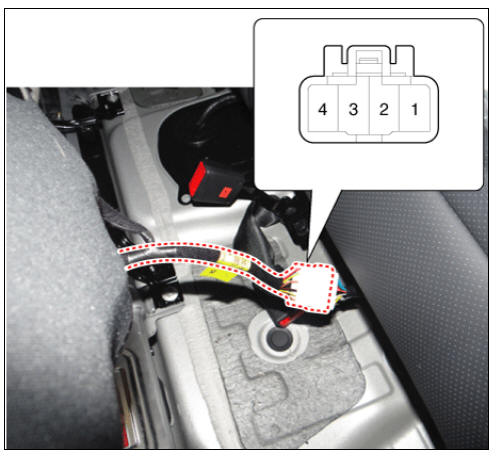
Rear Seat Heater
- Check for continuity and measure the resistance between terminals No 1 and No 4.
Standard value
Rear seat (Cushion only) : 3.16Ω+-10%/23ºC
Seat Heater Unit Diagnostic Mode
- Enter diagnostic mode by operating the seat heater switch.
- Enter diagnostic mode by referring to the below description.
- Keep pressing the seat heater switch for over 3 seconds and release the switch. Then, within 2 seconds, press the switch again for over 3 seconds.
- When diagnostic mode is entered, all switch LEDs will blink once.
- After entering diagnostic mode, check cause of failure according to blinking or illumination of LEDs.
Driver Side / Passenger Side Seat Heater
1st Row Seat Heater Unit 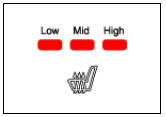
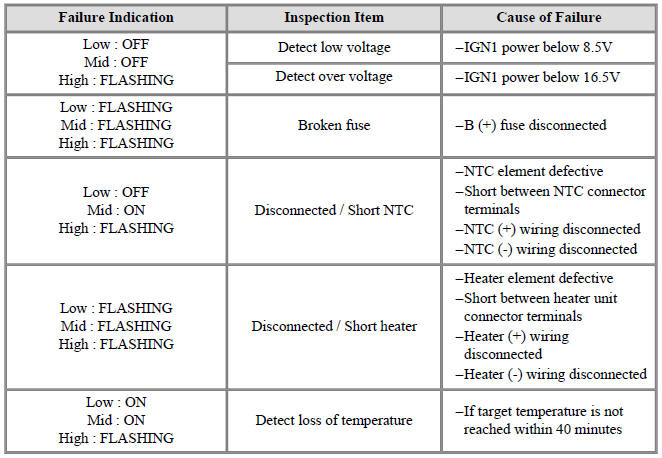
2nd Row Seat Heater Unit 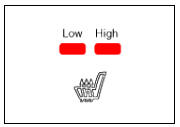
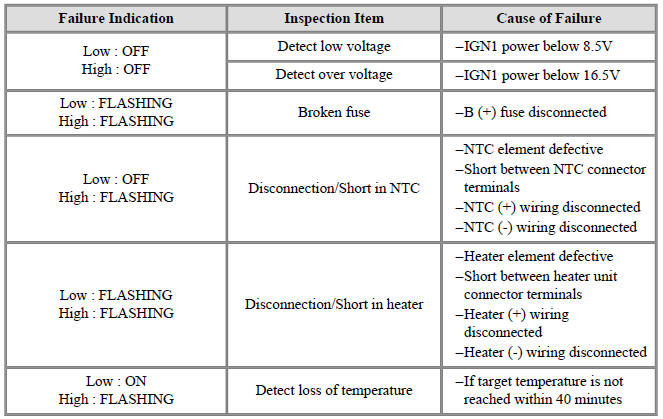
- Check the defective area by the blinking pattern of LED lamps.
- Error is recorded by the seat heater unit.
- Error memory can be deleted by pressing the seat heater switch for over 5 seconds with the LED lamps blinking four times.
- Switching "OFF" the ignition will end the diagnostic mode for seat heater unit.
- Switch "ON" the ignition and check that seat heater system operates properly. To check the error code, refer to step 2 above.
Removal
Front Seat Heater Unit
- Remove the passenger seat assembly.
(Refer to Body - "Front Seat assembly")
Warning
Before removing the passenger side seat assembly, pull upward to the maximum by pushing the front seat height adjusting switch (A).
- Remove the front seat cushion cover.
(Refer to Body - "Front Seat Cushion Cover")
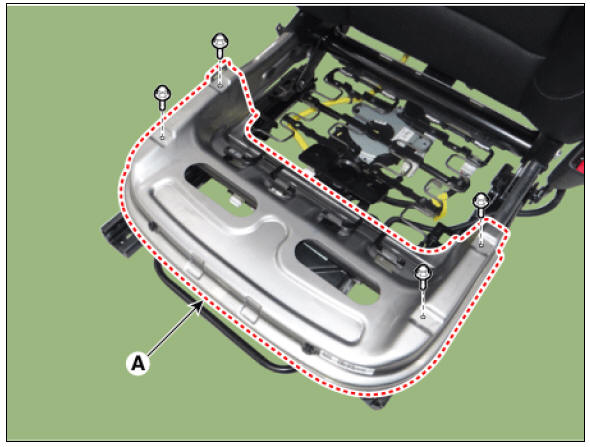
- Remove the front seat cushoin panel (A) after loosening the mounting bolts.
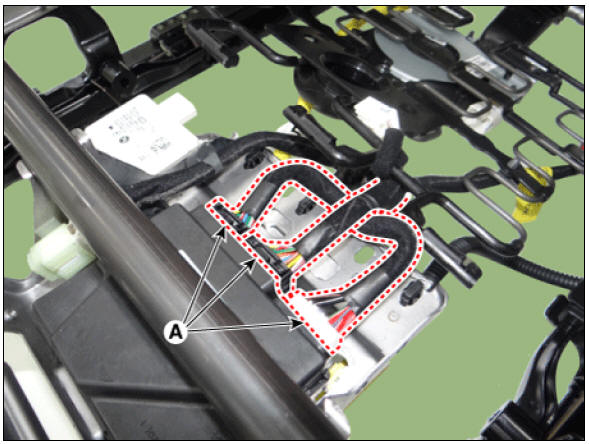
- Disconnect the ventilation seat unit connectors (A).
- Remove the ventilation seat unit (A) after loosening the mounting screws.
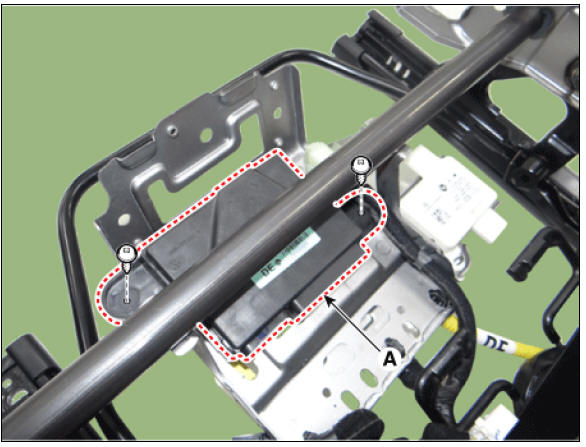
Rear Seat Heater Unit
- Remove the rear seat cushion.
(Refer to Body - "Front Seat Cushion Cover")
- Remove the rear seat heater unit (A) by loosening the screws.
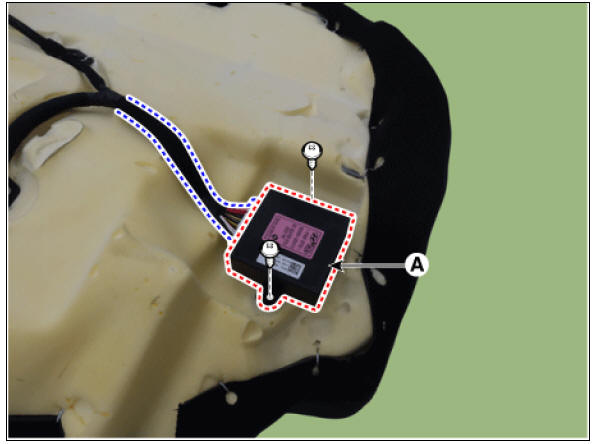
Installation
- Install in the reverse order of removal.
READ NEXT:
 Seat Heater Switch Repair procedures
Seat Heater Switch Components and components location
Front Seat Switch
Driver side seat heater switch
Passenger side seat heater switch
Rear Seat Switch
Rear seat heater switch (LH/RH)
Description
Seat Heater Smart Control
 Air Ventilation Seat
Air Ventilation Seat Components and components location
Ventilation seat blower
Ventilation seat unit (Assist seat only)
Circuit Diagram
Removal
Ventilation Blower
Disconnect the negative (-) battery terminal.
Remove the fron
 Lumbar Support Units
Removal
Disconnect the negative (-) battery terminal.
Remove the front seat back cover.
(Refer to Body - "Front Seat Back Cover")
Disconnect the lumbar support motor connector (A).
Separate the retaining clips (A) from t
SEE MORE:
 How to disconnect charging connector in emergency
Before disconnecting the charging
connector, make sure the doors are
unlocked. When the door is locked,
the charging connector lock system
will not allow disconnection. To prevent
charging cable theft, the
charging connector cannot be
 Head-Up Display (HUD)
The Head-Up Display is a transparent
display that projects an image of certain
information from the instrument cluster
and navigation system on the windshield
glass.
The head up display image on the
HUD screen may be invisible when:
Categories
- Home
- KIA Niro EV, Hybrid - Second generation - (SG2) (2021-2024) - Owner's manual
- Kia Niro - First generation - (DE) (2017-2022) - Service and Repair Manual
- Contact Us
