KIA Niro: Room Lamp Repair procedures | Vanity Lamp Repair procedures
Kia Niro - First generation - (DE) (2017-2022) - Service and Repair Manual / Body Electrical System / Lighting System / Room Lamp Repair procedures | Vanity Lamp Repair procedures
Removal
Warning
- Put on gloves to prevent hand injuries.
- When removing with a flat-tip screwdriver or remover, wrap protective tape around the tools to prevent damage to components.
- Disconnect the negative (-) battery terminal.
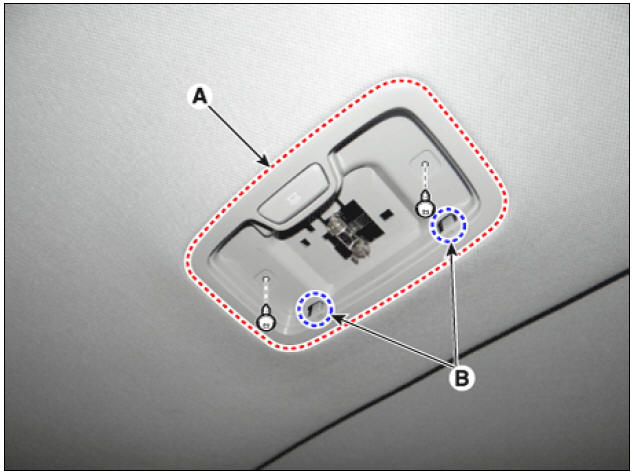
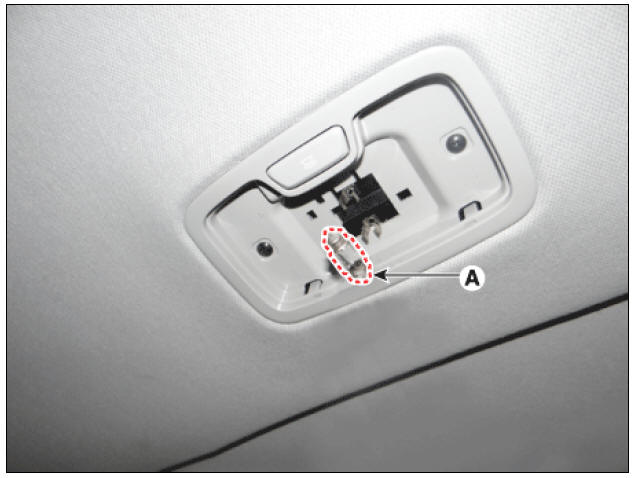
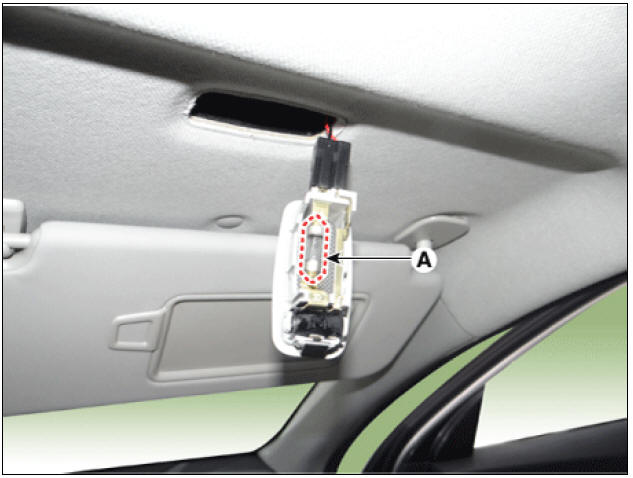
- Using a screwdriver or remover, separate the room lamp lens (A) from the room lamp.
- Remove the room lamp (A) after loosening the screws.
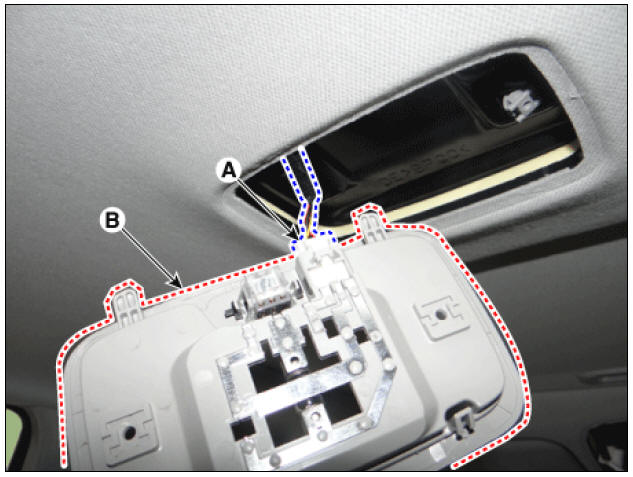
Warning
- When removing the room lamp, be careful of the direction in which the tool is inserted (B).
- When inserting the tool in the opposite direction, take caution as the room lamp may be damaged.
- Remove the room lamp assembly (B) after disconnecting the room lamp connector (A).
Bulb Replacement
- Using a screwdriver or remover, separate the room lamp lens (A) from the room lamp.
- Disconnect the room lamp bulb (A).
Installation
- Install in the reverse order of removal.
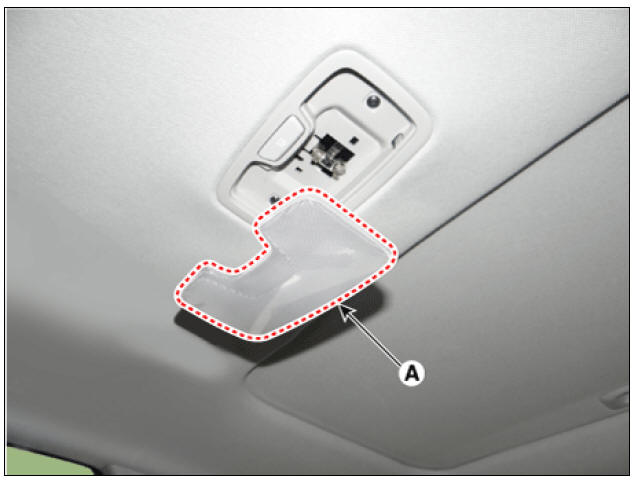
Vanity Lamp Repair procedures
Removal
- Disconnect the negative (-) battery terminal.
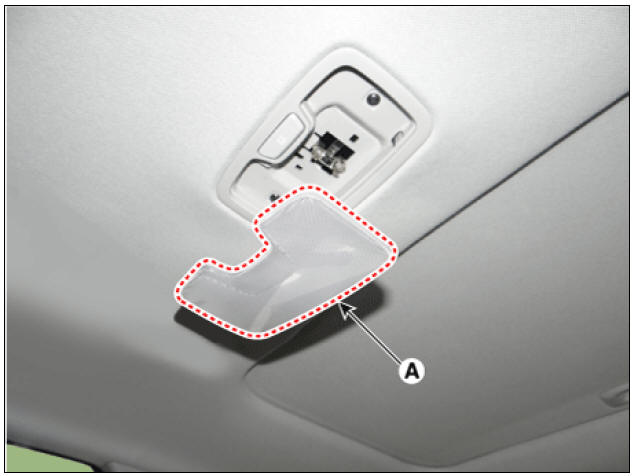
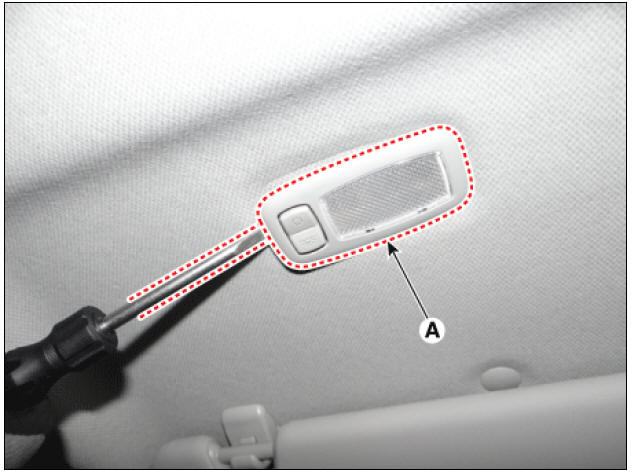
- Detach the vanity lamp (A) using a flat-tip screwdriver.
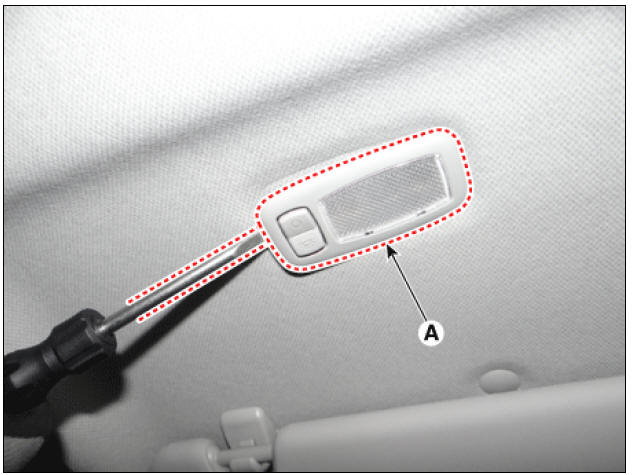
- Disconnect the vanity lamp connector (A).
Bulb Replacement
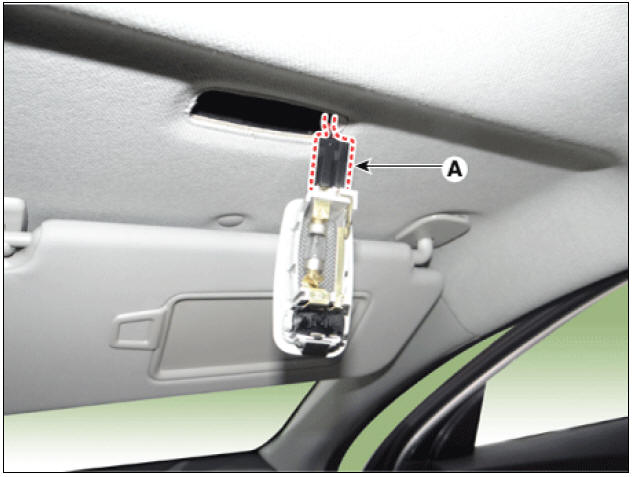
- Detach the vanity lamp (A) using a flat-tip screwdriver.
- Remove the vanity lamp bulb (A).
Installation
- Install in the reverse order of removal.
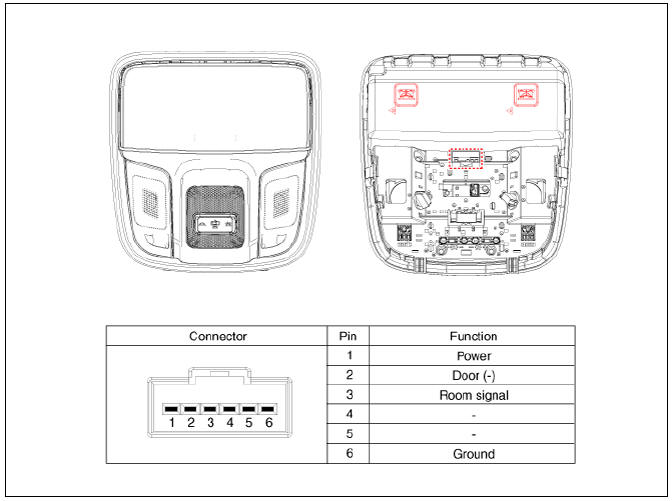
Connector and Terminal Function
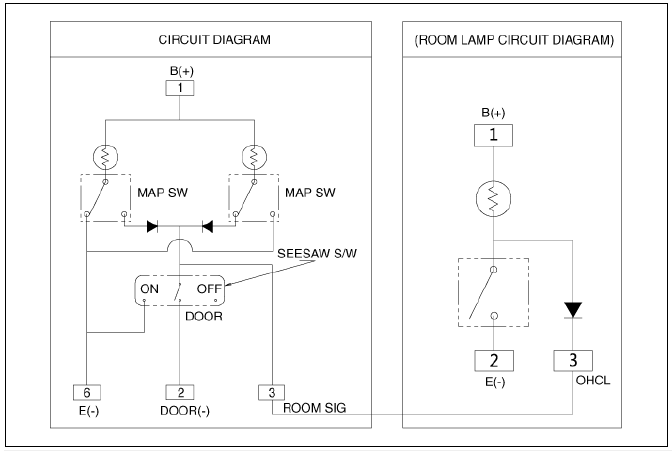
Circuit Diagram
Non-Sunroof
Sunroof (Bulb Type)
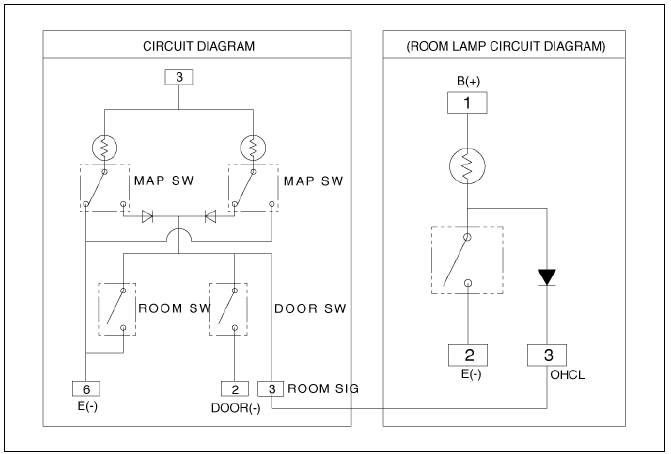
Sunroof (LED Type)

READ NEXT:
 Overhead Console Lamp Repair procedures | Hazard Lamp Switch
Inspection
Remove the overhead console lamp.
(Refer to Lighting System - "Overhead Console Lamp")
Check for continuity between terminals.
Removal
Disconnect the negative (-) battery terminal.
Remove
SEE MORE:
Drive Belt Tensioner Repair procedures
Removal and
Installation
Remove the drive belt.
(Refer to Drive Belt System - "Drive Belt")
Remove the mechanical tensioner (A).
Tightening torque :
18.6 - 23.5 N*m (1.9 - 2.4 kgf*m, 13.7 - 17.4 lb*ft)
Remove the hydr
Power limited
A: Power limited
In the following cases, this warning message
is displayed when the vehicle's
power is limited for safety.
When the power is limited for the
safety of the high-powered parts of
an electric vehicle. The power is limi
Categories
- Home
- KIA Niro EV, Hybrid - Second generation - (SG2) (2021-2024) - Owner's manual
- Kia Niro - First generation - (DE) (2017-2022) - Service and Repair Manual
- Contact Us