KIA Niro: Rear Seat Cushion Cover | Rear Back Armrest
Kia Niro - First generation - (DE) (2017-2022) - Service and Repair Manual / Body (Interior And Exterior) / Rear Seat / Rear Seat Cushion Cover | Rear Back Armrest
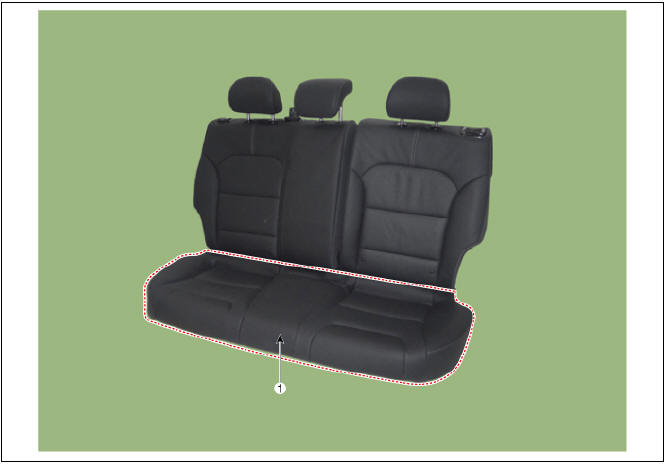
- Rear seat cushion cover
Replacement
- Remove the seat assembly.
(Refer to Rear Seat - "Rear Seat Assembly")
- Remove the rear seat cushion cover (A) after removing the hog-ring clips on the rear of seat cushion cover.
Back side

Inside
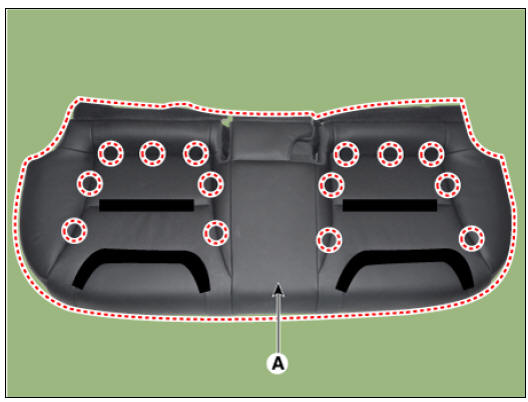
- Install in the reverse order of removal.
Warning
- Make sure that the connectors are plugged in properly.
- Replace any damaged clips.
- To prevent wrinkles, make sure that the material is stretched evenly over the cover (B) before securing the hog-ring clips (A).
- Replace the hog-ring clips with new ones using special tool (C) (09880-4F000).
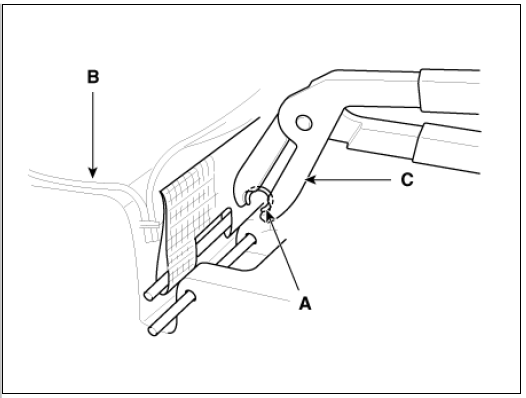
Rear Back Armrest

Replacement
- Remove the seat assembly.
(Refer to Rear Seat - "Rear Seat Assembly")
- Remove the rear back armrest (A) after loosening the cap & bolt.
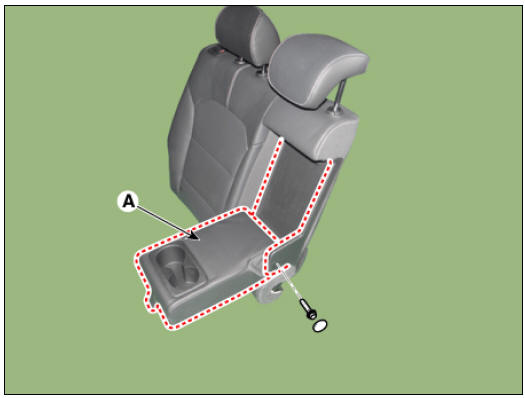
- Remove the rear back armrest board (A) after loosening the screws.
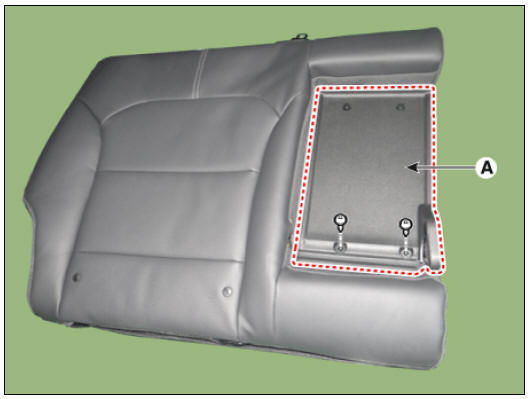
- Install in the reverse order of removal.
Warning
- Make sure that the connectors are plugged in properly.
- Replace any damaged clips.
Rear seat belt retractor
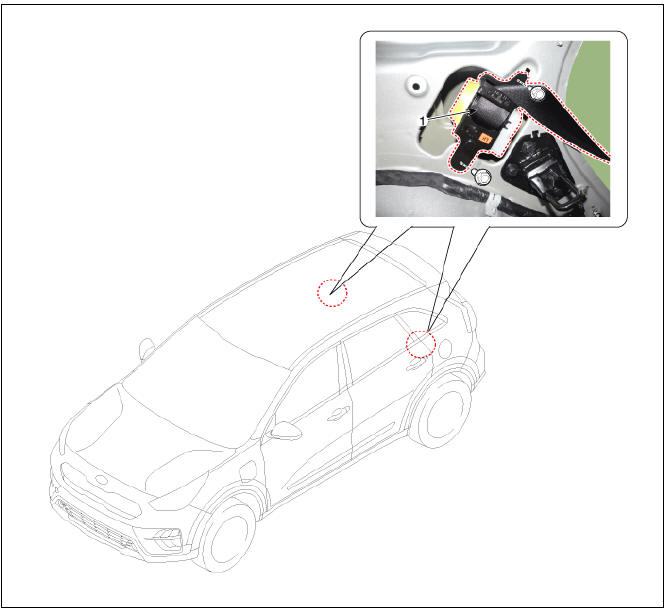
- Rear seat belt retractor
Replacement
Warning
When installing the belt, be careful not to damage the retractor.
- Remove the rear pillar trim.
(Refer to Interior Trim - "Rear Pillar Trim")
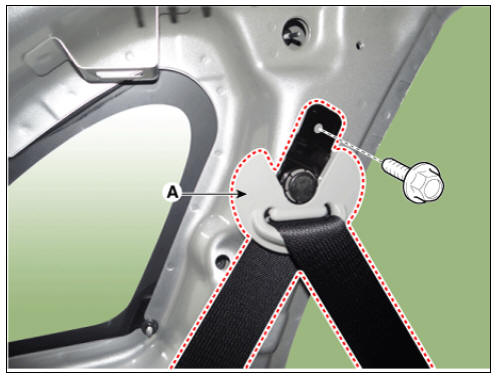
- Remove the rear seat belt upper anchor (A) after loosening the mounting bolts.
Tightening torque : 39.2 - 53.9 N*m (4.0 - 5.5 kgf*m, 28.8 - 39.8 lb*ft)
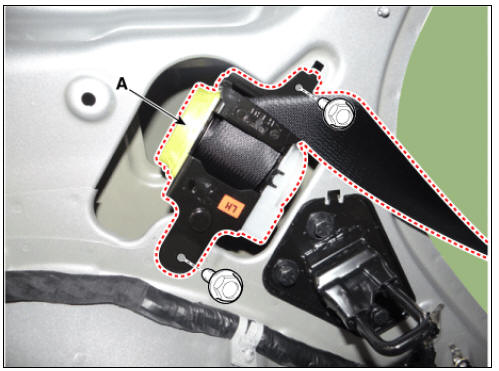
- Remove the rear seat belt retractor (A) after loosening the mounting bolt.
Tightening torque :
Lower : 39.2 - 53.9 N*m (4.0 - 5.5 kgf*m, 28.8 - 39.8 lb*ft) Upper : 7.8 - 11.8 N*m (0.8 - 1.2 kgf*m, 5.8 - 8.7 lb*ft)
- Install in the reverse order of removal.
Warning
- Make sure the connector is plugged in properly.
- Replace any damaged clips (or pin-type retainers).
READ NEXT:
 Rear Center Seat Belt Retractor
Rear center seat belt retractor
Replacement
Warning
When installing the belt, be careful not to damage the retractor.
Remove the rear seat back dust cover.
(Refer to Rear Seat - "Rear Seat Back Cover")
Remove the rear ce
 Roof Trim
Components (1)
General Type
Sun visor (LH)
Sun visor (RH)
Roof trim
Assist handle bracket
Components (2)
Sunroof Type
Sun visor (LH)
Sun visor (RH)
Roof trim
Assist handle bracket
SEE MORE:
 Driveshaft and axle
Service Data
Tightening Torques
Lubricants
Special Service Tools
Tool Name / Number/ Illustration/ Description
Ball joint puller
09568-34000/ / Remove the ball
joint
Puller
09495-33000/ /Used for removal of
spider assembly
 Coolant Repair procedures
Refilling And Bleeding
Warning
Never remove the cap when the engine is hot. Serious scalding could
be caused by hot fluid under high pressure escaping
from the reservoir.
Warning
When pouring inverter coolant, be sure to shut the relay box lid
Categories
- Home
- KIA Niro EV, Hybrid - Second generation - (SG2) (2021-2024) - Owner's manual
- Kia Niro - First generation - (DE) (2017-2022) - Service and Repair Manual
- Contact Us
