KIA Niro: Ignition Switch
Ignition Switch / Repair Procedures
Inspection
- Disconnect the key warning switch connector (A) and ignition switch connector (B) from the steering column.
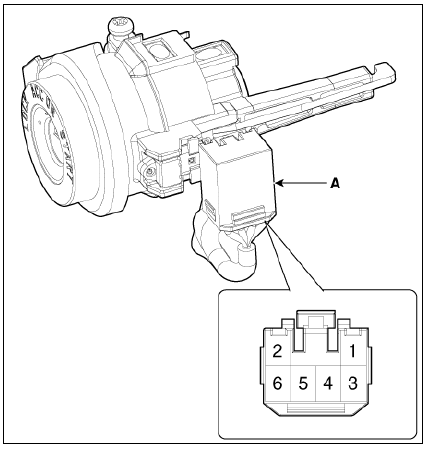
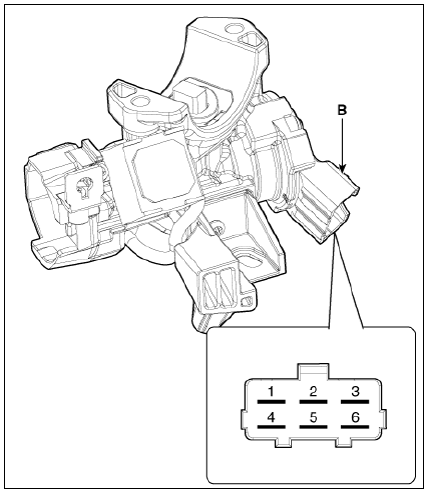
- Check for continuity between the terminals.
- If continuity is not specified, replace the switch.

Removal
- Disconnect the negative (-) battery terminal.
- Remove the crash pad lower panel.
(Refer to Body - "Crash Pad Lower Panel")
- Remove the steering column upper and lower shroud panel.
(Refer to Body - "Steering Column Shroud Panel")
- Remove the ignition switch connector (A) and key warning / immobilizer connector (B).
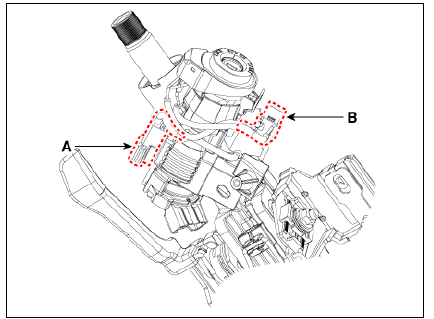
- Insert key and turn it to ACC position.
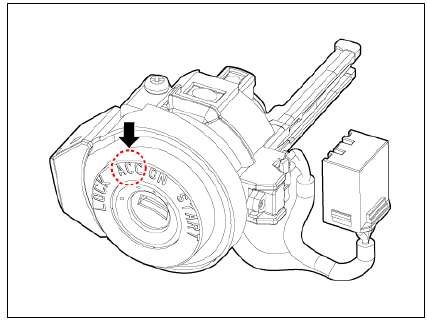
- Pushing lock pin (A) with the awl.
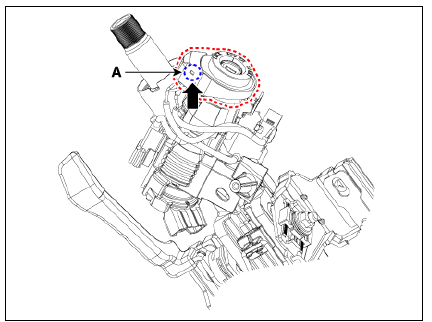
- Remove the key lock cylinder (A).
B : Key warning switch
C : Ignition switch connector
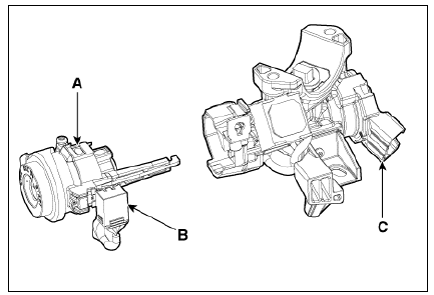
- Remove the ignition switch (A) after loosening the mounting bolts.
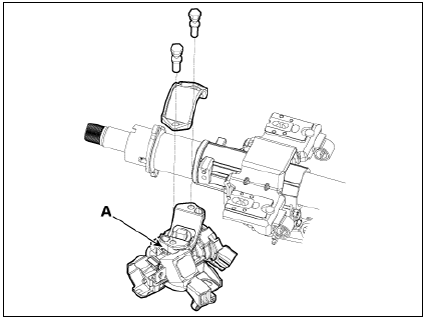
Installation
- Install in the reverse order of removal.
Warning
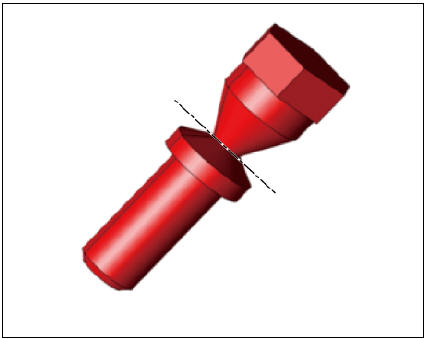
- Do not reuse the shear bolts.
- When installing the new shear bolts to the ignition switch
assembly, tighten the shear bolts until its head is cut off.
READ NEXT:
 Instrument Cluster Description and operation
Instrument Cluster Components and components location
Connector and Terminal Function
Instrument Cluster Description and operation
Description
Main Function
High speed CAN communication (C-CAN)
(1) Custom Function : car seats l
 Instrument Cluster Repair procedures
Removal
Warning
Put on gloves to protect your hands.
When removing with a flat-tip screwdriver or remover, wrap
protective tape around the tools to prevent damage to
components.
Instrument Cluster
Disconnect the negative (-) batter
SEE MORE:
 Fuel Filler Door / Repair Procedures | Charge Port Door Housing Assembly
Components and components location
Fuel filler door
Fuel Filler Door / Repair Procedures
Replacement
Warning
Use a plastic panel removal tool to remove interior trim pieces without marring the surface.
Open the fuel filler door
 How to connect
Outdoor (if equipped)
Open the cover of the V2L connector.
Close the cover after connecting
home appliances and electronic products
to the power outlet.
Connect the V2L connector to the
charging hole on the vehicle.
Pr
Categories
- Home
- KIA Niro EV, Hybrid - Second generation - (SG2) (2021-2024) - Owner's manual
- Kia Niro - First generation - (DE) (2017-2022) - Service and Repair Manual
- Contact Us
