KIA Niro: Hood lower latch assembly
Kia Niro - First generation - (DE) (2017-2022) - Service and Repair Manual / Body (Interior And Exterior) / Hood / Hood lower latch assembly
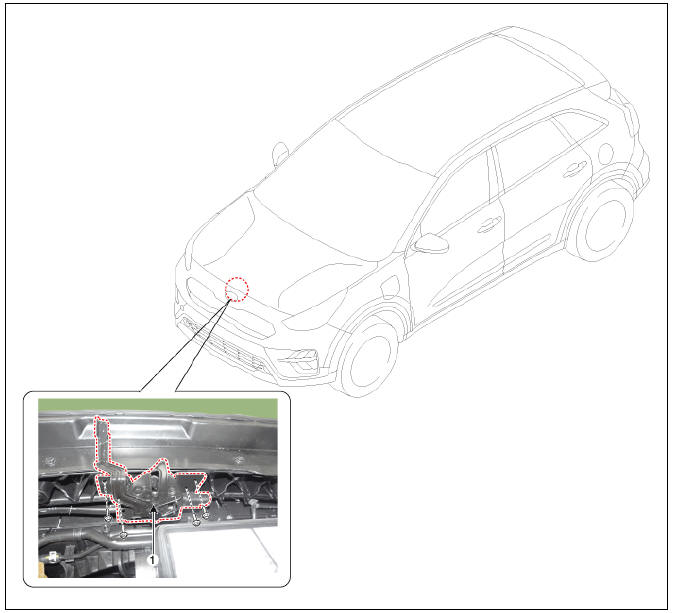
- Hood lower latch assembly
Replacement
- Remove the front bumper cover.
(Refer to Front Bumper - "Front Bumper Cover")
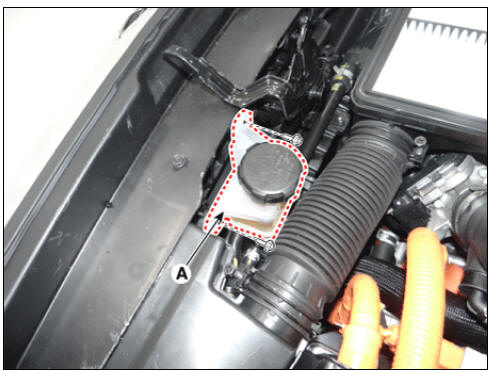
- Disconnect the hood lower latch connector (A).

- Remove the engine clutch reservoir (A) after loosening the bolts.
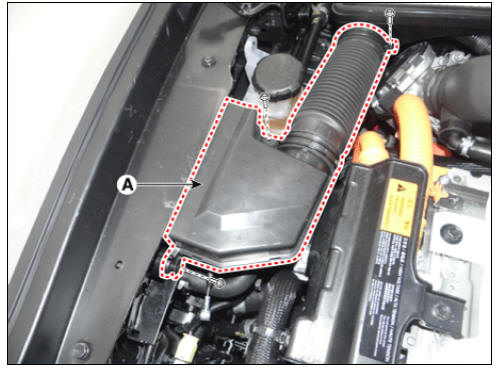
- Remove the air duct (A).
- Disconnect the hood latch connector (A).
Tightening torque : 7.8 - 11.8 N*m (0.8 - 1.2 Kgf*m, 5.8 - 8.7 lb*ft)
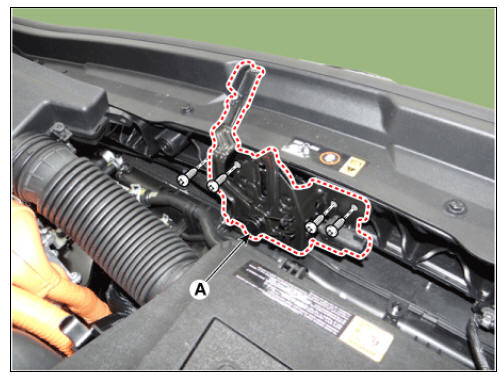
- Disconnect the hood latch cable (A) and remove the hood latch.

- Install in the reverse order of removal.
Warning
- Make sure the hood latch release cable is connected properly.
- Make sure the hood locks/unlocks and opens/closes properly.
- Adjust the latch alignment
READ NEXT:
 Door Scuff Trim | Cowl Side Trim
Front pillar trim
Front door scuff trim
Center pillar upper trim
Rear door scuff trim
Cowl side trim
Center pillar lower trim
Rear pillar trim
Door Scuff Trim
Component Location
Front door scuff trim
SEE MORE:
Closing the fuel filler door
Operation
Turn the fuel tank cap (2) clockwise
until it "clicks".
Press the rear center edge to close
the fuel filler door (1).
Ensure all the doors and the fuel filler
door are locked.
WARNING
Automotive fuels are flammab
Resuming smart regeneration system
To re-activate the Smart Regeneration
System while driving,
with the vehicle on, touch Settings ?
Vehicle ? Eco Vehicle ? Smart Recuperation
on the infotainment system or
pull and hold the right side paddle
shifter for over 1 second.
Then AU
Categories
- Home
- KIA Niro EV, Hybrid - Second generation - (SG2) (2021-2024) - Owner's manual
- Kia Niro - First generation - (DE) (2017-2022) - Service and Repair Manual
- Contact Us