KIA Niro: Fuel Pressure Regulator Repair procedures | Fuel Line Repair procedures
Removal
- Remove the fuel pump.
(Refer to Fuel Delivery System - "Fuel Pump")
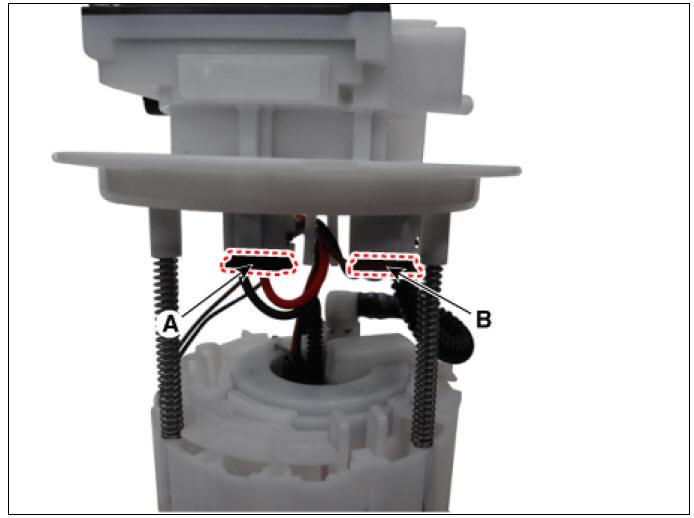
- Disconnect the fuel pump motor connector (A) and fuel sender connector (B).
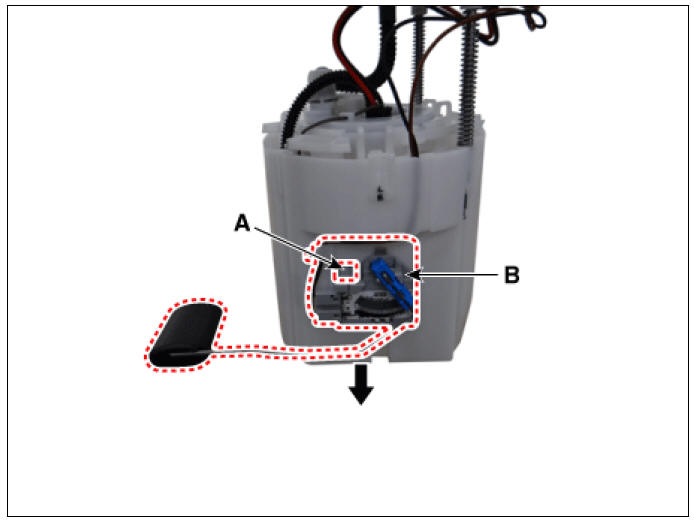
- Lift the fixing hook (A) by using a common driver, and then remove the fuel sender (B).
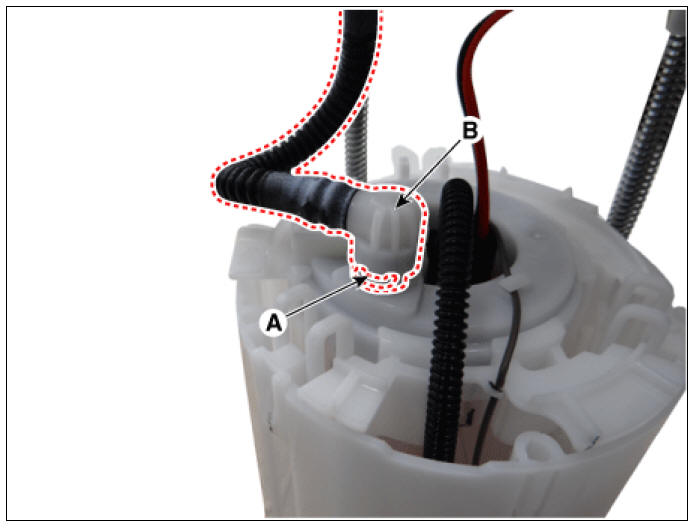
- Remove the fixing clip (A), and then disconnect the feed tube (B).
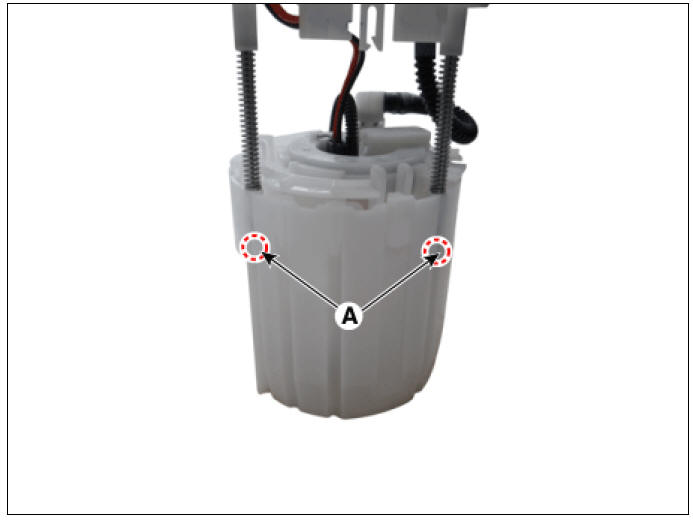
- Remove the head assembly after releasing the cushion fixing clip (A).
- Remove the reservoir-cup (B) after releasing the fixing hook (A).
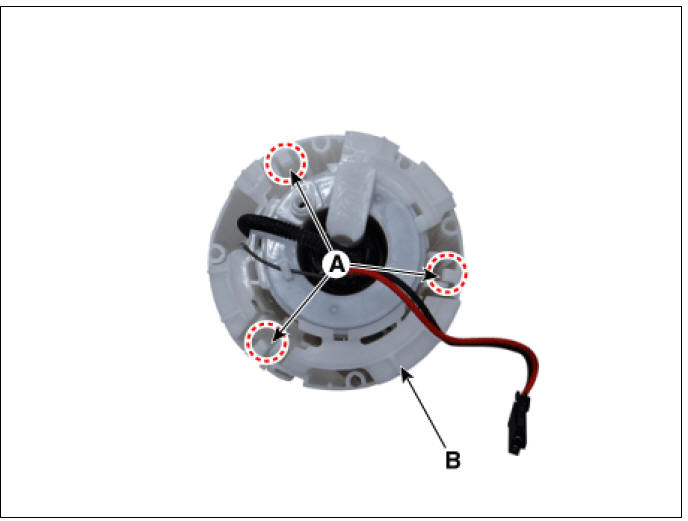
- Remove the fuel pressure regulator (B) after releasing the fixing hook (A).

Installation
- Install in the reverse order of removal.
Fuel Line Repair procedures
Removal
Low Pressure Fuel Line (High Pressure Fuel Pump �†’ Fuel Tank)
- Release the residual pressure in fuel line.
(Refer to the Fuel Delivery System - "Release Residual Pressure in Fuel Line")
- Switch "OFF" the ignition and disconnect the negative (-) battery terminal.
- Remove the air cleaner assembly (Refer to Engine Mechanical System - "Air Cleaner")
- Disconnect the fuel feed line quick-connecotor (A).
- Disconnect the vapor hose (B) from the purge control control valve.

Warning
Open the clamp cover (B) before disconnecting the quick connector (if the clip is applied). 
Warning
When removing the quick-connnector with the clip removing tool (A), be careful not to damage the plastic clip (B).
Damaged clip can result in fuel line leakage due to bad connection. 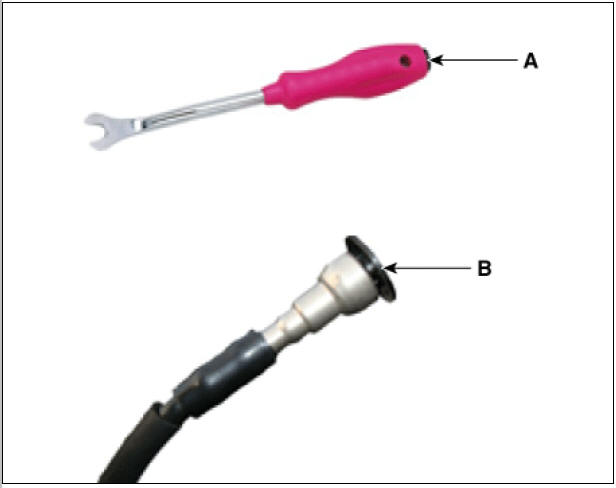
- Lift the vehicle.
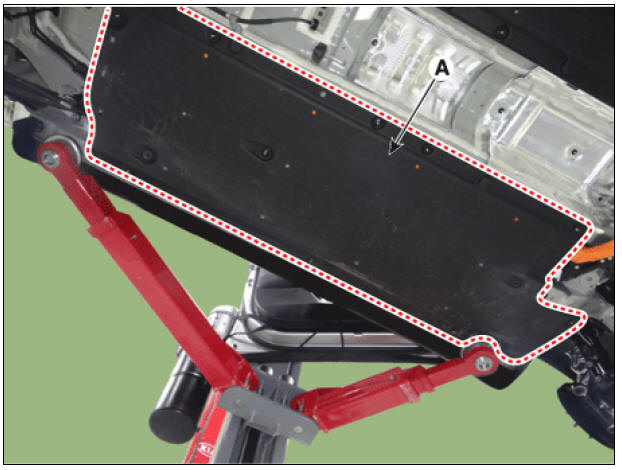
- Remove the under cover (LH) (A) after loosening the mounting bolt and nuts.
- Remove the fuel tank.
(Refer to to Fuel Delivery System - "Fuel Tank")
- Remove the front sub frame.
(Refer to Suspension System - "Sub Frame")
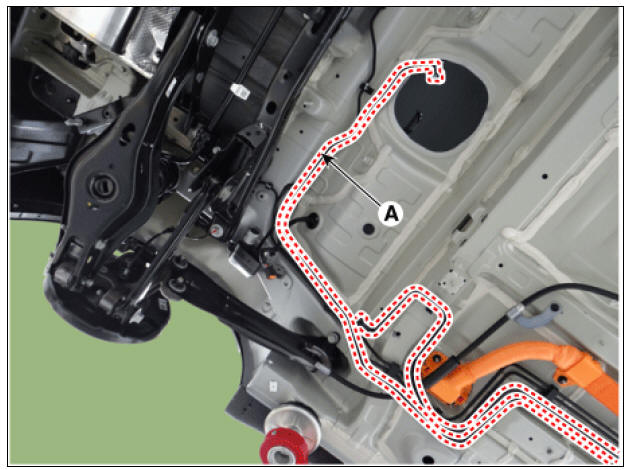
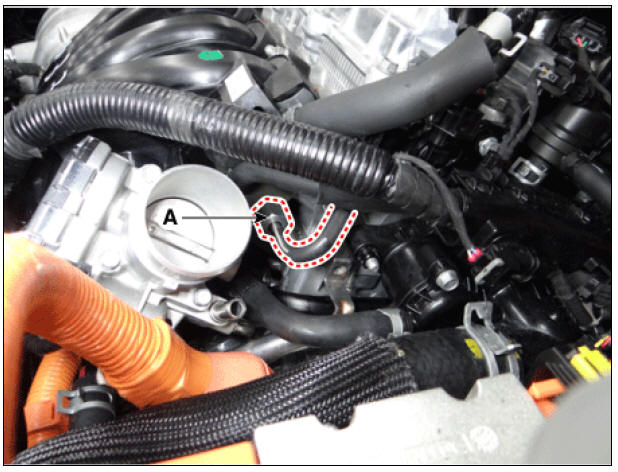
- Remove the fuel line (A) after loosening the mounting bolts and bracket.

High Pressure Fuel Line
(High Pressure Fuel Pump �†’ Delivery Pipe)
- Release the residual pressure in fuel line.
(Refer to the Fuel Delivery System - "Release Residual Pressure in Fuel Line")
- Switch "OFF" the ignition and disconnect the negative (-) terminal of the auxiliary 12V battery.
- Remove the air cleaner assembly (Refer to Engine Mechanical System - "Air Cleaner")
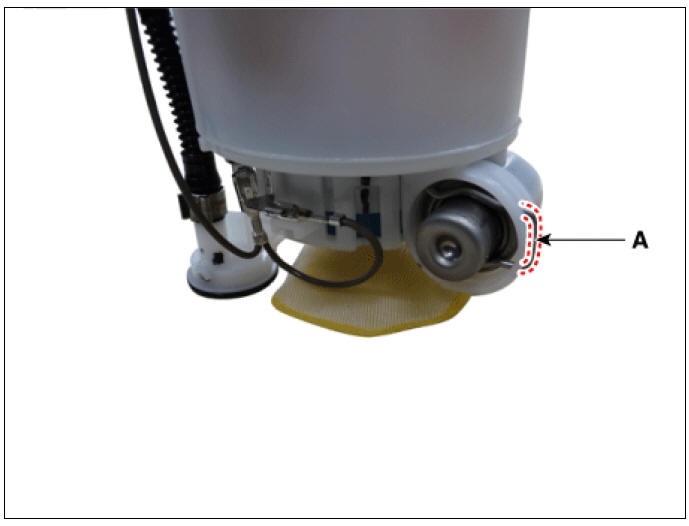
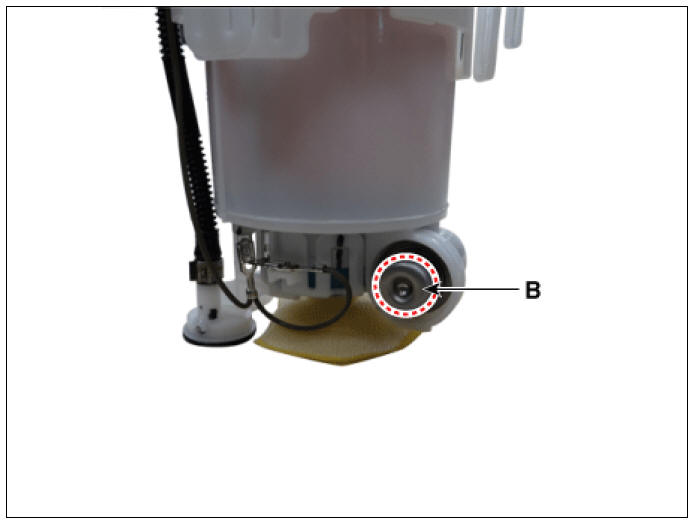
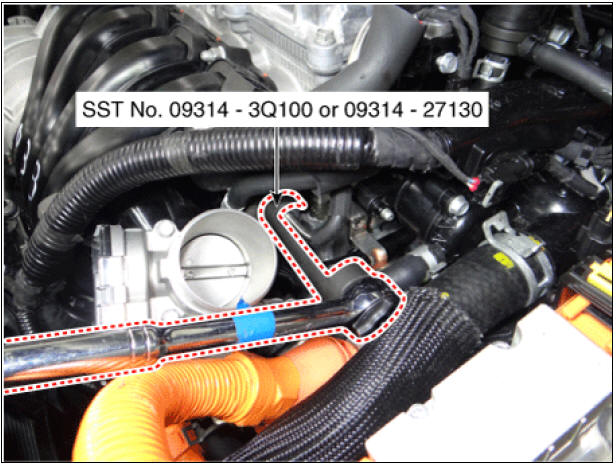
- Remove the high pressure pipe flange nut (A) by using the special service tool (B) (SST No. 09314 - 3Q100 or 09314 - 27130).
High pressure fuel pipe flange nut: 26.5 - 32.4 N*m (2.7 - 3.3 kgf*m, 19.5 - 23.9 lb*ft)
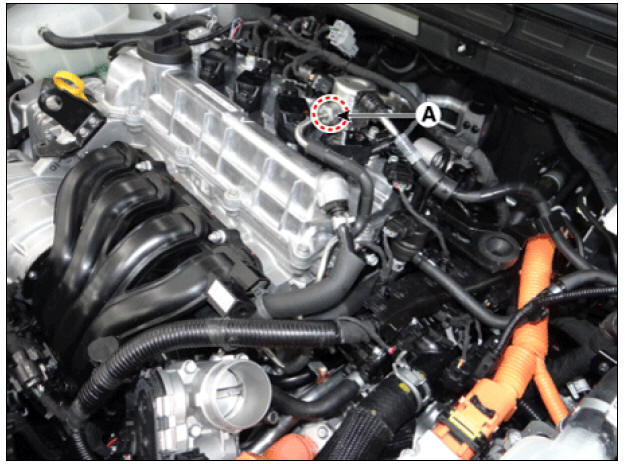
- Remove the high pressure pipe flange nut (A) by using the special service tool (B) (SST No. 09314 - 3Q100 or 09314 - 27130).
High pressure fuel pipe flange nut: 26.5 - 32.4 N*m (2.7 - 3.3 kgf*m, 19.5 - 23.9 lb*ft)
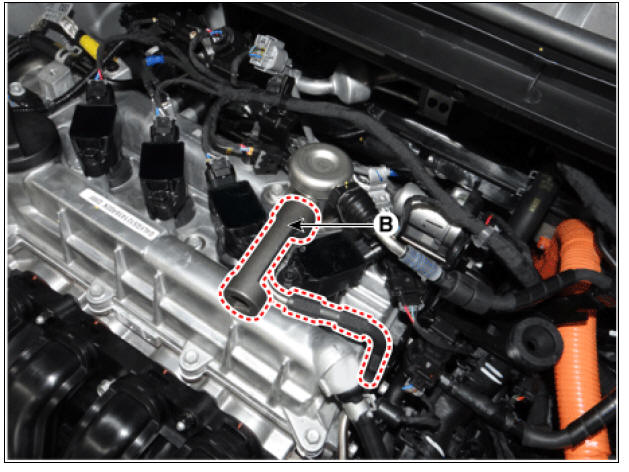
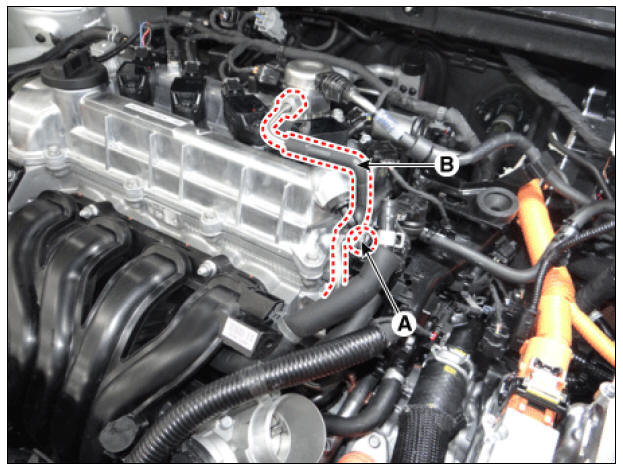
- Remove the high pressure fuel pipe function block mounting bolt (A).
- Remove the high pressure fuel pipe (B).
High pressure fuel pipe function block mounting bolt: 9.8 - 11.8 N*m (0.8 - 1.2 kgf*m, 7.2 - 8.7 lb*ft)

Installation
- Install the fuel line in the reverse order of removal.
- Install the high-pressure fuel pipe as follows.
(1) Completely pre-tighten the both side nuts (A) on high pressure tightening area of high pressure fuel pipe while keeping them vertically.
(2) Tighten the high pressure fuel pipe function block mounting bolt (B).
Tightening torque : 7.8 - 11.8 N*m (0.8 - 1.2 kgf*m, 5.8 - 8.7 lb*ft)
(3) Completely tighten the both side nuts (A) on high pressure tightening area of high pressure fuel pipe.
Tightening torque : 26.5 - 32.4 N*m (2.7 - 3.3 kgf*m, 19.5 - 23.9 lb*ft)

Warning
- Do not reuse the high pressure fuel pipe.
- Be careful not to transform the shape of the high pressure fuel pipe.
- Torque wrench should not be tilt when you tighten the nut.
- Follow the order and the tightening torque when you assemble.
- Inspect fuel leakage after high pressure fuel pipe assembly.
- Use the special service tool (09314-3Q100) to install the high pressure fuel pipe.
READ NEXT:
 Filler-Neck Assembly Repair procedures | Fuel Pump Control Module (FPCM)
Removal
Open the fuel filler door.
Switch "OFF" the ignition and disconnect the negative (-) terminal of the auxiliary 12V battery.
Remove the filler-neck assembly mounting screws (A).
Lift the vehicle.
Re
SEE MORE:
Stop Lamp Switch Repair procedures
Removal
Turn ignition switch OFF and disconnect the negative (-) battery
terminal.
Remove the crash pad lower panel.
(Refer to Body - "Crash Pad")
Remove the knee air bag.
(Refer to Restraint - "Knee Airbag(KAB) Module&q
Hybrid Power Control Unit (HPCU) connector and high voltage cable
Hybrid Power Control Unit (HPCU) terminal And Input/Output signal
HPCU Terminal Function
Connector (C133-S) (94Pin) : HPCU signal input and control
High Voltage Cable (C133-P) (2 Pin) : HPCU↔Power Relay Assembly
Categories
- Home
- KIA Niro EV, Hybrid - Second generation - (SG2) (2021-2024) - Owner's manual
- Kia Niro - First generation - (DE) (2017-2022) - Service and Repair Manual
- Contact Us