KIA Niro: Front Seat Cushion Cover | Front Seat Frame Assembly
Kia Niro - First generation - (DE) (2017-2022) - Service and Repair Manual / Body (Interior And Exterior) / Front Seat / Front Seat Cushion Cover | Front Seat Frame Assembly
Component Location
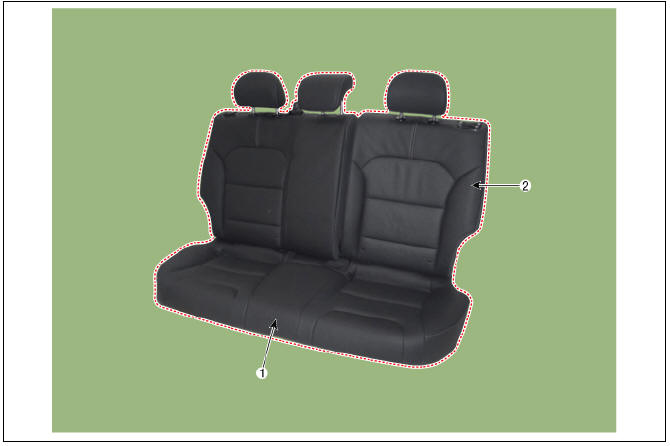
- Front seat cushion cover
Replacement
- Remove the front seat shield inner cover.
(Refer to Front Seat - "Front Seat Shield Inner Cover")
- Remove the front seat outer shield cover.
(Refer to Front Seat - "Front Seat Outer Shield Cover")
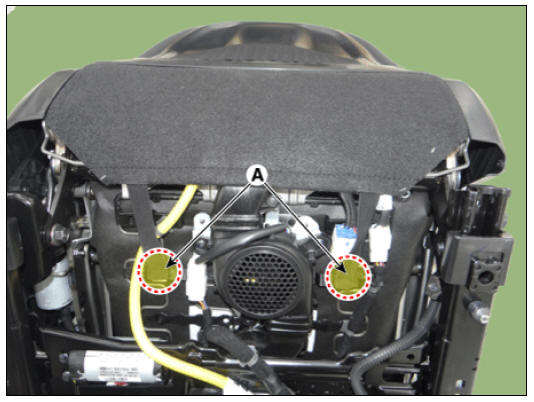
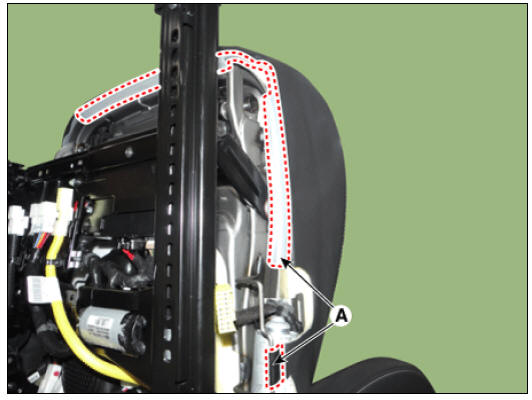
- Remove the front seat lower protector (A).
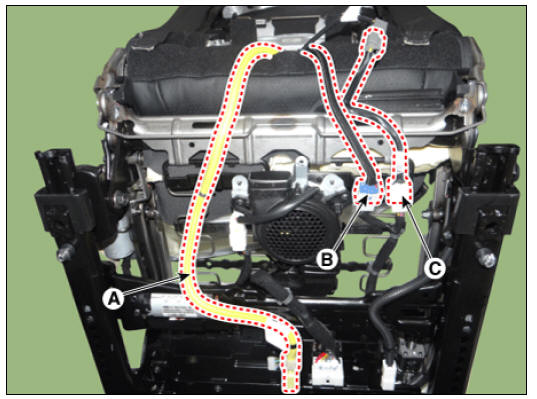
- Disconnect the airbag connector (A), heater connector (B), and extension wiring connector (C).
- Pull out the protectors (A), and then separate the front seat cushion cover from the front seat cushion frame.
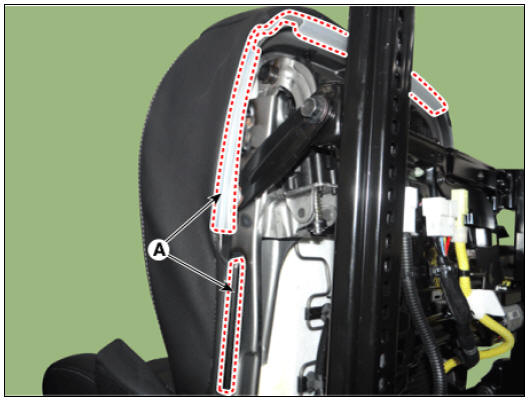
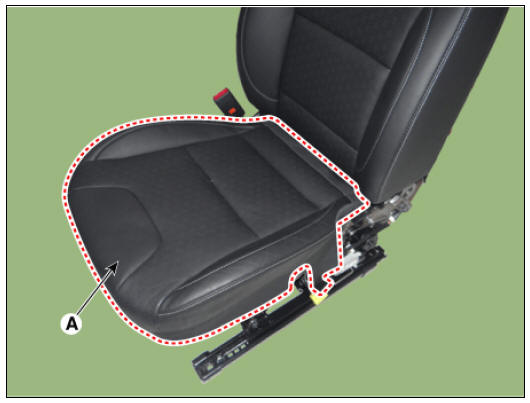
- Remove the front seat cushion cover (A) from the front seat cushion frame.
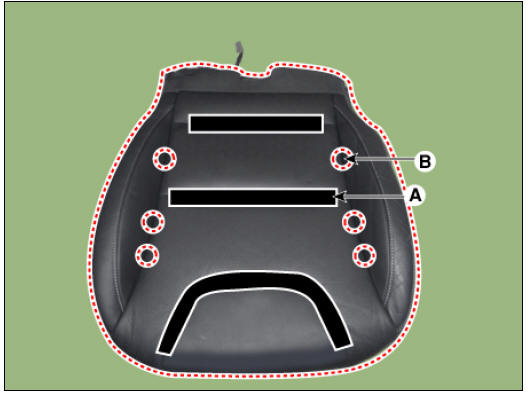
- Remove the velcro tape (A) and hog-ring clips (B) from the front of seat cushion.
- Install in the reverse order of removal.
Warning
- Make sure that the connectors are plugged in properly.
- Replace any damaged clips.
- To prevent wrinkles, make sure that the material is stretched evenly over the cover (B) before securing the hog-ring clips (A).
- Replace the hog-ring clips with new ones using special tool (C) (09880-4F000).
Front Seat Frame Assembly
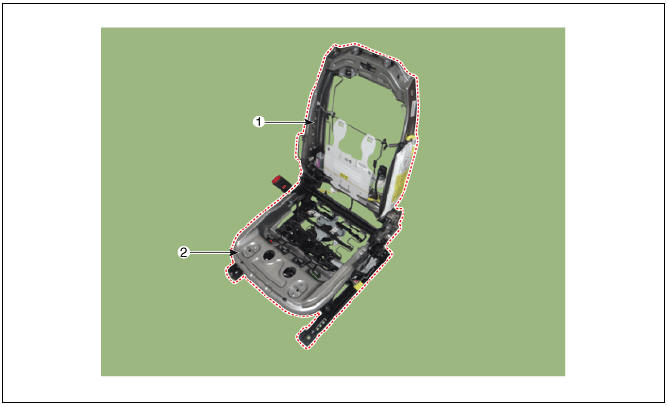
- Front seat back frame assembly
- Front seat cushion frame assembly
Replacement
Warning
- Put on gloves to protect your hands.
- Never attempt to measure the circuit resistance of the airbag module (squib) even if you are using the specified tester. If the circuit resistance is measured with a tester, accidental airbag deployment will result in serious personal injury
Warning
- When prying with a flat-tip screwdriver, wrap it with protective tape, and apply protective tape around the related parts, to prevent damage.
- Use a plastic panel removal tool to remove interior trim pieces without marring the surface.
- Take care not to bend or scratch the trim and panels.
- Remove the front seat back cover.
(Refer to Front Seat - "Front Seat Back Cover")
- Remove the front seat cushion cover.
(Refer to Front Seat - "Front Seat Cushion Cover")
- Remove the lumbar support assembly.
(Refer to Body Electrical System - "Lumbar Support Unit")
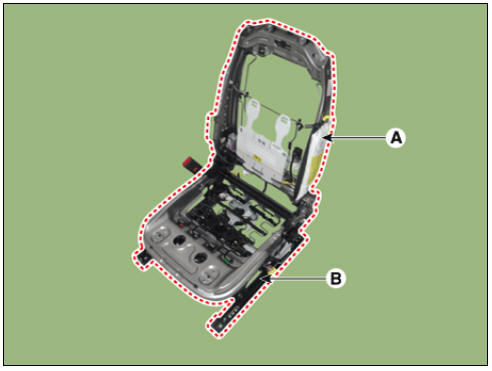
- After loosening the mounting bolts, disconnect the front seat back frame assembly (A) and front seat cushion frame assembly (B).
Tightening torque : 44.1 - 53.9 N*m (4.5 - 5.5 kgf*m, 32.5 - 39.8 lb*ft)
- Install in the reverse order of removal.
READ NEXT:
 Front Seat Belt Retractor | Height Adjuster
Front Seat Belt / Components And Components Location
Front seat belt retractor
Height adjuster
Rear seat belt retractor (side)
Rear seat belt retractor (center)
Front Seat Belt Retractor
Front seat belt retractor
SEE MORE:
LCD display messages (Kia Niro EV)
* For EV warning messages, refer to "LCD display messages"
LCD displays / Displayed contents
Door, hood, tailgate, sunroof
open
Low tire pressure warning display
A: Low tyre pressure
A: Lights
1:
2:
3: AUTO
4: OFF (O)
Sub Battery Pack Assembly
Warning
Be sure to read and follow the "General Safety Information and
Caution" before doing any work related with the high
voltage system. Failure to follow the safety instructions may result in
serious electrical injuries.
Be sure to
Categories
- Home
- KIA Niro EV, Hybrid - Second generation - (SG2) (2021-2024) - Owner's manual
- Kia Niro - First generation - (DE) (2017-2022) - Service and Repair Manual
- Contact Us