KIA Niro: Front Door Latch
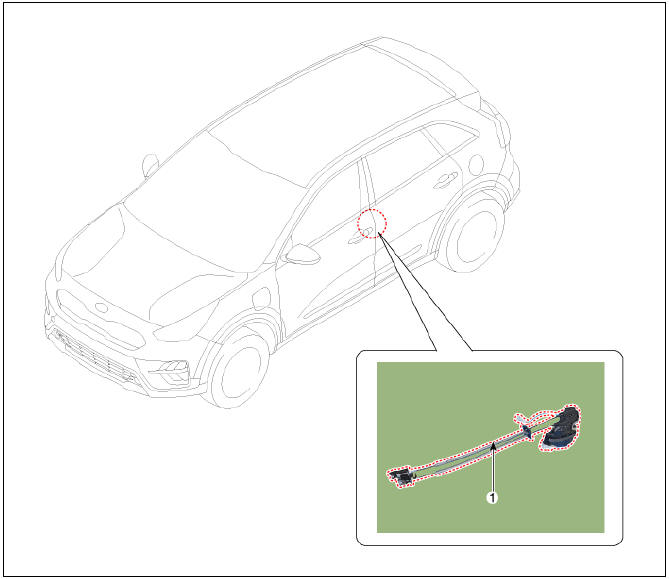
- Front door latch
Replacement
- Remove the front door module.
(Refer to Front Door - "Front Door Module")
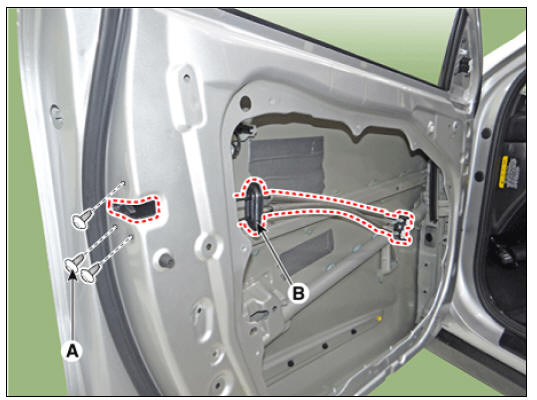
- Disconnect the front door latch rod (A) and extension wiring clip (B).
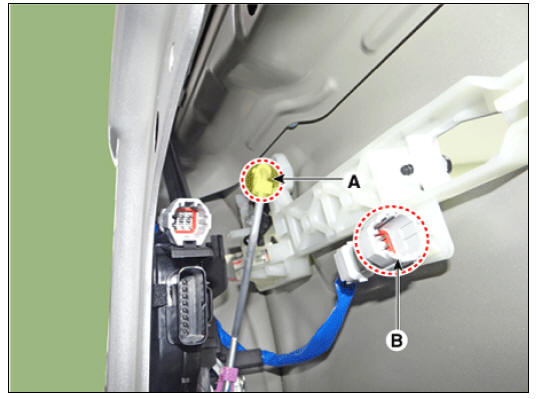
- Remove the front door latch (B) after loosening the mounting screw (A).
- Install in the reverse order of removal.
Warning
- Make sure the connector is connected properly.
- Make sure the door locks/unlocks and opens/closes properly.
- Replace any damaged clips.
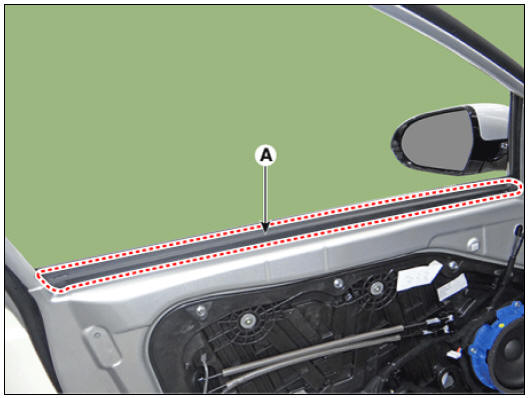
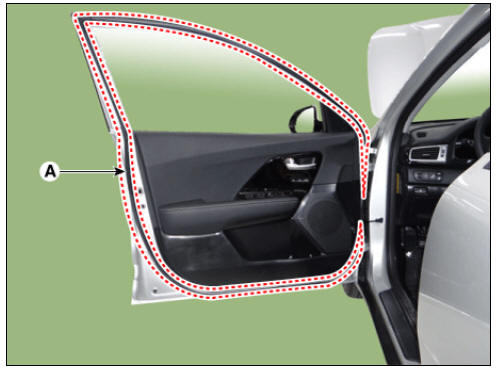
Front Door Belt Inside Weatherstrip
Replacement
- Remove the front door trim.
(Refer to Front Door - "Front Door Trim")
- Remove the front door belt inside weatherstrip (A).
- Install in the reverse order of removal.
Warning
Replace any damaged clips.
Front Door Belt Outside Weatherstrip
Replacement
- Pull down front door window glass by pressing the power window glass switch.
- Remove the front door belt outside weatherstrip (A).
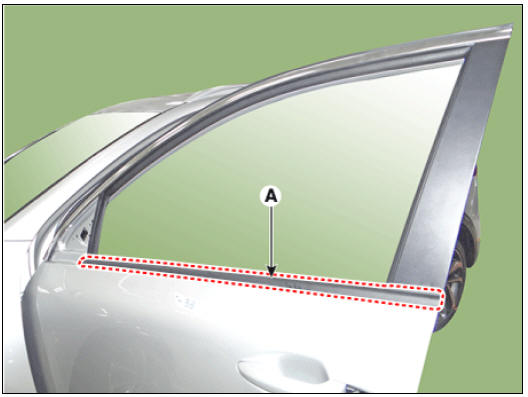
- Install in the reverse order of removal.
Warning
Replace any damaged clips.
Front Door Side Weatherstrip
Replacement
- Loosen the front door checker (A) mounting bolt.
Tightening torque : 19.6 - 29.4 N*m (2.0 - 3.0 kgf*m,14.5 - 21.7 lb*ft)
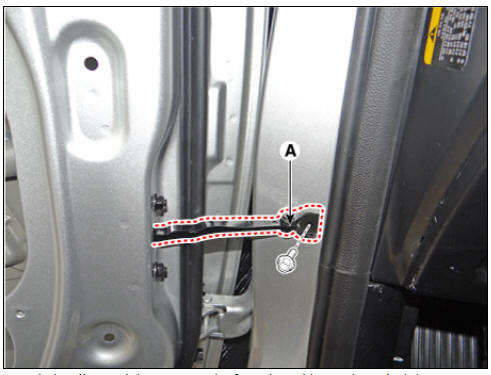
- Detach the clips, and then remove the front door side weatherstrip (A).
- Install in the reverse order of removal.
Warning
Replace any damaged clips.
READ NEXT:
 Fuel Filler Door / Repair Procedures | Charge Port Door Housing Assembly
Components and components location
Fuel filler door
Fuel Filler Door / Repair Procedures
Replacement
Warning
Use a plastic panel removal tool to remove interior trim pieces without marring the surface.
Open the fuel filler door
SEE MORE:
Piston Pins
Measure the diameter of the piston pin.
Piston pin diameter :
17.997 - 18.000 mm (0.70854 - 0.70866 in.)
Measure the piston pin-to-piston clearance.
Piston pin-to-piston clearance :
0.005 - 0.012 mm (0.00020 - 0.00047 in.)
Chec
Waist Line Molding Repair procedures
Replacement
Warning
Put on gloves to protect your hands.
Warning
Use a plastic panel removal tool to remove interior trim pieces
without marring the surface.
Be careful not to bend or scratch the trim and panels.
Using a remover, re
Categories
- Home
- KIA Niro EV, Hybrid - Second generation - (SG2) (2021-2024) - Owner's manual
- Kia Niro - First generation - (DE) (2017-2022) - Service and Repair Manual
- Contact Us