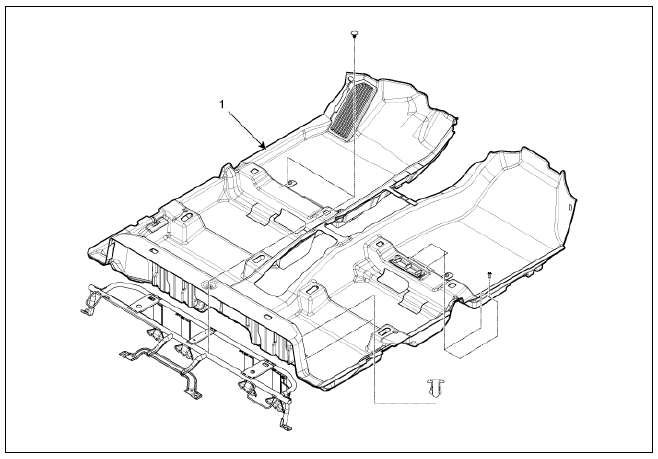
KIA Niro: Floor Carpet
Floor Carpet / Repair Procedures
Replacement
Warning
Put on gloves to protect your hands.
Warning
- Use a plastic panel removal tool to remove interior trim pieces without marring the surface.
- Be careful not to bend or scratch the trim and panels.
- Remove the console assembly.
(Refer to Floor Console - "Floor Console Assembly")
- Remove the accelerator pedal.
(Refer to Engine Control System - "Accelerator Position Sensor (APS)")
- Remove the front seat assembly.
(Refer to Front Seat - "Front Seat Assembly")
- Remove the rear seat assembly.
(Refer to Rear Seat - "Rear Seat Assembly")
- Remove the cowl side trim.
(Refer to Interior Trim - "Cowl Side Trim")
- Remove the center pillar lower trim.
(Refer to Interior Trim - "Center Pillar Trim")
- Remove the luggage side trim.
(Refer to Interior Trim - "Luggage Side Trim")
- Remove the floor carpet assembly (A).
- Install in the reverse order of removal.
Warning
Replace any damaged clips

- Floor carpet
READ NEXT:
 Floor Console Assembly Repair procedures
Floor Console / Components And Components Location
Console complete
Console front cover (RH)
Console front cover (LH)
Console upper cover
Shift lever boot assembly
Floor Console Assembly Components and components location
F
 Rear Console Cover / Console Armrest
Rear Console Cover Components and components location
Rear console cover
Rear Console Cover Repair procedures
Replacement
Remove the floor console assembly.
(Refer to Floor Console - "Floor Console Assembly")
Loosen the
SEE MORE:
 Steering Column and Shaft Repair procedures
Replacement
Warning
When a DTC related to MDPS motor occurs, check the connectors
and wiring. If no problem is found, replace the motor.
Be sure to check the last two digits of the constant in the
barcode of new MDPS motor before replaci
 Parking Distance Warning (PDW)
Specifications
Integrated body control unit (IBU)
Parking distance warning-forward (PDW-F) sensor
Parking distance warning-reverse (PDW-R) sensor
PDW on/off switch
Parking Distance Warning (PDW) Description And
Operation
PD
Categories
- Home
- KIA Niro EV, Hybrid - Second generation - (SG2) (2021-2024) - Owner's manual
- Kia Niro - First generation - (DE) (2017-2022) - Service and Repair Manual
- Contact Us
