KIA Niro: EGR Cooler Repair procedures | Intake Manifold Repair procedures
EGR Cooler Components and components location
Components
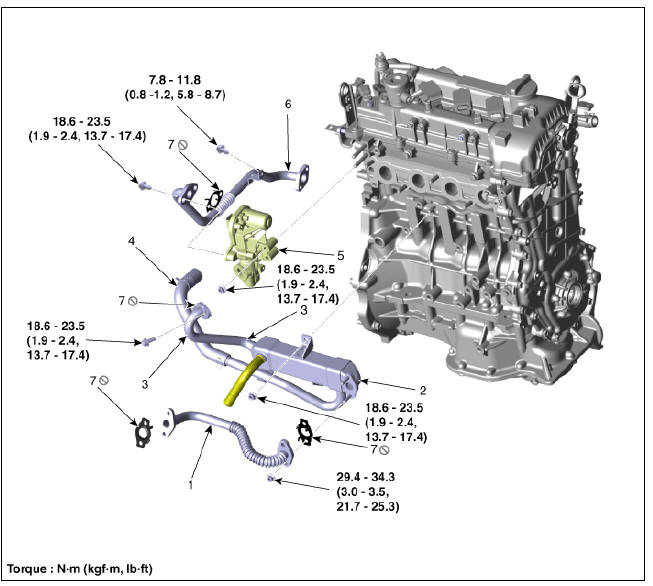
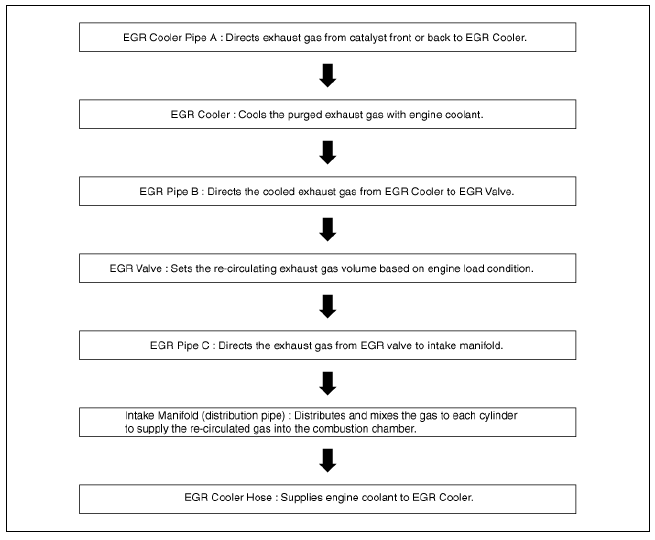
- EGR cooler pipe A
- EGR cooler
- EGR cooler pipe B
- EGR cooler coolant hose
- Electric EGR control valve
- EGR cooler pipe C
- Gasket
Operation

EGR Cooler Repair procedures
Removal and
Installation
- Disconnect the negative battery terminal.
- Remove the engine room under cover.
(Refer to Engine and Transaxle Assembly - "Engine Room Under Cover")
- Drain the coolant.
(Refer to Cooling System - "Coolant")
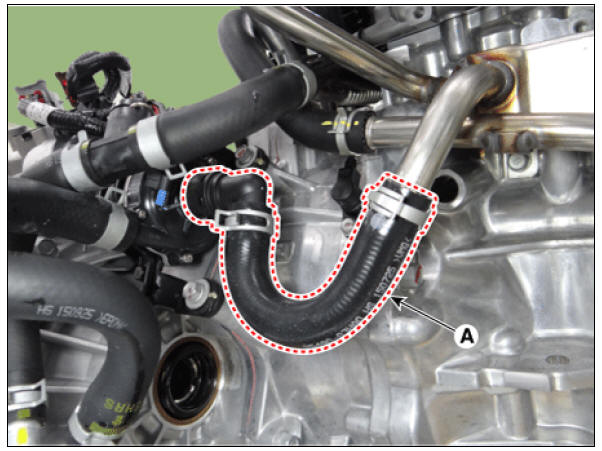
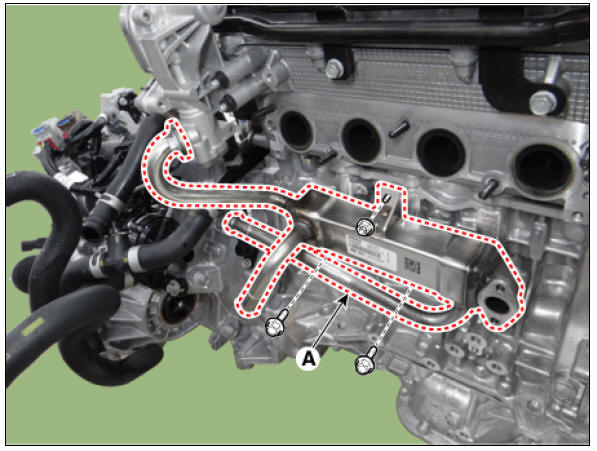
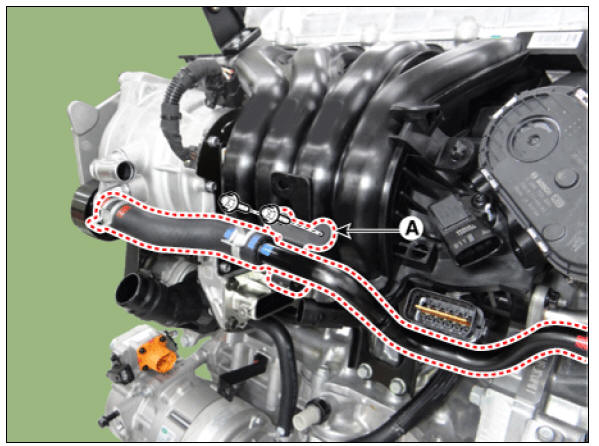
- Disconnect the EGR cooler coolant hose (A).
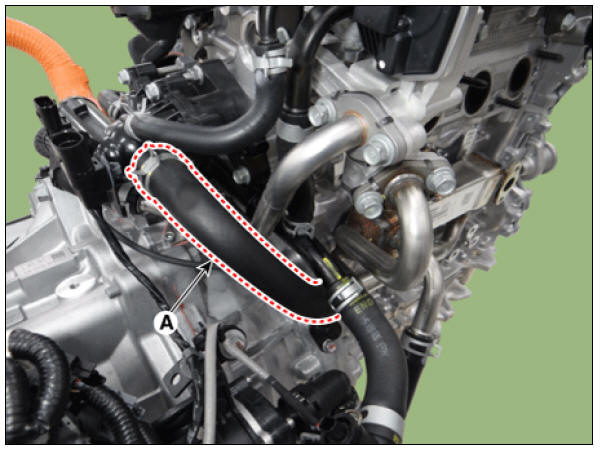
- Disconnect the heater pump coolant hose (A).
- Remove the exhaust manifold.
(Refer to Intake and Exhaust System - "Exhaust Manifold")
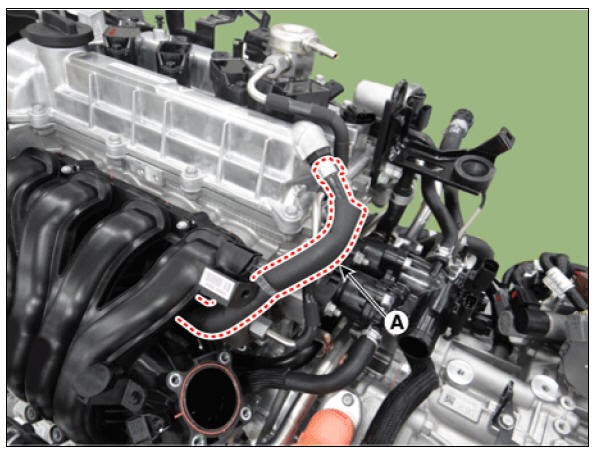
- Remove the EGR cooler (A).
Tightening torque : 18.6 - 23.5 N*m (1.9 - 2.4 kgf*m, 13.7 - 17.4 lb*ft)
- Install in the reverse order of removal.
- Fill the coolant.
(Refer to Cooling System - "Coolant")
Intake Manifold Repair procedures
Intake Manifold Components And Components Location
Components
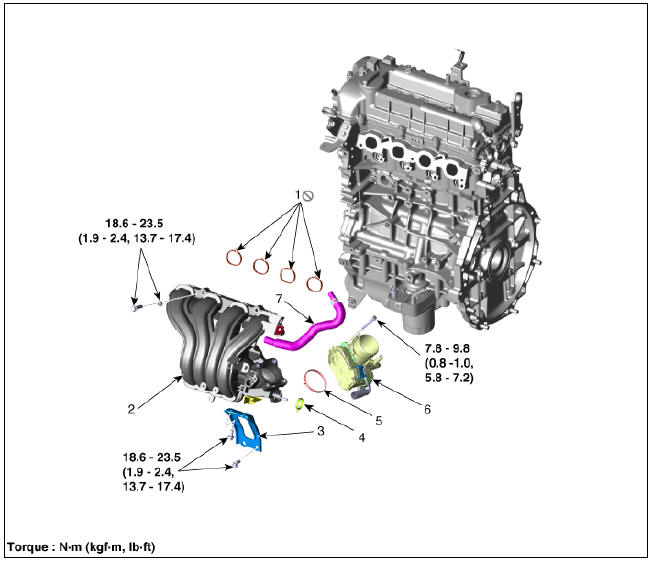
- Intake manifold gasket
- Intake manifold
- Intake manifold stay
- EGR cooler pipe C gasket
- Electronic throttle control (ETC)
- Electronic throttle control (ETC) gasket
- Positive crankcase ventilation (PCV) hose
Intake Manifold Repair procedures
Removal and
Installation
Warning
- Be sure to read and follow the "General Safety Information and Caution" before doing any work related with the high voltage system. Failure to follow the safety instructions may result in serious electrical injuries.
- Be sure to shut off the high voltage circuit according to the "High Voltage Shut-off Procedures" before doing any work related with the high voltage system to avoid serious electrical injuries.
- Shut off the high voltage circuit.
(Refer to Engine Mechanical System - "High Voltage Shut off Procedure")
- Remove the air cleaner assembly.
(Refer to Intake and Exhaust System - "Air Cleaner")
- Remove the engine room under cover.
(Refer to Engine and Transaxle Assembly - "Engine Room Under Cover")
- Disconnect the wiring connectors and harness clamps and remove the wiring protector around the intake manifold.
- Remove the hybrid starter generator (HSG) connector (A).
- Separate the hybrid starter generator (HSG) coolant hose & pipe (A).
Tightening torque : 8.8 - 10.9 N*m (0.9 - 1.1 kgf*m, 6.5 - 8.0 lb*ft)
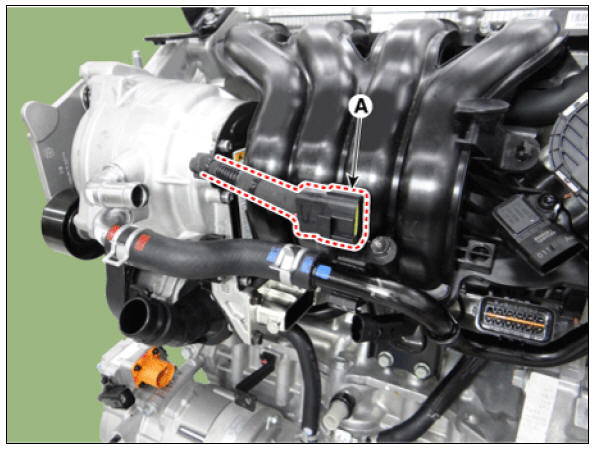
- Disconnect the positive crankcase ventilation (PCV) hose (A).
- Unfasten the electric throttle body control (ETC) module bolts.
(Refer to Engine Control / Fuel System - "Electric Throttle Body Control System (ETC)")
- Unfasten the EGR cooler pipe C mounting nuts (A).
Tightening torque : 7.8 - 11.8 N*m (0.8 - 1.2 kgf*m, 5.8 - 8.7 lb*ft)

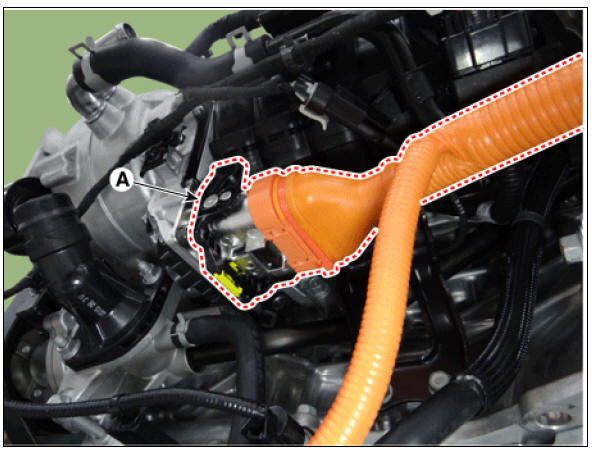
- Disconnect the hybrid starter generator (HSG) high voltage cable connector (A).
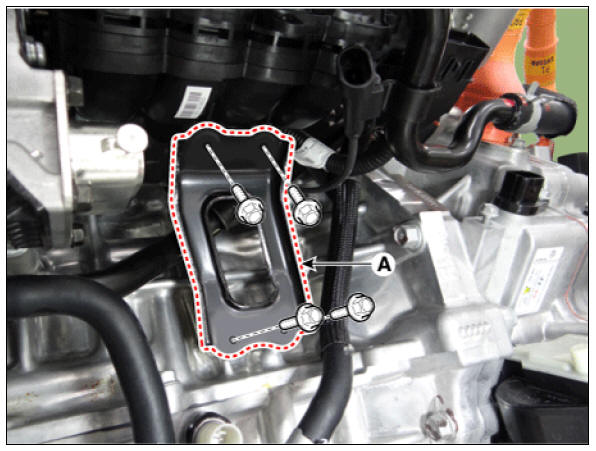
- Remove the intake manifold stay (A).
Tightening torque : 18.6 - 23.5 N*m (1.9 - 2.4 kgf*m, 13.7 - 17.4 lb*ft)
- Remove the intake manifold (A) with the gasket.
Tightening torque : 18.6 - 23.5 N*m (1.9 - 2.4 kgf*m, 13.7 - 17.4 lb*ft)

Warning
When installing the intake manifold, tighten the bolts and nuts, and then tighten the bolts and nuts to the specified torque in the sequence shown. 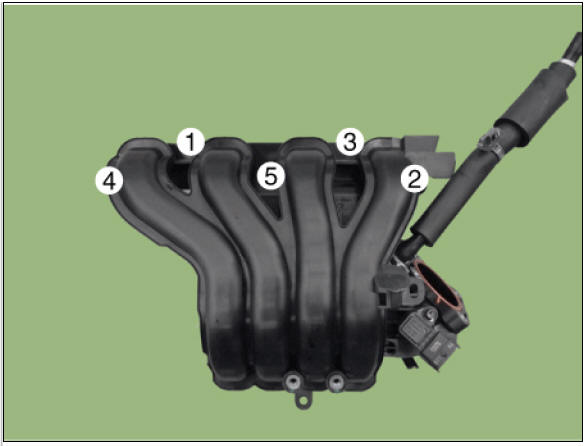
- Install in the reverse order of removal.
Warning
When installing, replace with new gaskets.
READ NEXT:
 Exhaust Manifold Repair procedures
Exhaust Manifold Components and components location
Components
Exhaust manifold gasket
Exhaust manifold
Exhaust manifold stay
Heat protector
Exhaust Manifold Repair procedures
Removal and
Installation
Remove the engine room un
Muffler Repair procedures
Muffler Components and components location
Components
Front muffler
GPF
Center muffler
Rear muffler
Gasket
Rubber hanger
Muffler Repair procedures
Removal and
Installation
Front Muffler
Disconnect the heated oxygen sensor
SEE MORE:
Lighting System
Lighting System / Components And Components Location
Specifications
Lighting System / Components And Components Location
Headlamp (Low/High BI-Function)
Turn signal lamp
Sub low beam
Daytime running light, Position lamp
Fog
Connector Inspection Procedure
Handling of Connector
a. Never pull on the wiring harness when disconnecting connectors.
b. When removing the connector with a lock, press or pull locking lever.
c. Listen for a click when locking connectors. This sound indicates that
Categories
- Home
- KIA Niro EV, Hybrid - Second generation - (SG2) (2021-2024) - Owner's manual
- Kia Niro - First generation - (DE) (2017-2022) - Service and Repair Manual
- Contact Us