KIA Niro: Crash Pad Lower Panel | Glove Box Housing
Kia Niro - First generation - (DE) (2017-2022) - Service and Repair Manual / Body (Interior And Exterior) / Crash Pad / Crash Pad Lower Panel | Glove Box Housing
- Crash pad lower panel
Crash Pad Lower Panel Repair procedures
Replacement
Warning
Put on gloves to protect your hands.
Warning
- Use a plastic panel removal tool to remove interior trim pieces without marring the surface.
- Be careful not to bend or scratch the trim and panels.
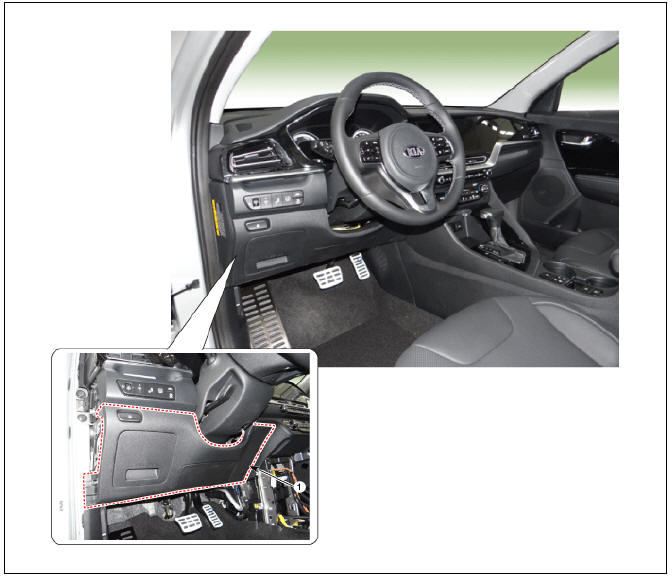
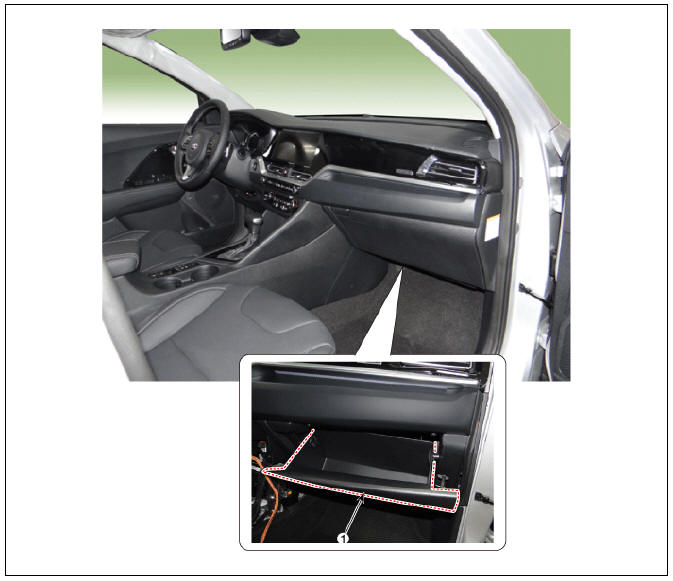
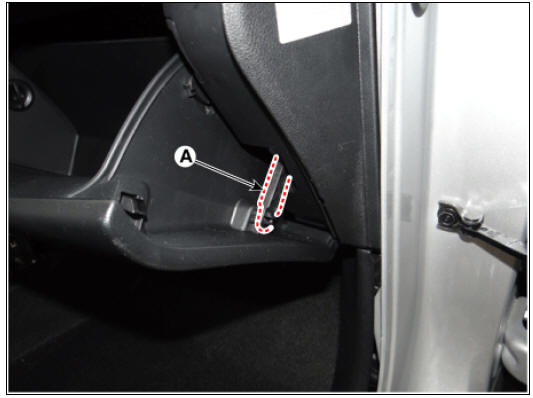
Using a screwdriver or remover, remove the crash pad side cover (LH) (A).
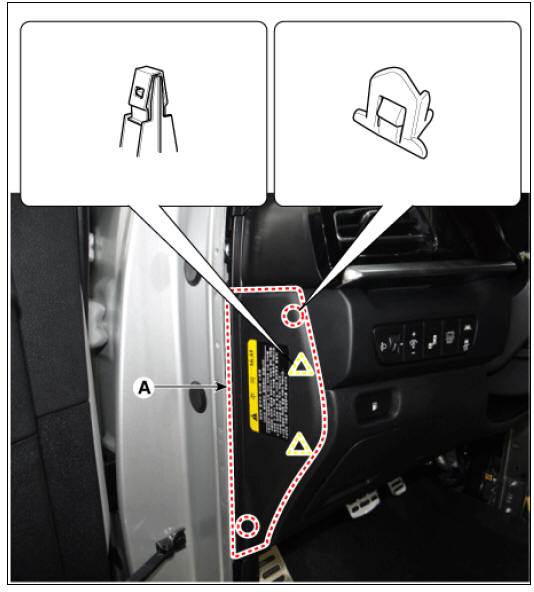
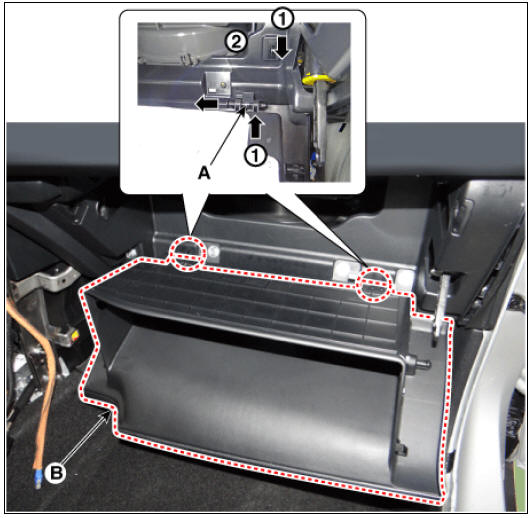
- Loosen the mounting screws, remove the crash pad lower panel (A).
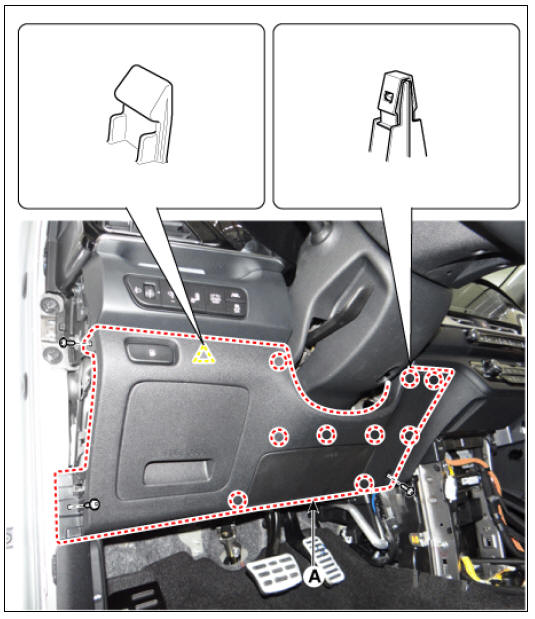
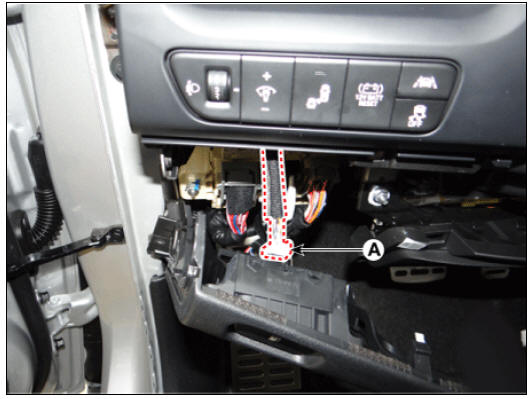
- Disconnect the fuel filler door switch connector (A) and diagnosis connector (B).

- To install, reverse the removal procedure.
Warning
- Replace any damaged clips (or pin-type retainers).
- Make sure the connector are connected in properly.
Glove Box Housing
Glove Box Housing Components and components location
- Glove box
Glove Box Housing Repair procedures
Replacement
Warning
Put on gloves to prevent hand injuries.
Warning
- When removing with a flat-tip screwdriver or remover, wrap protective tape around the tools to prevent damage to components.
- Use a plastic panel removal tool to remove interior trim pieces without marring the surface.
- Take care not to bend or scratch the trim and panels.
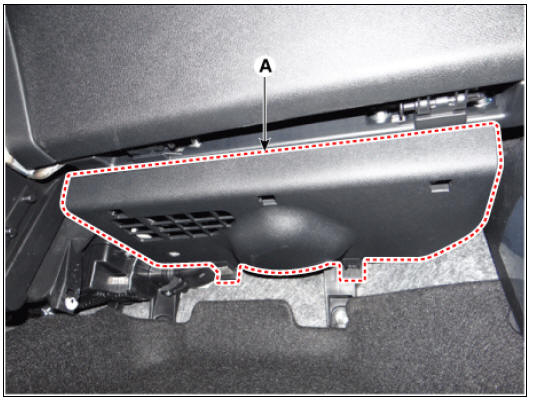
- Open the glove box (A) in the direction of the arrow.
- Remove the air damper clip (A).
- Pull out the both sides stopper (B) from the glove box (A).
- Remove the lock pins (A) and then remove the glove box (B).
- To install, reverse the removal procedure.
Warning
Replace any damaged clips (or pin-type retainers).
Glove box housing complete
- Glove box housing complete
Replacement
Warning
Put on gloves to protect your hands.
Warning
- Use a plastic panel removal tool to remove interior trim pieces without marring the surface.
- Be careful not to bend or scratch the trim and panels.
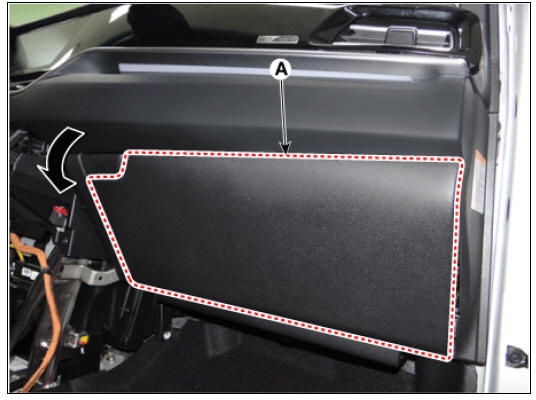
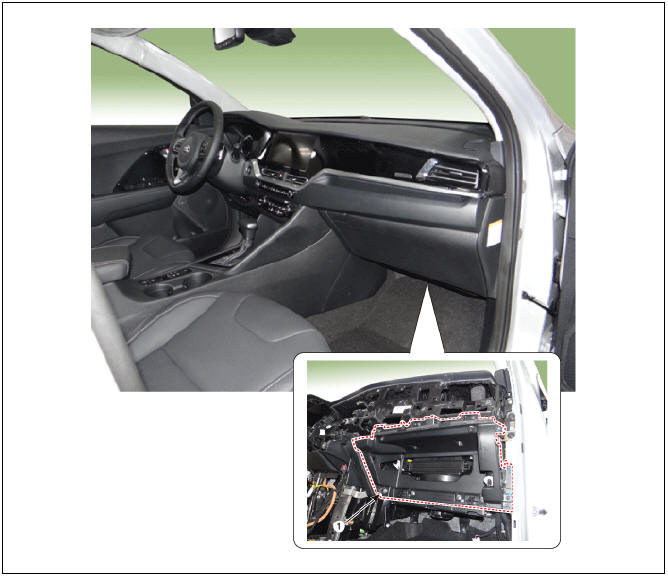
- Using a screwdriver or remover and remove the crash pad under cover (RH) (A).
- Remove the crash pad garnish assembly (RH).
(Refer to Crash Pad - "Crash Pad Garnish")
- Remove the glove box.
(Refer to Crash Pad - "Glove Box")
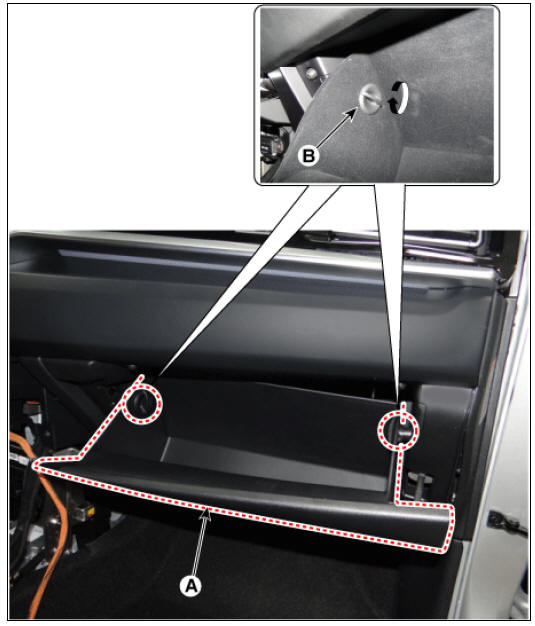
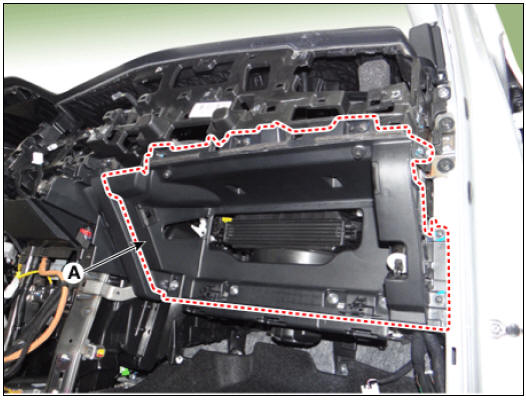
- After loosening the mounting screws and bolts, remove the glove box housing (A).
- To install, reverse the removal procedure.
Warning
- Replace any damaged clips (or pin-type retainers).
- Make sure the connector are connected in properly.
READ NEXT:
 Steering Column Shroud Panel
Steering Column Shroud Panel Components and components
Steering column shroud upper panel
Steering column shroud lower panel
Steering Column Shroud Panel Repair procedures
Replacement
Warning
Put on gloves to protect your hands.
Crash Pad Side Cover
Crash Pad Side Cover Components and components location
LH
Crash pad side cover (LH)
RH
Crash pad side cover (RH)
Crash Pad Side Cover Repair procedures
Replacement
Warning
Put on gloves to protect your hands.
Warning
U
SEE MORE:
Lighting controls (Kia Niro EV)
Operating lights
Type A
Type B
Type C
Operation
OFF (O)
AUTO
The headlamps and tailamps will
turn ON or OFF automatically
depending on the external ambient
light level.
Position & Taillamp ( )
Low beam ( )
I
EGR Cooler Repair procedures | Intake Manifold Repair procedures
EGR Cooler Components and components location
Components
EGR cooler pipe A
EGR cooler
EGR cooler pipe B
EGR cooler coolant hose
Electric EGR control valve
EGR cooler pipe C
Gasket
Operation
EGR Cooler R
Categories
- Home
- KIA Niro EV, Hybrid - Second generation - (SG2) (2021-2024) - Owner's manual
- Kia Niro - First generation - (DE) (2017-2022) - Service and Repair Manual
- Contact Us