KIA Niro: Cluster Fascia Panel | Center Fascia Panel
Kia Niro - First generation - (DE) (2017-2022) - Service and Repair Manual / Body (Interior And Exterior) / Crash Pad / Cluster Fascia Panel | Center Fascia Panel
Cluster Fascia Panel Components and components location
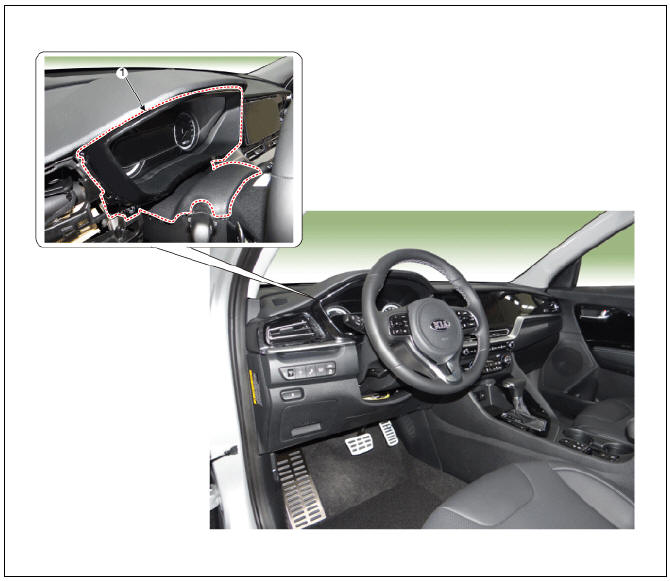
- Cluster fascia panel assembly
Cluster Fascia Panel Repair procedures
Replacement
Warning
Put on gloves to protect your hands.
Warning
- Use a plastic panel removal tool to remove interior trim pieces without marring the surface.
- Be careful not to bend or scratch the trim and panels.
- Remove the crash pad lower panel.
(Refer to Crash Pad - "Crash Pad Lower Panel")
- Using a screwdriver or remover, remove the center fascia panel (A).
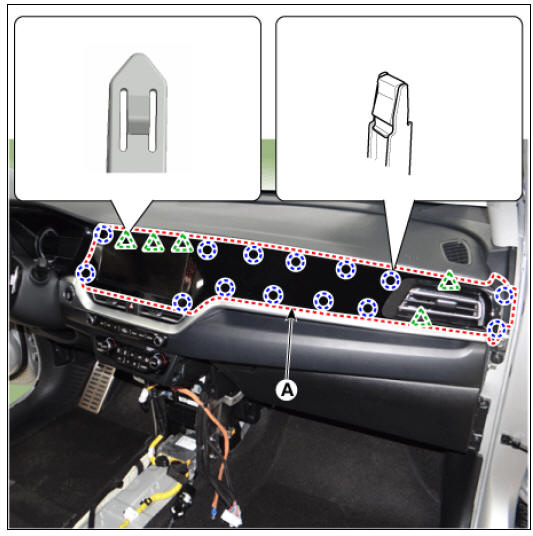
- Loosen the mounting screws, remove the crash pad garnish assembly (LH) (A).
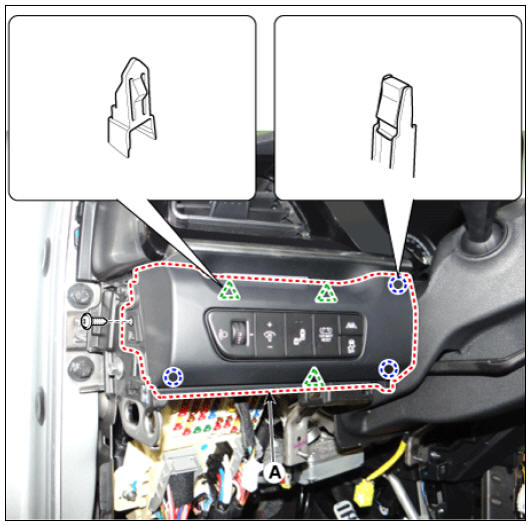
- Loosen the mounting screws, remove the side air vent duct (LH) (A).
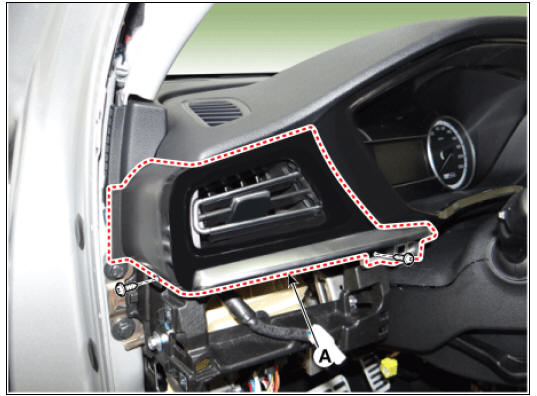
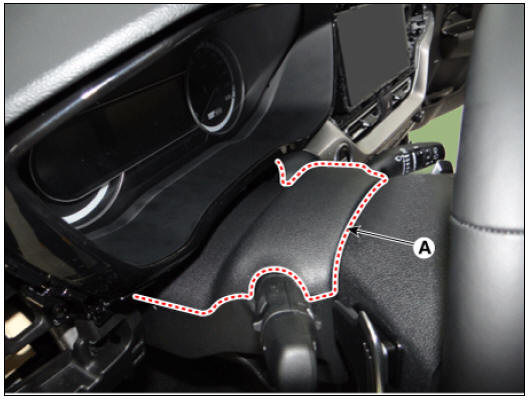
- Using a screwdriver or remover, remove the steering column shroud upper panel (A).
- Loosen the mounting screws, remove the cluster fascia panel (A).
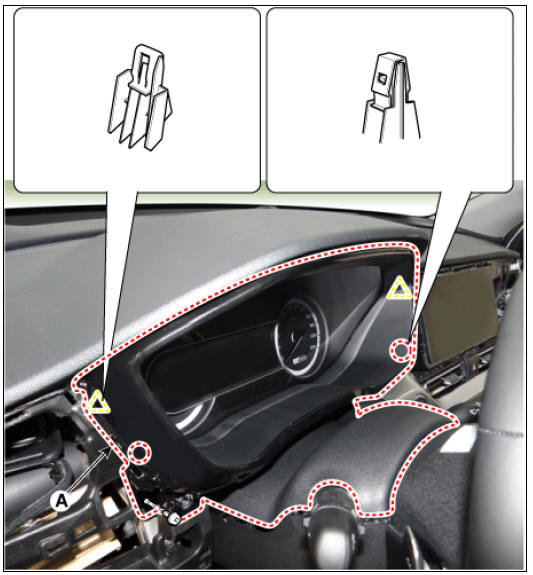
- To install, reverse the removal procedure.
Warning
Replace any damaged clips (or pin-type retainers).
Center Fascia Panel
Center Fascia Panel Components and components location
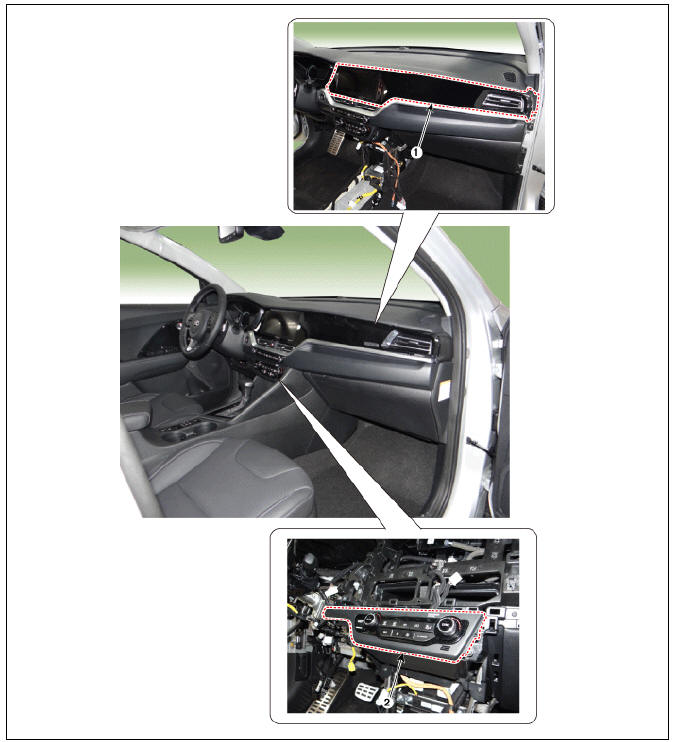
- Center fascia panel
- Center fascia lower panel
Center Fascia Panel Repair procedures
Replacement
Warning
Put on gloves to protect your hands.
Warning
- Use a plastic panel removal tool to remove interior trim pieces without marring the surface.
- Be careful not to bend or scratch the trim and panels.
Center fascia panel
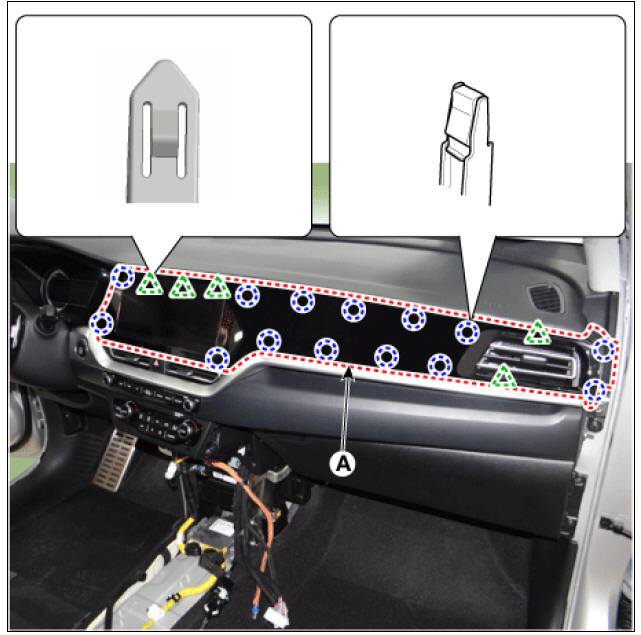
- Using a screwdriver or remover, remove the center fascia panel (A).
- To install, reverse the removal procedure.l.
Center fascia lower panel
- Remove the crash pad lower panel.
(Refer to Crash Pad - "Crash Pad Lower Panel")
- Remove the crash pad garnish.
(Refer to Crash Pad - "Crash Pad Garnish")
- Remove the console front tray.
(Refer to Floor Console - "Floor Console Assembly")
- Remove the AVN keyboard.
(Refer to Body Electrical System - "AVN Keyboard")
- Using a screwdriver or remover, remove the center fascia lower panel (A).
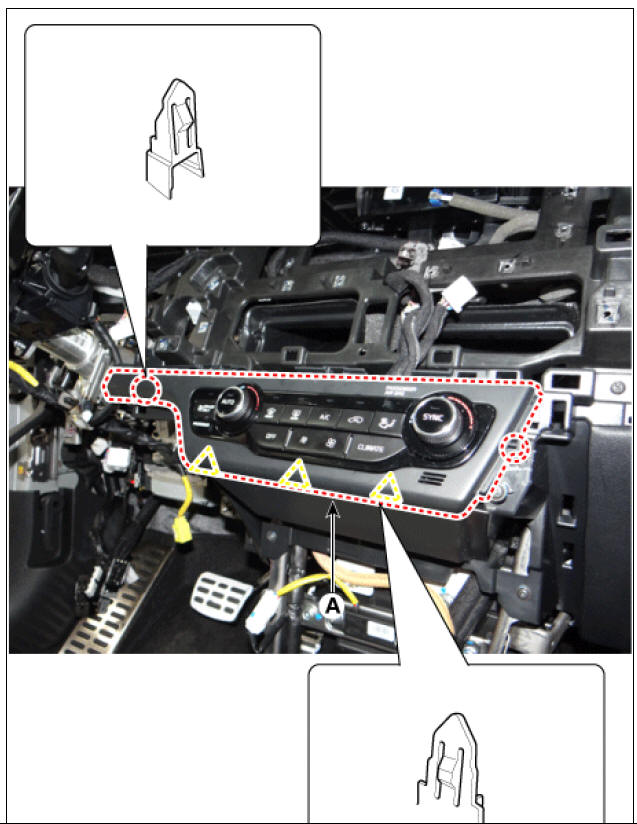
- To install, reverse the removal procedure.
Warning
- Replace any damaged clips (or pin-type retainers).
- Make sure the connector are connected in properly
READ NEXT:
 Crash Pad Garmish
Crash pad garmish (LH)
Crash pad garmish (RH)
Replacement
Crash pad garmish LH
Warning
Put on gloves to protect your hands.
Warning
When removing with a flat-tip screwdriver or remover, wrap
protective tape around the tools to
 Crash Pad Lower Panel | Glove Box Housing
Crash pad lower panel
Crash Pad Lower Panel Repair procedures
Replacement
Warning
Put on gloves to protect your hands.
Warning
Use a plastic panel removal tool to remove interior trim pieces without marring the surface.
B
SEE MORE:
 Muffler Repair procedures
Muffler Components and components location
Components
Front muffler
GPF
Center muffler
Rear muffler
Gasket
Rubber hanger
Muffler Repair procedures
Removal and
Installation
Front Muffler
Disconnect the heated oxygen sensor
 AC Inverter System / Description And Operation
Specification
AC Inverter System / Components And Components Location
Battery
AC inverter outlet switch
AC inverter unit
AC Inverter System / Description And Operation
Description
An inverter is a device that transforms th
Categories
- Home
- KIA Niro EV, Hybrid - Second generation - (SG2) (2021-2024) - Owner's manual
- Kia Niro - First generation - (DE) (2017-2022) - Service and Repair Manual
- Contact Us
