KIA Niro: Windshield Glass / Installation
Kia Niro - First generation - (DE) (2017-2022) - Service and Repair Manual / Body (Interior And Exterior) / Windshield Glass / Windshield Glass / Installation
Warning
When replacing the windshield glass fitted with the front camera, be sure to replace it with the replacement windshield glass fitted with the coupler. If attaching the coupler on the windshield glass without coupler, the front camera may not work properly.
- With a knife, smoothly scrape off the old adhesive to a thickness of about 2 mm (0.0079 in.) on the bonding surface around the entire windshield opening flange:
Warning
Do not scrape down to the painted surface of the body as damaged paint may degrade the bonding strength.
Warning
- Remove the rubber dam and fasteners from the body.
- Mask off surrounding surfaces before painting.
- Clean the bonding surface with a sponge dampened in alcohol. After cleaning, keep the surface clean from oil, grease and water.
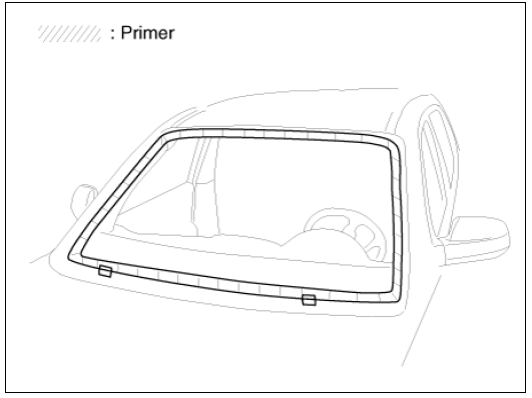
- With a sponge, apply a light coat of body primer to the original adhesive remaining around the windshield opening flange. Let the body primer dry for at least 10 minutes.
Warning
- Do not apply glass primer to the body, and be careful not to mix up glass and body primer sponges.
- Do not touch the primed surfaces by hand.
- Mask off the dashboard before painting the flange.

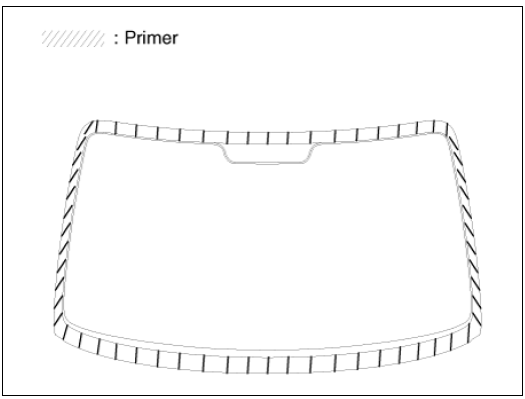
- Apply a light coat of glass primer to the outside of the fasteners.
Warning
- Do not touch the primed surface by hand as the adhesive may not bond to the glass properly, causing leakage after installing the windshield glass.
- Do not apply body primer to the glass.
- Keep water, dust, and abrasive materials away from the primer.

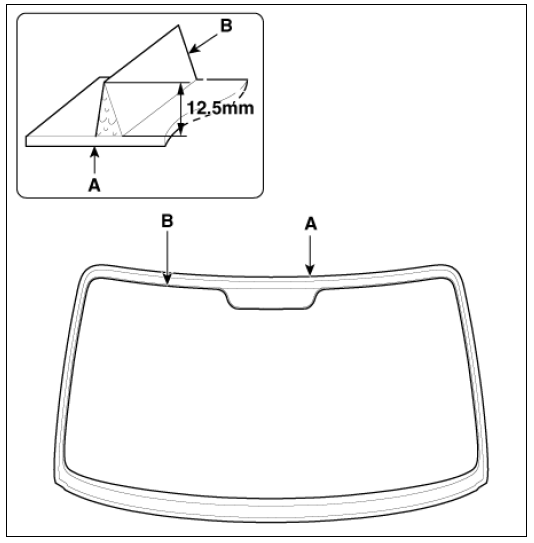
- Pack adhesive into the cartridge without air pockets to ensure continuous delivery. Load the cartridge in a caulking gun, and run a bead of adhesive (B) around the edge of the windshield glass (A) between the fastener and molding as shown. Apply the adhesive within 30 minutes after applying the glass primer. Make a slightly thicker bead in each corner.

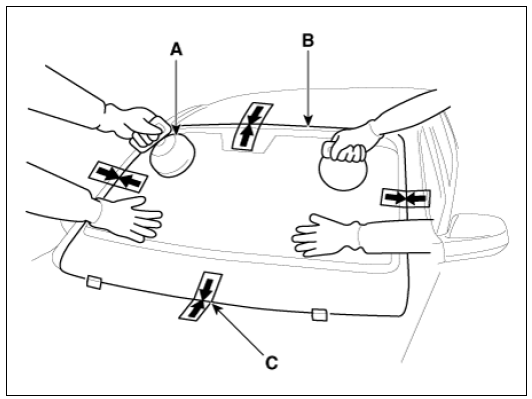
- Use suction cups (A) to hold the windshield glass (B) over the opening, align it with the alignment marks (C), and set it down on the adhesive. Lightly push on the windshield until its edges are fully seated on the adhesive all the way around. Do not open or close the doors until the adhesive is dry.

- Install the cowl top cover.
(Refer to Cowl Top Cover - "Repair procedures")
- Let the adhesive dry for at least one hour, then spray water over the roof and check for leaks. If a leak occurs, let it dry, then seal with sealant :
Warning
- Let the vehicle stand for at least four hours after windshield installation. If the vehicle must be driven within 4 hours, it must be driven slowly.
- Keep the windshield dry for the first hour after installation.
- Install the inside rear view mirror assembly.
(Refer to Mirror - "Inside Rear View Mirror")
- Install the front pillar trim.
(Refer to Interior Trim - "Front Pillar Trim")
READ NEXT:
 Tailgate Window Glass
Tailgate window glass
Removal
Warning
Put on gloves to prevent hand injuries.
Warning
Use seat covers to avoid damaging any surfaces.
Remove the tailgate Trim.
(Refer to Tailgate - "Tailgate Trim")
Remove the rear view
SEE MORE:
 Injector
Specification
Description
The GDI injector is similar to a standard injector, but sprays fuel at a much
higher pressure directly
into the combustion chamber and has a swirl disc to get the fuel swirling as it
exits the nozzle. This
aids i
 Sunroof / Repair Procedures
Adjustment
Inspect Glass Alignment
Inspect the step height between the roof panel (A) and the glass
weatherstrip (B) and then adjust it if
necessary.
Alignment adjustment
Standard value (mm(in.))
(1) Front edge : 0 mm (0 in.)
(2) Rear
Categories
- Home
- KIA Niro EV, Hybrid - Second generation - (SG2) (2021-2024) - Owner's manual
- Kia Niro - First generation - (DE) (2017-2022) - Service and Repair Manual
- Contact Us
