KIA Niro: A/C Pressure Transducer
A/C Pressure Transducer Components and components location
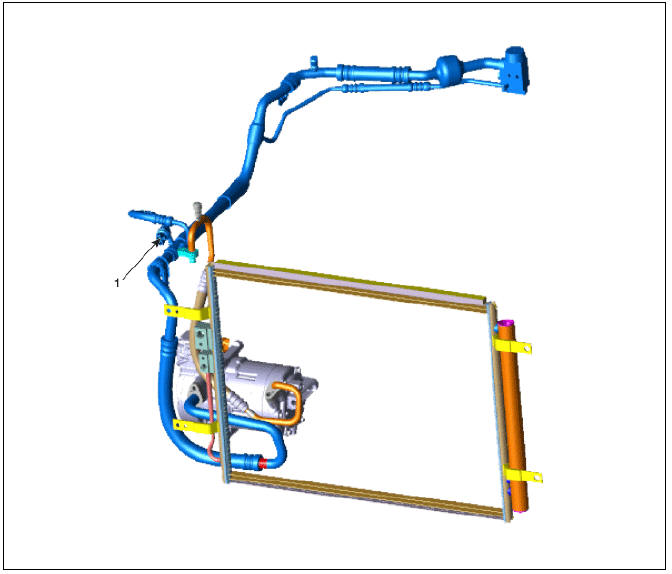
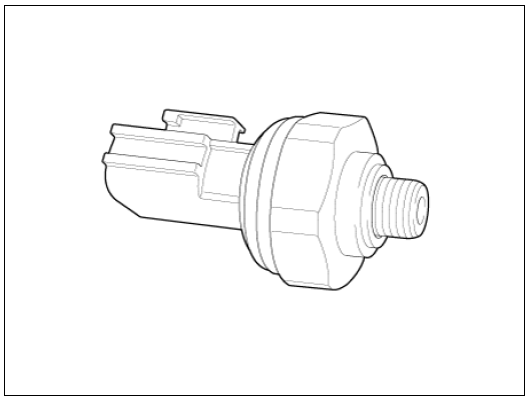
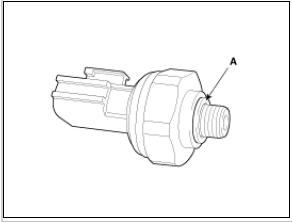
- A/C Pressure Transducer
Description
A/C pressure transducer measures the pressure in high pressure line and converts it into voltage. Based on the converted voltage, engine ECU controls cooling fan by operating it at high or low speed. Engine ECU stops the operation of compressor when the temperature of refrigerant line is too high or low irregularly to optimize air conditioning system.
A/C Pressure Transducer Repair procedures
Inspection
- Measure the pressure of high pressure line by measuring voltage output between terminals "1" and "2".
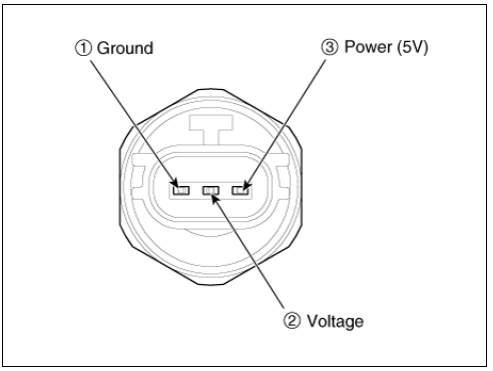
- Check if the voltage is within specification.
Voltage = 0.00878835 * Pressure + 0.37081095
- If the measured voltage is not wihtin specification, replace the A/C pressure transducer.
Replacement
- Disconnect the negative (-) battery terminal.
- Recover the refrigerant with a recovery/charging station.
Warning
If PAG oil mixes into the POE oil of the system, dielectric breakdown may occur due to decreased volumetric resistivity and the A/C compressor may not work.
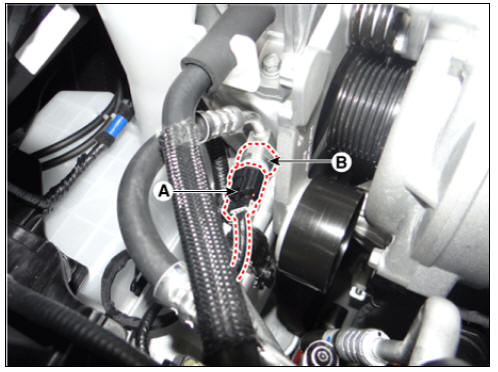
- Disconnect the A/C pressure transducer connector (A).
- Remove the A/C pressure transducer (B).
Warning
Be careful not to bend the liquid & suction pipe.
- Install in the reverse order of removal.
Warning
When installing, replace it with a new O-ring (A).
READ NEXT:
 Evaporator Core Repair procedures, Evaporator Temperature Sensor
Replacement
Disconnect the negative (-) battery terminal.
Remove the heater and blower assembly.
(Refer to Heater - "Heater Unit")
Remove the heater unit lower case (A) after loosening the mounting screws.
In-car Sensor
In-car Sensor Description and operation
Description
The in-car air temperature sensor is built into the heater & A/C control
unit.
The sensor consists of a thermistor that measures the temperature inside the
vehicle. The signal
decided
SEE MORE:
Securing a Child Restraint System seat with "Top-tether Anchorage" system
Type A
Type B
Operation
Route the Child Restraint System seat
strap over the seatback.
Connect the top-tether to the toptether
anchorage.
Tighten the top-tether according to
the instructions of your Child
Restraint System&
Towing service
Wheel dolly
Proper lifting and towing procedures
are necessary to prevent damage to
the vehicle. The use of wheel dolly (1)
or flatbed is recommended.
On 2WD vehicles, it is acceptable to
tow the vehicle with the rear wheels
Categories
- Home
- KIA Niro EV, Hybrid - Second generation - (SG2) (2021-2024) - Owner's manual
- Kia Niro - First generation - (DE) (2017-2022) - Service and Repair Manual
- Contact Us